
Users guide
81 Intel® RAID Software User Guide
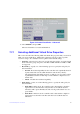
— Write Back with BBU – In this mode, the controller enables write back
caching when the BBU is installed and charged. This option provides a good
balance between data protection and performance.
Note: The
write policy depends on the status of the BBU. If the BBU is not present, is
low, is failed, or is being charged, the current write policy switches to write
through, which provides better data protection.
• I/O Policy – The I/O policy applies to reads on a specific virtual drive. It does not
affect the read ahead cache.
— Cached –
In this mode, all reads are buffered in cache memory. Cached I/O
provides faster processing.
— Dir
ect – In this mode, reads are not buffered in cache memory. Data is
transferred to the cache and the host concurrently. If the same data block is
read again, it comes from cache memory. Direct I/O makes sure that the cache
and the host contain the same data.
• Disk cache policy – Select a cache setting for this virtual drive:
— Enable – Ena
ble the drive cache.
— Dis
able – Disable the drive cache.
— Unc
hanged – Updating the drive cache policy to Unchanged may enable
/disable the drive cache based on the WCE (Write Cache Policy) bit of the
save mode page of the drive.
• Emulation – Lets you to set the emulation type on a virtual drive to default or
none. The force option forces the emulation to be set on a controller even when
MFC settings do not support it. The possible options are Default, Disabled, or
Forced.
• Initialize – Select to initialize the virtual drive. Initialization prepares the storage
medium for use. Fast initialization will be performed on the virtual drive.
• Configure Hot Spare – Select to configure physical drives as hot spares for the
newly created virtual drive.
This option is enabled only if there are additional dr
ives and if they are eligible to
be configured as hot spares. This option is not applicable for RAID 0. If you select
this option and after the Virtual drive is created, a dialog appears. The dialog asks
you to choose the physical drives that you want to configure as hot spares.
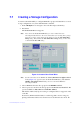
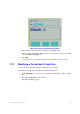
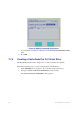
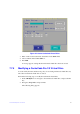
7.7.2 Creating a CacheCade Virtual Drive
The MegaRAID CacheCade software provides you with read caching capability.
Perform the following steps to create a CacheCade virtual drive:
1. In the VD Mgmt screen,
navigate to the controller, and press the F2 key.
2. Navigate to Cr
eate CacheCade Virtual Drive, and press Enter.
The Cr
eate CacheCade Virtual Drive dialog appears.