Introduction Thank you for purchasing our innovative all-in-one solution---SOHO Server 501705 appliance for your networking needs. The SA integrates server services such as a Network Address Translator (NAT), Virtual Private Network (VPN), SPI firewall, and networked storage into one easy to manage device. The SOHO Server allows a group of trusted computers and networks to connect quickly and safely.
System Information Services DHCP Client/Server Proxy DNS RIP DDNS Client FTP Server Network Programmable Static Route Network Protocols Supported: PPPoE, TCP, UDP, ICMP, ARP PPP Authentication PAP, CHAP, MS CHAPv2 Real Time Clock File Sharing Supports CIFS,SMB, Appletalk(AFP), NFS User Management Local User Account Management Power Management Support Mechanical Off/Soft Off/Sleeping/Working System States Other Features Personal Web Server USB Printer Server USB
and decrypted via the pre-defined dedicated tunnel. This prevents any hackers from stealing private information in the public network. With this functionality, any sub-network can be grouped as though they are in the same network. Firewall The SOHO Server provides a powerful firewall capable of preventing hackers from attacking the gateway or internal network. Many famous DoS attacks can be detected and prevented.
www.yahoo.com. USB Print Server USB Print Server allows any computer in the network to share an USB printer. It complies with USB 2.0 specifications. And the users can print from any computer over a LAN. Personal Web Server The Personal Web Server enables users to host an information type website from their appliance. Create your website and place it on the appliance for the world to see.
the apply button. Power Down by press the power button Prompt Power Down Please press and hold the power button at least 4 seconds. - Hard Disk Standby If the hard disk is idle for a while, we would like the hard disk to enter standby mode to reduce the consumption of power. In the left menu, select NAS Management -> HD Initialization Wizard, in HD Power Management Setting, please select the time in the ‘Turn Off hard disk’ field (Figure 3.2a).
WAN port MDI/MDIX switch Four LAN ports: 10/100 Mbps Two USB 2.0 port Reset Button Power Button Power Jack - DC 12V LEDs: Link/Activity LEDs for Each Ethernet Port, Power LED, HD (Hard Disk) LED, HB (Heart-Beat) & Packet Transmit/Receive LEDs WAN Port The WAN port is used to connect to an ADSL/Cable modem for linking to the Internet. WAN MDI/MDIX Switch The WAN MDI/MDIX switch is used to adjust the cable connection of the WAN port.
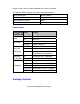
initiate a reset, you must hold the button for at least 5 seconds. The primary default settings are listed in the following table. Configuration Item Default Settings Administrator Username Administrator Password Admin Internal IP address 172.16.1.
z z z z z Smart Server Power Adapter and Power Cord Ethernet cable User Manual CD Quick Installation Guide 8 © INTELLINET NETWORK SOLUTIONS
Quick Installation This chapter will give you brief instructions on how to install the product. In section 2.1, we will configure the hardware part of SA step by step. In section 2.2, we will check whether the IP address of your PC is assigned by DHCP. Once we complete the installation of the SA hardware and checked your PC settings, we will use the web-based management to configure the SA to suit your network environment. In section 2.3, and 2.4, we will review all the software settings.
The hardware installation is now complete. Check Your PC First Please check the following settings on your PC: Do not assign an IP address to your PC. 1. Please select sequentially: In Start menu -> Settings -> Control panel -> Network connections -> Local Area Connection. Then a 2. “Local Area Connection Status” window shows up. (Figure 2.2a) Click the Properties button in Local Area Connection Status. Then the “Local Area Connection Properties” window shows up as Figure 3. 2.2b.
Figure 2.
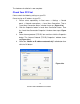
Figure 2.2c Connect to the Web-Based Manager Please follow the steps to connect to the web-based manager: 1. Open a browser on the PC that is DIRECTLY connected to the SA. Type “http://172.16.1.1” in address field. And then press Enter key. 2. An authentication window shows up to prompt you to type the username and the password. 3. Leave the username blank and type “admin” as a password. (Figure 2.3a.) 4. Then press OK button. The default web page will appear like Figure 2.3b. Figure 2.
Figure 2.3b Web-Based Manager – Basic Settings Start to configure your network environment by clicking the Basic Settings in left menu. The Basic Settings page is shown as Figure 2.4a.
Figure 2.4a The Basic Settings page contains Network Policy, Internal Network Interface, Domain Name Server, and External Network Interface. We describe these settings below in detail. You must click the apply button after you finish inputting the settings. You will see a rebooting window as Figure 2.4b. During the rebooting phase, do not turn off or unplug the SOHO Server .
Figure 2.4b Internal Network Interface The default settings are: Host Name: “SA” Private IP: “172.16.1.1” Private IP Netmask: “255.255.0.0” According to the default settings, we will assign the LAN to network “172.16.1.x” You can add more detailed configurations later in section 4.1 DHCP Server settings. For the Network Address Translation (NAT) application, the private network address should be set in the following address range reserved by the Internet Assigned Numbers Authority (IANA).
Domain Name Server Most of the time this information is not needed, as your ISP will automatically provide the information. Please ask the DNS IP address from your ISP if one is required. External Network Interface External network interface includes ADSL/PPPoE , DHCP Client and Fixed IP Address settings. Make sure that the system information webpage shows that your Link status is ‘Link Up’. If not, please check your connection and/or switch the MDX switch located next to your WAN port.
If you have a fixed IP address from your ISP to access the Internet, please follow the steps below: 1. 2. 3. 4. 5. Select the Fixed IP Address radio button. Enter the Public IP address. Enter the External Gateway. Enter the External Netmask. Click the apply button.
If you have a dynamic IP address from your ISP to access the Internet, please select the DHCP Client radio button. Once the external IP address is obtained via the DHCP protocol, there is no need to give an external IP address, external gateway address or netmask. The DHCP server will dynamically assign these fields. In general, you should choose this option if you are connecting the SOHO Server to a cable modem.
Most ADSL connections do not give you a fixed IP address. In this case, you must enter the user name and password provided by your ISP for authentication. Please follow the steps below. 1. Please select the ADSL/PPPoE radio button. 2. In ADSL/PPPoE Setting: Enter the User Name and Password. 3. Click the apply button to save your settings. After completing your configuration, each time the SA boots, it will try to connect with your ISP and the ISP will assign the SOHO Server an external IP address.
If your ISP provides a PPTP server, you could set up the PPTP client here. Please follow the steps: 1. Select ADSL/PPTP radio button. 2. Enter the user name. (You get this from your ISP) 3. Enter the password. (You get this from your ISP) 4. Enter the IP address of your host in My IP Address. 5. Enter the IP address of the server in Server IP Address. In the following chapters, we will cover more details of configuring the SA.
Configuration Hierarchy This chapter gives you an overview of all the configuration options available. The SOHO Server is a multifunction product. The section3.1 explains the corresponding settings for each function. And in section3.2, we describe the power management in detail. There are eight main categories in configuration menu, Basic settings, Network settings, Firewall settings, VPN settings, System management, System reports, User management and NAS management. Each item has advanced configurations.
Overview of Configuration Menu Figure 3.
Network Settings When you select Network Settings in the left menu of the web page, five configuration options appear: DHCP Server, IP Alias, Multiple NAT, Route Settings and DDNS. Please refer to the corresponding section for these configurations. DHCP Server In DHCP Server settings, we assign the rage of the virtual IP addresses for the four LAN ports of SA. All devices connect to the LAN ports of SA will be dynamically assigned the IP addresses within the range.
Under DHCP server settings, the SA defaults to assigning IPs 172.16.1.2 through 172.16.1.250...So depending on how many fixed IP devices they have, they can assign their device to an IP of 172.16.1.251 (through 254) as these IPs will not be handed out by the SA. If they have more devices or want a different IP range, then all they need to do is modify the range that the SA hands out so it does not hand out an IP in that range. Typical offices set their DHCP server to assign IPs from 30 through 200.
To Disable the DHCP Server If you already have a DHCP server on your network, 1. Select Disable radio button 2. Click the apply button. Or you do not have DHCP server on your network, but you would like to assign a static IP address to each device connected to the LAN port of SA. 1. Select Disable radio button. 2. Assign a static IP address to each device connected to the LAN port. For example, you have four PCs, PC1, PC2, PC3 and PC4 connected to the LAN port.
Please follow the steps to add another network: 1. Enter “192.168.1.1” in IP Alias 1. 2. Enter “255.255.255.0” in Netmask of IP Alias 1. 3. Click the apply button. Note that the IP Alias 1, 192.168.1.1 is assigned to SA and the network is “192.168.1.x”. For additional IP addresses of the internal network interface to be accepted, enter the other IP address in IP Alias 2 and IP Alias 3. Enter “0” in each field if none.
packets from always sending on the same IP address and the other IP address to sit idle. Multiple NAT solves this and allows you to increase the bandwidth. Multiple NAT allows you to dispatch your network packets evenly to these IP addresses provided by ISP. 1. Enter the Internal IP range1, e.g. “172.16.1.1/24”. It means the network is “172.16.1.x” 2. Enter the External IP range1, the IP address range you get from your ISP. 3. Enter the Internal IP range2, e.g. “192.168.1.1/24”.
(Routing Information Protocol). If the router supports RIP, it will automatically exchange routing information with SA and it is not necessary to set a static route. Please refer the steps and figures to set a static route. 1. Select Enable radio button in Routing Setup. 2. Enter the network in Destination network column. (e.g. “192.168.6.0/24”) 3. Enter IP address of the gateway in Gateway column. (e.g. “172.16.1.249”) 4. Enter the number in Hop count column.
Internet. DDNS provides a simple, and in most cases free, solution. The Internet uses DNS servers to lookup domain names and translates then into IP addresses. Domain names, such as www.yahoo.com, are just easy to remember aliases for IP addresses. A dynamic DNS service provides a means of updating your IP address so that you listing will be current when your IP address changes. There are several services on the Internet that are available for free. We will only cover one, www.dyndns.org.
3. Enter the User name. The user name you log in DDNS service. 4. Enter the password. The password you log in DDNS service. 5. Enter the Host name. The host name you register in DDNS service. 6. Click the apply button. Every time your public IP changes, the SA will tell the DDNS server what your new IP address is. Other users, through the magic of DDNS, will be sent to the right place.
Virtual Server Settings The virtual server service is a way to simulate multiple servers on the intranet. You have several IP addresses within your LAN. These IPs are not visible to the users from the Internet. When servers are installed in the office that need to be seen from the Internet, we establish some forwarding rules to deal with the packet from the Internet users and direct the SA to forward the specific packets to the specific IP address.
or enter “0” in each field for none. 6. Click the apply button. URL Filter Setup The URL Filter function is used to restrict internal hosts from accessing specific URL locations. You deny any access to the URL location specified in the Site1, Site2 …Site10 fields. Please follow the steps: 1. Select Enable radio button in URL Filter. 2. In Site 1, please enter the URL address. 3. Please repeat the step 2 to build more URL addresses not allowed. 4. Click the apply button. If the Site1 is given as www.yahoo.
IP Filter Setup The IP filter function is similar to URL Filter. It provides further restrictions in access permission. URL Filtering only blocks port number 80 (HTTP). In IP filtering, you can assign a group of IP to be restricted. You can block four individual ports or a range of ports in the same time. So the specific group of intranet hosts cannot connect to these ports. Please follow the steps: 1. Select Enable radio button in IP Filter. 2. Enter the IP address range in the format “x. x. x. x / x”(e.
Denial of Service It is highly recommended that the DoS Protection feature be enabled to prevent attacks on the network. However, if you allow someone to manage the router from outside or are running a web server, e-mail server, or FTP server, you should either disable Detect SYN Flood Attack or increase the TCP flow. Otherwise, the configuration web pages will not be sent smoothly.
PPTP Settings For most companies, the PPTP server creates a secure connection that a remote user can access a host within the company. The remote user has to run a PPTP client and connect to the PPTP server. The PPTP server has to validate the remote user as being in the User List in section 9.1. The server certifies the PPTP client with a username and password. After passing the certification, the server will assign a private IP address to the client.
System Management When you select the System Management item in the left menu, four configuration items appear including; Administrator Settings, Event Report Settings, Firmware Update, Time Settings and SNMP. Please refer the corresponding section for these configuration details.
Administrator Settings In Administrator settings you will find the basic administrator functions. The settings are easily modified and managed by the administrator. They are described as below: 1. New Password: the administrator could change the administrator password here. Please enter the new password you would like to change to. Note that you must fill the new password in both Password change and Password confirmation fields. If both fields are not the same, the page will not be submitted. 2.
administrator to connect to. 6. Restart device: This function reboots the SOHO Server . Select the enable radio button to restart SA. The default setting of the function is disabled. 7. Clear event log: This function is used to clean the system history that is listed in Event Report (section 8.2). If you choose the “No” radio button, the event record never clears even when you reboot the system. 8. Clear DHCP lease: This function is used to clean the DHCP Lease record listed in section 8.4.
Firmware Update Updates and functionality can be added via this function. Please check the web for the latest firmware if you are having any issues. In general, no update should be needed unless it is recommended by technical support. Note: Do not do a firmware update over a wireless connection or power the unit down during a firmware update. Any interruption during an update will damage your unit and require you to send it in for service.
Though it is not generally necessary, you should Restore factory default to make sure that new features and settings are implemented. Note: You must re-initialize the hard drive if you do this. Time Settings The NAS’s built-in clock should be adjusted to the current local time. This will insure accurate time reporting in the logs and file records. Select your GMT time zone and then enter the date and time. Click on Apply to make the changes.
SNMP The SNMP agent allows users with SNMP client applications to conveniently inspect the network status of SA. Please follow the steps below to setup the SNMP agent. 1. Select the Enable radio button in the SNMP Agent field. 2. Enter the Community Name. Note that the agent side and the client side must use the same community name. 3. Enter the contact information in System Contact field. For example, the phone number or the email account of the administrator. 4.
System Reports When you select System Reports in the left menu of the web page, four configuration items appear including; System Information, System Log, URL Log, and DHCP Lease Report. Please refer to the corresponding section for these configuration items.
System Information The System Information displays some useful information about the system. It shows the firmware version, the system up time and the internal and external network connections. On SA, We have one WAN port and four LAN ports. The WAN port belongs to the external network interface and the LAN port belongs to the internal network interface. They are described as below: Firmware Version: 2.00 The system up time IP Address: the IP address is shown as your current setting.
Server, we assigned the IP address range to the internal network interface. Hardware Address: Ethernet hardware address Netmask: corresponding to the network. Max. Transfer Unit: maximum bytes of a packet. Tx/Err Packets: e.g. 309/0, means you sent 309 packets and there are “0” packets with errors. Rx/Err Packets: e.g. 3573/2, it means you received 3573 packets and there are 2 error packets. Link Status: Shows the current transfer speed. e.g. 100Mbps, full duplex.
URL Log The URL Log function records the recent connections for each client. If you would like to view what the user is browsing, you can click the corresponding Destination URL in the rightmost column.
DHCP Lease Report The DHCP Lease Report function reports all leased IP provided by DHCP server. From this page, you can find out which host was assigned to which IP address. You can clear all the records through administrator settings. Please refer to the section 7.1, Clear DHCP Lease. User Management The NAS provides a client/server environment for users to share files over the network. File sharing works by authorizing the users or groups to access shared folders by their username and password.
Users For file sharing to work, we have to allow users and/or groups. We create the user accounts here. The admin and guest accounts are in the system by default and cannot be removed. The admin account is different than the one used to access the UI and can be modified. Enter a username and password. Note: Windows 98 SE, Me users should user the same username as their Windows login. Passwords are recommended, but are not required. Click Apply when completed.
Groups After creating the users, you can categorize the users into different groups to make assignment easier. Click on Add to create a new group name. Enter the group name Highlight the user(s) on the right side and click on the Å button to assign the user(s) to the group. Highlight multiple users by holding down the Shift key or Ctrl key while selecting users. Select users on the left side and click on the Æ button to remove them from the group. When complete, click the Apply button.
NAS Management Manage the main functions of the shared storage from this menu. HD Initialization Wizard The first time you use the NAS, you may have to initialize the hard disk. The wizard provides an easy way to initialize the hard disk. By enabling SMART, the NAS will report when the hard drive is about to fail. Your hard drive must support this feature. The HD Power Management should be enabled to prolong the life of the hard drive.
Enter the workgroup name, description and initial share folder name. The workgroup name should be the same one that the computers accessing the NAS are on. Windows 2000/XP users can use a different workgroup name if desired. Click Next to continue. You can find your workgroup name by right clicking on My Computer and selecting Properties. You must assign at least one user to this share folder.
The progress of the initialization will be displayed. You can also view the progress by returning to the main wizard screen. Once the initialization is complete, the status will change to Ready. USB HD Information Each of formatted partitions (FAT32, EXT2 and EXT3) on the attached USB storage drive will be shown in the USB HD information page. The naming rule for “Mounting path” is based on the connecting port.
Advanced Settings All the file protocols settings are located here. Disable any protocols not in use by the computers on the network to increase performance. Most users will not need to change any of the settings. Make sure to click on Apply after making any changes. Change the workgroup or NAS description. Workgroup name should be the same for all computers sharing files. Enable Apple file sharing for compatibility with older Macs. Enable the FTP server to allow remote and local FTP file access.
Enter the Remote UID, IP, netmask and the local mapping user. Once complete, mount the share on the Linux machine. A typical mount command line: # mount :/ / File Sharing For file sharing, you must create users and groups first. Use this to organize the data on the NAS. You can create private and public folders. By managing which users have access to the shares, users can only access information that they are allowed to.
Highlight the share folder and click on Remove or Modify to delete or edit the shared folder properties. USB Storage Sharing As mentioned above, each partition of the attached USB storage will be presented to one shared folder. So, if one USB storage device be plugged into A port and it have 2 partitions. The system create the USBHDA1 and USBHDA2 automatically and assigned the guest have read/write permission by default.
FTP Server If you want to access files stored on your NAS from a remote location, the included FTP server is the easiest way. Here is a typical setup: Connection Diagram: Work PC<-->Internet<-->DSL/Modem<-->Router<-->NAS To access files from the NAS from a remote location, a static IP and/or a DNS name is required. You can also setup a DDNS account if you are using a dynamic IP (your DSL IP changes all the time). See Dynamic Domain Name Server for additional information and help in setting up this service.
Now from the remote location, type into a browser (or FTP application) ftp:// and it will take you to your NAS unit. If you cannot see anything on your browser, make sure you have the 'View FTP Folders' option turned on in your browser settings. You may also have to go into 'File->Login As'. Use a valid user name and password for the NAS. Personal Web Server The Web Server settings are currently under 'Nas Management->Web Server'.
Web page design You must have an 'index.html' file as that is what the web server will look for as the first page of your website. You are free to make folders under the ‘www’ directory to help organize your website. All references to those directories can be called on from any page. You can use many popular web page design programs to make your website and then copy the finished product (all associated images, files and folders also) to the ‘www’ shared folder.
E-mail Server The E-mail Server settings are located under Nas Management->E-mail Server. Getting started In order to use the e-mail server, you must have a domain name or have registered with a DDNS service provider. E-mail requires a domain name and will not work with just an IP address. Enable the e-mail server by selecting the ‘Enable’ radio button. Enter your domain name in ‘Mail Domain Name’. For example, myhomedomain.com is a valid name. Do not enter the ‘www’ usually associated with domain names.
Windows includes MS Outlook Express as a standard application. Start Outlook. Under Tools->Mail, you want to ADD a mail account. Enter a display name, the formal name you want your e-mails to appear to come from (Usually your full name). In the e-mail address field, enter your new e-mail address. From the above example, we would enter ‘teacher@school.com’ or ‘teacher@school.dyndns.org’. Under ‘Incoming mail server’ and ‘Outgoing mail server’, enter your domain name.
Connect a USB Printer to the USB port on the back of the NAS and turn it on. Locate the NAS device in My Network Places and select it by double clicking on the icon. Enter a valid user name and password when prompted. You will now see the printer port next to the shares for the device. Double click on the PortA printer icon and follow the instructions to install the printer driver at the local station. You may need to select ‘Have Disk’ and insert your printer’s driver CD during the installation process.
Appendix A PPTP VPN (W2K and XP only) Important: Make sure that the subnet of your Appliance is different the network you are trying to connect from. For example: User’s office IP addresses are 192.168.1.x, set your Appliance to 192.168.2.1 Netmask 255.255.255.0. Make sure that you have created a user account and password on the Appliance for the users that you want to allow VPN access. Proceed to your appliance’s PPTP Settings under VPN Settings. 1. Enable the Server 2.
desktop. Click Finish when done. 7. Use the user name and password on your Appliance to log in. You should be able to see the Appliance in your network neighborhood now. You must initiate the VPN connection each time unless you selected otherwise. TIPS: If all you need is file transfer, we suggest using the FTP server feature, as it is faster and simpler. If you must use the PPTP VPN feature, then you can also disable the encryption under Properties -> Security to increase the performance.
Searching the Network for the NAS If you are not able to locate the NAS in the Network Neighborhood or My Network Places, you can try to search for it. Click Search under My Network Places. Enter the name of the NAS or the Fixed IP address if configured that way and click Search Now. All other company and/or products names are trademarks and/or registered trademarks of their respective owners.