
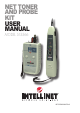
User Manual


8
Checking low voltage (less than 24 volts DC or AC only) —
• NRM LED lighted – The black test lead is connected to negative (–)
DC voltage.
• REV LED lighted – The black test lead is connected to positive (+)
DC voltage.
other fuNctioNs/comPoNeNts
Over-current Indicator
The over-current indicator lights when current on the line exceeds 90 (mA).
Current over 90 mA means that you may have connected to a digital line
or an unusually congured analog line. NOTE: If the line is digital,
plugging an analog modem into it will damage the modem. Disconnect
the tester from the line within 10 seconds to avoid damage to the tester.
Testing the Dial Tone
1. Switch the TEL/EAR switch to the EAR position.
2. Plug the phone line into the tester’s RJ jack.
3. Push the LISTEN button to the down position. This takes the phone
line off the hook and plays sound on the phone line through the
tester’s speaker.
4. Check for a good dial tone.
Testing a phone line without an RJ11 plug — Connect the phone line to
the test pins on the tester’s reverse side with an alligator clip (not included),
then carry out the test as described above. NOTE: As soon as the dial
tone check is complete, return the TEL/EAR switch to the TEL position
and push theLISTEN button to the up position to avoid unnecessary
drain on the battery.
WARNING: If the Over-Current LED lights, the line being tested has
more than 90 mA of current and is probably a digital phone line. Turn off
the Listen switch or unplug.
Replacing the Tip
1. To replace the tracer tip, hold the probe with the tracer tip pointing
8