
User manual


SE WALL BOX MANUAL ASSEMBIY
Packing list
①---Front door---1pc
②--- Front frame---1pc
③--- Side frame---2pcs
④--- Side panel---2pcs
⑤-- To p---1pc
⑥--- Back frame---1pc
⑦---19”mounting rails ---2pcs
⑧-- Bottom---1pc
⑨--- Package of accessories
Item list of accessories package
M5X10 self-tapping screws---
10pcs
M6X12 screws ---
21U& More than12U,12pcs
less than21U, 8pcs
M6X12 screws&square
nuts---
12U& less than12U,10SET
More than12U, 20SET
Tip:Check the quantities of the items
after open package, ensure the
quantities is right to improve the
assembly efficiency.
ATTENTION:
please remove front/back door and
side plane from the frame prior to
unpacking
【
1
】
Remove
⑦
from
②
, put them
separate for the preparation of the
frame assembly
.
【
2
】
Open the front door by key, pull the door
latch downward, refer to the picture, remove
the front door from front frame, put them
separate for the preparation of the frame
assembly.
【
3
】
Fix 19” mounting rails to the first holes of
top & bottom of side frames by 4sets of M5
screws.
【
4
】
Install side frames to the grooves of back
frame by 4pcs of M6*12 screws (6pcs if more than
18U) as shown by the arrow in the picture, note 19”
mounting rails are in the front side.
【
5
】
I
nstall top and bottom as shown by
the arrow in the picture.
Tip:Please note the direction when install
bottom, screws will be in the front side,
please refer to picture.
【
6
】
Install front frame by 4pcs of
M6*12 screws (6pcs of M6*12 screws if
more than 18U), refer to the picture.
【
7
】
Install side panels, refer to the
picture
【
8
】
Repetition step 2, install
front door.
Tip: SE enclosure is the bolted
structure, need to adjust the
diagonal size of enclosure after
the assembly, ensure
homogeneous space for all
doors and doors work well.
M6
Attention:
screws be
in the front side
M6
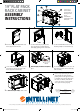
19” FLAT PACK
RACK CABINET
ASSEMBLY
INSTRUCTIONS
North & South America
IC Intracom Americas
550 Commerce Blvd.
Oldsmar, FL 34677
USA
Asia & Africa
IC Intracom Asia
4-F, No. 77, Sec. 1, Xintai 5th Rd.
Xizhi Dist., New Taipei City 221
Tai wan
Europe
IC Intracom Europe
Löhbacher Str. 7
D-58553 Halver
Germany
© IC Intracom. All rights reserved. Intellinet is a trademark of IC Intracom, registered in the U.S. and other countries. For specifications, go to intellinet-network.com. For warranty information, go to intellinet-network.com/warranty.
1 Front door
2 Front frame
3 Side frame x2
4 Side panel x2
5 Top
6 Back frame
7 Mounting rail x2
8 Bottom
Remove the side panels (4) from the side
frames (3) and set them aside.
1
2
Use the included key to pull open the
door (1) and remove it from the front
frame (2) by pushing down on the latch.
3
Use the 4 included M5 screws to attach a
mounting rail (7) to each side frame (3).
4
Use 4 of the included M6 screws (use 6 for
larger units) to attach each of the 2 side
frames (3) to the back frame (6).
5
Slide the top (5) and the bottom (8) into
place.
Note: screws
to the front
6
Use 4 of the included M6 screws (use 6 for
larger units) to attach the front frame (2)
to the assembly.
SE WALL BOX MANUAL ASSEMBIY
Packing list
①---Front door---1pc
②--- Front frame---1pc
③--- Side frame---2pcs
④--- Side panel---2pcs
⑤-- To p---1pc
⑥--- Back frame---1pc
⑦---19”mounting rails ---2pcs
⑧-- Bottom---1pc
⑨--- Package of accessories
Item list of accessories package
M5X10 self-tapping screws---
10pcs
M6X12 screws ---
21U& More than12U,12pcs
less than21U, 8pcs
M6X12 screws&square
nuts---
12U& less than12U,10SET
More than12U, 20SET
Tip:Check the quantities of the items
after open package, ensure the
quantities is right to improve the
assembly efficiency.
ATTENTION:
please remove front/back door and
side plane from the frame prior to
unpacking
【
1
】
Remove
⑦
from
②
, put them
separate for the preparation of the
frame assembly
.
【
2
】
Open the front door by key, pull the door
latch downward, refer to the picture, remove
the front door from front frame, put them
separate for the preparation of the frame
assembly.
【
3
】
Fix 19” mounting rails to the first holes of
top & bottom of side frames by 4sets of M5
screws.
【
4
】
Install side frames to the grooves of back
frame by 4pcs of M6*12 screws (6pcs if more than
18U) as shown by the arrow in the picture, note 19”
mounting rails are in the front side.
【
5
】
I
nstall top and bottom as shown by
the arrow in the picture.
Tip:Please note the direction when install
bottom, screws will be in the front side,
please refer to picture.
【
6
】
Install front frame by 4pcs of
M6*12 screws (6pcs of M6*12 screws if
more than 18U), refer to the picture.
【
7
】
Install side panels, refer to the
picture
【
8
】
Repetition step 2, install
front door.
Tip: SE enclosure is the bolted
structure, need to adjust the
diagonal size of enclosure after
the assembly, ensure
homogeneous space for all
doors and doors work well.
M6
Attention:
screws be
in the front side
M6
7
Install the 2 side panels (4).
8
Reverse Step 2 by inserting the lower
door latch into the frame and then
pushing down on the upper door latch
to install the front door (1). Note: Once
the unit is assembled, check that all
corners are square to ensure that the
door opens and closes properly.
Wallmount Cabinet instructions ICG.indd 1 7/30/14 2:22 PM