
User manual


- 26 -
5: Adjusting the Camera Lens
5.1 Adjusting the Focus
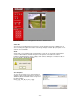
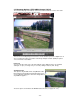
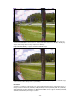
To get the finest image, adjust the lens focus according to your environment. Before adjusting,
turn the set screw counterclockwise, then turn the lens in either direction till you get the most
well-defined image edges while viewing the picture quality on your Web browser. When you
finish adjusting the lens, turn the set screw clockwise to fix it in place.
NOTE: Do not force the lens beyond either the clockwise or counterclockwise limit. Also, a good
level of focus is normally achievable throughout several planes within the camera’s focusing
spectrum. Since optimum focusing is dependent upon the camera’s field of view, it is important
to scan the focusing plane from the closest to furthest perspectives before attempting any fine-
tuning.
5.2 Replacing the Lens
The Pro Series Network Camera is designed with a CS mount. The lens supplied with your
product can be replaced with any standard C or CS lens, typically used within the surveillance
industry. Follow the instructions below to replace the supplied lens with any C- or CS-type lens.
1. Unscrew the camera lens by turning the lens counterclockwise (see above).
2. For C lens only: Attach the new lens to a C-CS adapter.
3. Screw the new lens onto the camera. If applicable, adjust the iris according to the prevailing
light conditions.
4. Focus the lens as instructed above.
5. Reload your Web browser and monitor the results from the product homepage.
NOTE: The Night Vision Infrared Camera is equipped with a special lens which cannot be
replaced and must not
be removed.
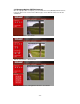
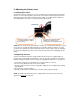
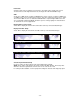
Turn this part either clockwise
or counterclockwise to adjust
the lens focus.
Turn this part counterclockwise
(with the lens facing you) to
unscrew the lens for replacement.
Set Screw