
User manual

- 55 -
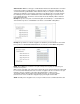
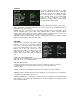
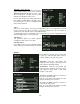
SHUTTER
Just like a traditional camera or a digital
camera, a network camera has a shutter that
controls the exposure of the image. Normally
the camera operates in automatic shutter
mode (“AUTO”), which is the recommended
setting for most installations. In certain
situations you may be able to achieve better
results by using a different setup.
“AUTO”: The shutter speed is controlled automatically according to the brightness of the scene.
“FLK”: Select 'FLK' mode when flickering occurs on the screen due to an imbalance between
illumination and power frequency.
“FIXED”: Click the select button to open the settings page, then select a fixed shutter speed
from the following values: 1/50, 1/250, 1/500, 1/2000, 1/5000, 1/10,000, 1/100,000. Higher
numbers mean shorter shutter time; lower numbers mean the shutter stays open longer (e.g.,
1/50 means that the shutter stays open for 1/50
th
second for each frame).
“MANUAL”: Click the select button to open the settings page. Here you can adjust the target
brightness by adjusting the slider from left to right.
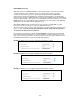
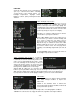
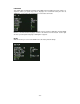
WHITE BAL.
This parameter controls the white balance. White
balance is the process of removing unrealistic
color casts, so that objects which appear white in
person are rendered white in the video. White
balance has to take into account the "color
temperature" of a light source, which refers to the
relative warmth or coolness of white light. The
camera offers several options that are explained
next.
“ATW”: Auto Tracking White Balance
This mode can be used within the color temperature range 1,800°K ~ 10,500°K (eg, fluorescent
light, outdoor, etc.). It is the default mode.
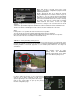
“AW”: Auto White Balance
Select this value in case the other modes do not give satisfactory results. For example:
- Conditions under a very high color temperature (e.g., a clear sky and sunset)
- Dark conditions
“FIXED”: Select from four (4) different modes that are designed for special conditions.
“MANUAL”: When selecting manual mode and clicking on the select button, you can adjust the
red and blue color according to your needs.
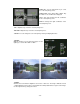
“FIXED” and “MANUAL” should only be used if the camera is installed in a location with stable
light conditions, e.g., indoors with artificial light. For all other installations the automatic modes
are the preferred option.