
User's Manual


5
2. First-Time Installation and Configuration
2.1. Selecting a Power Supply Method
Optionally, the AP can be powered by the supplied power adapter or PoE (Power over Ethernet). The
AP automatically selects the suitable one depending on your decision.
To power the AP by the supplied power adapter:
1. Plug the power adapter to an AC socket.
2. Plug the connector of the power adapter to the power jack of the AP.
NOTE: This product is intended to be power-supplied by a Listed Power Unit, marked “Class 2” or
“LPS” and output rated “5V DC, 1 A minimum” or equivalent statement.
To power the AP by PoE:
1. Plug one connector of an Ethernet cable to an available port of a PoE hub.
2. Plug the other connector of the Ethernet cable to the LAN/CONFIG port of the AP.
NOTE: The PoE capability of the bridge is PowerDsine-compatible. Please visit the Web site of Pow-
erDsine for more information (http://www.powerdsine.com).
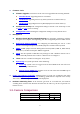
2.2. Mounting the AP on a Wall
The AP is wall-mountable.
1. Stick the supplied sticker for wall-mounting.
2. Use a
φ6.5mm driller to drill a 25mm-deep hole at each of the cross marks.
3. Plug in a supplied plastic conical anchor in each hole.
4. Screw a supplied screw in each plastic conical anchor for a proper depth so that the wireless AP
can be hung on the screws.
5. Hang the wireless AP on the screws.