
User Manual User guide

Chapter 1
Getting Started
7
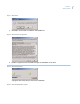
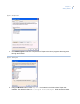
10. Click Yes to confirm the removal of the older version of Topaz. When the program has been
removed, the following message displays.
11. Click Ok.
12. Insert the Topaz installation CD and install the new version of Topaz, as described in
Software Installation on page 8.
13. When the installation is complete, open Windows explorer or My Computer and navigate to
the folder:
C:\Program Files\GE\Topaz\Screens
14. Locate the file, sysconfig.dat, and move it to a temporary folder.
15. There are now two Topaz icons on your desktop. One of them is labeled Topaz the other one
is Topaz Server. From your desktop, double-click Topaz Server (not Topaz).
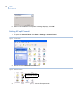
16. Log on as master.
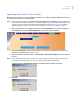
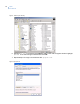
17. Navigate to the Control tab and select Back Up/Restore.
18. Under Restore Database, select the drive letter C.
19. After the restore is complete, shut down Topaz and restart the computer.
20. After the computer is rebooted, log on to Windows explorer and remove the Topaz directory
from the C drive that was created in step 3.
21. Navigate to the temporary folder where you placed the file, sysconfig.dat, in step 14 and
replace it in the folder: C:\Program Files\GE\Topaz\Screens
22. From your desktop, double-click Topaz (not Topaz Server). Log on to Topaz using your
installer login and password.