
Configuration Manual Instruction Manual


TruVision 360° Camera Configuration Manual 15
3. Click Save to save changes.
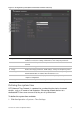
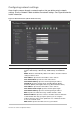
To define the DDNS parameters:
1. Click Configuration > Network > DDNS.
2. Check Enable DDNS to enable this feature.
3. Select DDNS Type. Two options are available: DynDNS and IPServer.
• DynDNS: Enter the user name and password registered to the DynDNS web
site. The domain name is that of the DynDNS web site.
• ezDDNS: Enter the host name, it will automatically register it online.
• IPServer: Enter the address of the IP Server.
4. Click Save to save changes.
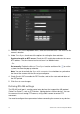
To define the PPPoE parameters:
1. Click Configuration > Network > PPPoE.
2. Check Enable PPPoE to enable this feature.
3. Enter User Name, Password, and Confirm password for PPPoE access.
4. Click Save to save changes.
To define the SNMP parameters:
1. Click Configuration > Network > SNMP.
2. Select the corresponding version of SNMP: v1, v2c or v3.
3. Configure the SNMP settings. The configuration of the SNMP software should be
the same as the settings you configure here.
4. Click Save to save changes.
Note: Before setting the SNMP, please download the SNMP software and manage to
receive the camera information via SNMP port. By setting the Trap Address, the
camera can send the alarm event and exception messages to the surveillance center.
The SNMP version you select should be the same as that of the SNMP software.
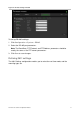
To define the 802.1X parameters:
1. Click Configuration > Network > 802.1X.
2. Check Enable IEEE 802.1X to enable the feature.
3. Configure the 802.1X settings, including EAPOL version, user name, and password.
The EAPOL version must be identical with that of the router or the switch.
4. Click Save to save changes.