
User Manual


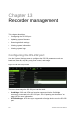
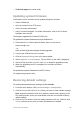
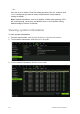
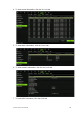

Table Of Contents
- Chapter 1 Product introduction
- Chapter 2 Installation
- Chapter 3 Getting started
- Chapter 4 Recording
- Chapter 5 Alarm settings
- Chapter 6 Network settings
- Configuring general network settings
- Configuring DDNS
- Configuring an NTP server
- Configuring email
- Configuring UPnP
- Configuring SNMP
- Configuring an FTP server to store snapshots
- Configuring a remote alarm host
- Configuring multicast
- Configuring the server and HTTP ports
- Configuring the RTSP service port
- Telnet setup
- Checking network status
- Exporting network packet data
- Chapter 7 HDD management
- Chapter 8 Operating instructions
- Chapter 9 Live view
- Chapter 10 Controlling a PTZ camera
- Chapter 11 Playing back a recording
- Chapter 12 Archiving recorded files
- Chapter 13 Recorder management
- Chapter 14 Camera settings
- Chapter 15 User management
- Chapter 16 Using the web browser
- Appendix A Specifications
- Appendix B PTZ protocols
- Appendix C Port forwarding information
- Appendix D KTD-405 keypad
- Appendix E Maximum pre-recording times
- Appendix F Supported PTZ commands
- Appendix G Default menu settings
- Index

102 TruVision DVR 12 User Manual
Chapter 13
Recorder management
This chapter describes:
Configuring the RS-232 port
Updating system firmware
Restoring default settings
Viewing system information
Viewing system logs
Configuring the RS-232 port
Use the System Settings menu to configure the RS-232 parameters such as
baud rate, data bit, stop bit, parity, flow control, and usage.
Figure 31: RS-232 setup window
There are three ways the RS-232 port can be used:
ProBridge: POS and ATM text insertion supported via the ProBridge
accessory connected to the RS-232 port. See “Capturing text insertions” on
page 125 for more information.
ATS/Challenger: NTP time sync supported to foreign device over the RS-232
port.