
User Manual


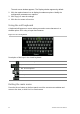


Table Of Contents
- Chapter 1 Product introduction
- Chapter 2 Installation
- Chapter 3 Getting started
- Chapter 4 Recording
- Chapter 5 Alarm settings
- Chapter 6 Network settings
- Configuring general network settings
- Configuring DDNS
- Configuring an NTP server
- Configuring email
- Configuring UPnP
- Configuring SNMP
- Configuring an FTP server to store snapshots
- Configuring a remote alarm host
- Configuring multicast
- Configuring the server and HTTP ports
- Configuring the RTSP service port
- Telnet setup
- Checking network status
- Exporting network packet data
- Chapter 7 HDD management
- Chapter 8 Operating instructions
- Chapter 9 Live view
- Chapter 10 Controlling a PTZ camera
- Chapter 11 Playing back a recording
- Chapter 12 Archiving recorded files
- Chapter 13 Recorder management
- Chapter 14 Camera settings
- Chapter 15 User management
- Chapter 16 Using the web browser
- Appendix A Specifications
- Appendix B PTZ protocols
- Appendix C Port forwarding information
- Appendix D KTD-405 keypad
- Appendix E Maximum pre-recording times
- Appendix F Supported PTZ commands
- Appendix G Default menu settings
- Index

TruVision DVR 12 User Manual 59
Using the mouse
The USB mouse provided with the recorder can be used to operate all the
functions of the recorder, unlike the front panel which has limited functionality.
The USB mouse lets you navigate and make changes to settings in the user
interface.
Connect the mouse to the recorder by plugging the mouse USB connector into
the USB port on the back panel or the front panel. The mouse is immediately
operational and the pointer should appear.
Note: Use a USB 2.0 or higher mouse.
Move the pointer to a command, option, or button on a window. Click the left
mouse button to enter or confirm a selection.
You can purchase a spare mouse by ordering part number TVR-MOUSE-1.
See Table 5 below for a description of the mouse buttons.
Table 5: Mouse buttons
Item
Description
Left button
Single-Click Live view: Select a camera to display the quick
access toolbar (see “Accessing frequently used
commands” on page 69).
Menu: Select a component of a menu, such as a
button or an input field. This is similar to pressing the
Enter button on the remote/front panel controls.
Double-Click Live view: Switch between single screen and multi-
screen mode in live/ playback mode.
Click and Drag Live view: Drag channel/time bar.
PTZ control: Adjust pan, tilt and zoom.
Tamper-proof, privacy masking and motion
detection functions: Select the target area.
Digital zoom-in: Drag and select target area.
Right button
Single-Click Live view: Display menu.
Menu: Exit the current menu and return to higher
level.
Scroll
-wheel Scroll Up Live view: Return to the previous window.
Menu: Move the selection to the previous item.
Scroll Down Live view: Move to the next window.
Menu: Move the selection to the next item.
Using the IR remote control
The recorder is supplied with an infra red (IR) remote control unit. Like the
mouse, it can be used to operate all of the main functions of the unit.