
User Manual Owner manual


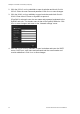


Table Of Contents
- Chapter 1 Introduction
- Chapter 2 Installation
- Installation environment
- Package contents
- Cable requirements
- Camera descriptions
- Setting up the camera
- Connecting the devices
- Accessing the SDHC card
- Mounting the dome cameras on a ceiling
- Mounting the bullet camera
- Using the camera with TVR 60/ TVN 20/ TVN 40/ LNVR and other systems
- Using the camera with TruVision Navigator
- Chapter 3 Network and streaming configuration
- Chapter 4 Camera configuration
- Chapter 5 Camera management
- Chapter 6 Camera operation
- Appendix A Specifications
- Appendix B Pin definitions
- Index

2BChapter 3: Network and streaming configuring
20 TruVision Outdoor IP Camera User Manual
configuration window. The Local configuration window appears. See Figure 6 on
page 20.
The camera is shipped with on-screen display (OSD) menus in English only.
Figure 6: Example of a configuration window (Local configuration shown)
Configuration panel
Menu window
Current user displayed
Exit system
Save changes
There are two main folders in the configuration panel:
Local configuration
Remote configuration
Local configuration
Use the Local menu to manage the network type, display mode and local storage
paths. In the Configuration panel, click “Local configuration” to display the Local
settings window. See Figure 6 and Table 2 for descriptions of the different menu
parameters.
Table 2: Overview of the Local configuration window
Parameters
Description
Protocol type
Specifies the network protocol used.
Options include: TCP and UDP.
Stream type
Specifies the streaming method used.
Options include: Main stream and sub stream. Main is default.
Display mode
Specifies the width/height ratio of the image.
Options include: Full screen, 4:3, 16:9 or adjustable.
Package file size
Specifies the maximum file size.
Options include: 128 MB, 256 MB and 512 MB