
User's Manual

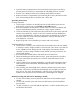
1. Open the battery compartment located on the back of the remote controller by
pressing down on the battery compartment tab and pulling the door outward.
2. Insert 4 “AA” alkaline batteries (not included) with polarities as shown.
3. Replace the battery compartment by first inserting the 2 tabs at the bottom of the
door, then pressing the door in until the door ‘clicks’ shut.
Operating Instructions
Creating a Network
1. On the remote controller, the include button is located behind a protective lid.
Raise the lid to gain access to the
Include and Exclude buttons.
2. Press and release the include button. The INCLude icon in the LCD display will
begin to flash indicating that the controller is ready to register modules.
3. On the In-wall switch, press and release the top half of the rocker switch (the ON
switch). If successful, the “INCL” icon on the controller will stop flashing and
the word “SUCCESSFUL” will turn on steady in the LCD display for 2 seconds.
If not successful, the words “NOT SUCCESSFUL” will turn on steady in the
LCD display for 2 seconds.
4. Repeat steps 2 & 3 for each module you wish to add to the network.
Assigning Modules to Channels
1. On the remote controller, press and hold the ON and OFF buttons for the channel
to which you want to assign a module at the same time. After about 3 seconds, the
word, “LEARN” will be displayed in the LCD display. This indicates that the
controller is ready to assign a module to that channel. You may now release the
ON and OFF buttons.
2. Press and hold the Include button. The INCLude icon will turn on.
3. While still holding the Include button in step 3, press and release the top half of
the rocker switch (the ON switch). Do not release the Include button on the
controller yet.
4. Choose a light level by pressing and holding, or pressing and releasing the ON or
OFF switch on the In-wall switch. Possible settings are FULL ON, FULL OFF,
and DIMMED.
5. After reaching your desired light level, release the Include button on the remote
controller. The remote controller will automatically store the light level that you
have just set. The word “SUCCESSFUL” will turn on for 2 seconds and the
module is now associated to that channel with a default light level assigned.
Remotely turning ON and OFF or dimming a module
1. To turn ON a module, press and release the ON button for that module’s given
channel.
2. To turn OFF a module, press and release the OFF button on for that module’s
given channel.
3. To dim a module up, press and hold the ON button. To dim a module down, press
and hold the OFF button.