2 Connecting and Configuring the Printer Use this chapter to understand how to configure the printer to communicate in your network.
Chapter 2 — Connecting and Configuring the Printer Connecting the Printer to Your PC You can easily connect the PD41 or PD42 commercial printer to your PC using one of these ports: • USB device port • RS-232 serial interface port • IEEE 1284 communications port (optional) Note: You cannot use the USB device port and IEEE 1284 port at the same time. To select the active interface, go to Setup mode > COM: > Interface.
Chapter 2 — Connecting and Configuring the Printer Make sure the serial port settings on the printer match the settings on the connected device. The default serial communication settings on the printer are: 9600 baud rate, 8 data bits, no parity, 1 stop bit and no flow control. You can use a serial connection to communicate with your PC and run PrintSet, LabelShop, or InterDriver.
Chapter 2 — Connecting and Configuring the Printer Connecting the Printer to Your Network Using either the integrated Ethernet or the optional 802.11 wireless network interface provides features such as security, FTP server, web server, and Alert handling. Setting Up Ethernet Communications Use the Ethernet port to set up the PD41 or PD42 as a network printer. The printer is set to automatically retrieve an IP number from the network (DHCP) once it is turned on.
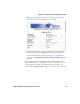
Chapter 2 — Connecting and Configuring the Printer Entering the IP address brings up the home page of the printer, where you can check and modify printer settings. 5 You will be prompted to enter a login name and a password. By default, the login name is admin and the password is pass. For more information on using the web page to configure the printer, see “Configuring the Printer From the Home Page” on page 38.
Chapter 2 — Connecting and Configuring the Printer Setting Up 802.11 Radio Communications The printer can have an internal 802.11 b/g radio to transfer and receive data using wireless communications. This user’s guide assumes that you have already set up your wireless communications network including your access points. The following procedures include information on setting up wireless security for both IPL and Fingerprint.
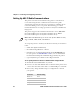
Chapter 2 — Connecting and Configuring the Printer 1 Start PrintSet on your PC. 2 In the General Tasks box, click Add Printer and step through the screens of the Add Printer Wizard until you have successfully added your printer. 3 In the Printer Tasks box, click Wireless Setup Wizard and step through the screens to set up wireless network and security parameters.
Chapter 2 — Connecting and Configuring the Printer If you are using Fingerprint, send this command to the printer: setup write "wlan","uart1:" 4 Set up the printer to use the correct SSID and authentication modes. For help, see the next section, Configuring Wireless Printing Using IPL or “Configuring Wireless Printing Using Fingerprint” on page 33. 5 If you are going to use certificates for validation, transfer the certificate to the printer. The printer can accept .pfx, .pem, and .der certificates.
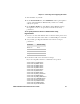
Chapter 2 — Connecting and Configuring the Printer ws,.WEP_KEY,1 3 Send the following command to activate the settings. ws,ACTIVE,1 To configure the printer to use WPA-PSK or WPA2-PSK mode 1 Send the following commands to login as an admin and set the SSID: .x,su -p pass admin ws,SSID,xxxxx where xxxxx can be from 0 to 32 alphanumeric characters 2 Send one of the following commands to turn on WPA or WPA2 authentication.
Chapter 2 — Connecting and Configuring the Printer ws,WPA2,ON ws,WPA_PSK, 3 Send these commands to configure the EAP_TYPE: ws,EAP_TYPE,xxxx where xxxx can be OFF, LEAP, PEAP, or TTLS. ws,.EAP_USER,xxxx ws,.EAP_PASS,xxxx where xxxx is the unique username and the unique password for this protocol.
Chapter 2 — Connecting and Configuring the Printer which transmits the name of the last certificate authority successfully installed. An additional read-only variable for the supplicant state, called STATE, is also returned. • You may need to send the following command several times for the wireless station to connect: ws,ACTIVE,1 Configuring Wireless Printing Using Fingerprint Use the following procedures to configure your printer with Fingerprint for wireless printing.
Chapter 2 — Connecting and Configuring the Printer 2 Send one of the following WPA/WPA2 ON commands to turn on WPA or WPA2 authentication. Send the WPA-PSK or WPA2-PSK command to set a pre-shared key: setup setup setup setup setup "wlan","WPA","ON" "wlan","WPA2","ON" "wlan","WPA_PSK","xxxxxxxxxx" "wlan","ACTIVE","1" write "wlan","uart1:" where xxxxxxxxxx is a value between 8 and 64 characters.
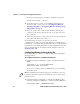
Chapter 2 — Connecting and Configuring the Printer 5 If you are using certificates for validation, here are some commands you may need to use. • Send the following commands to set a certificate and enable validation: setup "8021x","CA_CERT","c:/test.pfx@export" setup "8021x","VALIDATE","ON" where c:/test.pfx is the location and name of the certificate and export is the passphrase. • Send the following commands to set a common name for server 1 and server 2: setup "8021x",".
Chapter 2 — Connecting and Configuring the Printer Connecting a Keyboard to the USB Host Port You can use an external USB keyboard to: • input data in Fingerprint applications. Some applications may require more complex input from users than the simple push of a button. • manage setup in Fingerprint, Direct Protocol, and IPL. In the installed keyboard layouts, the arrow keys on the keyboard are mapped to the up, down, right, and left functions in the Setup menu.
Chapter 2 — Connecting and Configuring the Printer Connecting a USB Hub to the USB Host Port You can connect a USB hub to the printer so that you can connect several USB devices to the printer at the same time. Note: You can only connect one mass storage device and one HID (keyboard or scanner) peripheral to the USB hub at a time. Configuring the Printer You can change the configuration settings of your printer: • directly from the screen. • from the printer home page. • using PrintSet.
Chapter 2 — Connecting and Configuring the Printer Starting point SETUP: NET-COM, NET1 SETUP: SER-COM, UART1 SETUP: COM SETUP: PRINT DEFS SETUP: NETWORK SETUP: MEDIA Option SETUP: EMULATION SETUP: FEEDADJ The Main Nodes of the Setup Menu in Fingerprint Starting point SETUP: COM SETUP: SER-COM SETUP: CONFIGURATION SETUP: NETWORK Option SETUP: MEDIA SETUP: TEST/SERVICE The Main Nodes of the Setup Menu in IPL Configuring the Printer From the Home Page If you are using an Ethernet or 802.
Chapter 2 — Connecting and Configuring the Printer The home page displays the assigned name, firmware version, Active Command Set, MAC address, and IP address of your printer. The home page also displays the contents of the image buffer, as well as the status of the Ready-to-Work indicator. 3 Click Configuration. 4 Click the link for the settings you want to configure. 5 You will be prompted to enter a login name and a password. By default, the login name is admin and the password is pass.
Chapter 2 — Connecting and Configuring the Printer Configuring Media Settings Use the media page to view and change media settings such as XSTART position, media type, and contrast. To configure media settings 1 Click Printer > Media. 2 Enter the correct information for the media you are using. 3 Click Submit Setup. Configuring Print Engine Settings (Fingerprint only) Use the print engine page to adjust the media feed direction (start and stop adjust positions) and print speed.
Chapter 2 — Connecting and Configuring the Printer Use the following table to understand the Web Shell settings. Understanding the Web Shell Settings Setting Description Testfeed [value] Calibrates the label stop sensor performs a testfeed. Selecting this setting is equivalent to issuing the TESTFEED command on the printer. Ribbon Sensor [value] Calibrates the ribbon sensor. The ribbon sensor is also calibrated by the testfeed.
Chapter 2 — Connecting and Configuring the Printer 3 Select the Notification method. 4 Click Submit Settings. Use the following table to understand the Alert Settings. Understanding the Alert Settings Setting Description Label Not Taken (Fingerprint only) Sent when the printed label is not taken from the printer. This setting applies to label and ticket media and requires an optional label taken sensor. Cutter Error There was an error related to the label cutter.
Chapter 2 — Connecting and Configuring the Printer Configuring General Network Settings Use the General network page to view the printer name, change passwords, and set restrictions. To configure general network settings 1 Click Network Admin > General. 2 View or update your settings. Note: To enter a new password, you need to check the Set password check box. 3 Click Submit General settings. Use the following table to understand the general network settings.
Chapter 2 — Connecting and Configuring the Printer Understanding the General Network Settings (continued) Setting Description Restrictions Sets restrictions on who is allowed to upgrade the printer firmware or view and change network settings. You cannot remove “admin” from the list of authorized users. Users allowed to update: Defines who may perform a firmware upgrade using FTP, PrintSet, or IFAB. This setting does not affect upgrading from a Compact Flash card.
Chapter 2 — Connecting and Configuring the Printer Understanding the Mail Settings Setting Description Mail (SMTP) Server Choose a configuration method for your mail server settings: • SMTP settings from DHCP: Choose this setting is you want the printer to receive settings automatically from your DHCP server. This setting requires that you choose DHCP and IP Selection in the TCP/IP section. • Manual settings: Choose this option to manually configure the Mail Server address and port.
Chapter 2 — Connecting and Configuring the Printer Use the following table to understand SNMP settings. Understanding the SNMP Settings Setting Description Read Community Community with rights to read the SNMP MIBs. Read/Write Community Community with rights to read and write SNMP MIBs. System Name Administrative name for the SNMP node. Authentication Failure Defines if a trap is sent when an unauthorized Trap SNMP request tries to access the printer. Choose Enable to send the trap.
Chapter 2 — Connecting and Configuring the Printer Use the following table to understand the TCP/IP settings. Understanding the TCP/IP Settings Setting Description IPV4 Settings Configuration method: The method by which an IP address is assigned to the printer. You can choose between DHCP, BOOTP, BOOTP+DHCP, or MANUAL. Address: The current IP address of the printer. Netmask: Manually assigned netmask for the printer. Default Router: The IP address of the default router.
Chapter 2 — Connecting and Configuring the Printer Understanding the TCP/IP Settings (continued) Setting Description Name Resolution DNS Server: The IP address of the name server. DNSv6 Server: The IP address of the name server for IPv6. WINS Server (Primary and Secondary): The IP addresses of the primary and secondary WINS servers. If you chose DHCP or BOOTP for the configuration method, you may see the currently assigned WINS IP addresses depending on the configuration of your DHCP server.
Chapter 2 — Connecting and Configuring the Printer Use the following table to understand the Avalanche settings. Understanding the Avalanche Settings Setting Description Enabler Mode Click one of the option buttons: • Disabled: Disables Avalanche. • Manual settings: Enables Avalanche. You need to enter the Agent address and Port in the text fields. • Find agent by broadcast: Enables Avalanche and the network connection broadcasts to find the agent.
Chapter 2 — Connecting and Configuring the Printer Understanding the Wireless LAN Settings (continued) Setting Description Authentication Sets the type of authentication for you use for WEP keys. You can choose between Auto, Open System, and Shared. WPA Sets the Wi-Fi Protected Access (WPA) to either on or off. WPA Pre-shared key Sets the WPA Pre-shared key. WPA2 Sets the Wi-Fi-Protected Access version 2 to either on or off. Roaming setting Sets the roaming reluctancy to 1, 2 or 3.
Chapter 2 — Connecting and Configuring the Printer Use the following table to understand the 802.1x settings. Understanding the 802.1x Settings Setting Description EAP Type Choose the Extensible Authentication Protocol (EAP) type: • TTLS (default) • LEAP • PEAP • EAP-FAST • Off (disables 802.1x security) Inner Authentication Choose the inner authentication method: • PAP (TTLS only) • MSCHAPv2 • EAP/MSCHAPv2 • EAP/MD5 • EAP/GTC Outer Name (TTLS only) Specify the EAP identity passed in the clear.
Chapter 2 — Connecting and Configuring the Printer Understanding the 802.1x Settings (continued) Setting Description Server Common Name #1 Server Common Name #2 (TTLS and PEAP only) Specify common names. If you specify one common name, the server certificate common name must match this name for authentication. If you specify two common names, the server certificate common name must match at least one of them. The default is “” (any common name).
Chapter 2 — Connecting and Configuring the Printer Configuring the Printer Using Commands Sent From Your PC You can change configuration parameters by sending commands directly to the printer using your terminal program (HyperTerminal) and a serial or network connection. If your printer uses the Fingerprint language, you use the SETUP command, followed by the node, subnode, and parameters setting.
Chapter 2 — Connecting and Configuring the Printer Upgrading the Firmware The latest firmware and software is available for download from the Downloads page on the Intermec web site at www.intermec.com. You can upgrade the firmware on your printer using: • PrintSet. You can download PrintSet from the downloads page for the printer on the Intermec web site at www.intermec.com. • a CompactFlash (CF) card or 2GB USB storage device. • an Ethernet or 802.11 network connection.
Chapter 2 — Connecting and Configuring the Printer To upgrade using a serial or USB connection • Use Fingerprint or IPL commands to send the upgrade file to your printer. For help, see the Intermec Fingerprint Command Reference Manual or the IPL Command Reference Manual. To upgrade using an Ethernet or 802.11 network connection 1 Start your web browser application. 2 In the address field, enter the IP address of your printer. 3 Press Enter. The home page of your printer appears.
Chapter 2 — Connecting and Configuring the Printer Downloading Fonts and Graphics The PD41 and PD42 support 15 scalable Unicode TrueType and TrueDoc fonts as standard. The Unicode standard allows the use of special characters for various languages including non-Latin fonts, such as Arabic, Cyrillic, Chinese (including enhanced Simplified Chinese GB18030), Japanese, Korean, and Hebrew. Note: Fingerprint firmware supports the download of any TrueType font.
3 Troubleshooting and Maintaining the Printer Use this chapter to troubleshoot and maintain the printer.
Chapter 3 — Troubleshooting and Maintaining the Printer Troubleshooting the Printer You may have printer operation, print quality, or printer communication problems at some time during the life of the printer. It is easy to fix most of the problems and you will find solutions in “Troubleshooting Printer Problems and Finding Solutions” on page 61. If you cannot find the answer to your problem, you may need to contact Product Support.
Chapter 3 — Troubleshooting and Maintaining the Printer Understanding Error Messages on the PD42 Use the following tables to troubleshoot some common error messages you may see on the PD42 printer display. Some of the error messages are specific to the type of firmware you have loaded on your printer. Possible PD42 Printer Error Icons and Messages Error Message Solution Printhead lifted. Lower printhead. Maintenance. The printer is upgrading its firmware. Wait for it to complete the task.
Chapter 3 — Troubleshooting and Maintaining the Printer Possible PD42 Printer Error Icons and Messages (continued) Error Icon ‘ Error Message Solution IP configuration error. The printer is trying to acquire an IP address from the network. Wait until the printer receives the IP address. Out of media. Load media in printer. For help, see “The printers can enter various states which indicate the current mode of operation.” on page 10. Field out of label.
Chapter 3 — Troubleshooting and Maintaining the Printer Troubleshooting Printer Problems and Finding Solutions Use the following table to troubleshoot common printer problems. Printer Problems and Possible Solutions Problem Possible Solution The Power LED does not light up when the printer is switched on. Check that the power cable is correctly connected to the printer and the electrical outlet. The Error LED turns on after printing.
Chapter 3 — Troubleshooting and Maintaining the Printer Printer Problems and Possible Solutions (continued) Problem Possible Solution When using the cutter, • Make sure the media thickness does not exceed 0.25 mm (9.8 mils). the label is not cut straight. • Make sure the media is loaded correctly and that it runs as close to the center section of the printer as possible. When using the cutter, • Make sure the cutter is installed propoerly.
Chapter 3 — Troubleshooting and Maintaining the Printer Printer Problems and Possible Solutions (continued) Problem Possible Solution The printer is working, • Printing on direct thermal media: Make sure the media is loaded with the heat-sensitive side but nothing is being facing the printhead. printed. • Printing with thermal transfer ribbon: Make sure the ink-side of the ribbon faces the media. For help, see “Loading Thermal Transfer Ribbon” on page 17.
Chapter 3 — Troubleshooting and Maintaining the Printer Troubleshooting Communication Problems You can use Dump mode to verify that the printer is receiving data correctly from the host. Using the Line Analyzer in Fingerprint In Dump mode, the printer runs a Fingerprint program called Line analyzer. The Line Analyzer captures incoming characters on the communication ports and prints them on one or more labels. The easiest way to enter Dump mode is through Test mode or Extended Test mode.
Chapter 3 — Troubleshooting and Maintaining the Printer Using Dump Mode When you enter Dump mode, the printer captures incoming characters on the communications ports and prints them on one or more labels. You can access Dump mode in two different ways with slightly different results: • You can access Dump mode through Test mode or Extended Test mode and you will receive printouts that look exactly like those produced with the Line Analyzer program in Fingerprint.
Chapter 3 — Troubleshooting and Maintaining the Printer 2 Load media and ribbon (if necessary). For help see, “Loading Media” on page 9 and “Loading Thermal Transfer Ribbon” on page 15. 3 Press and hold the Print button. 4 Continue to keep the Print button pressed down and turn on the Power switch. After approximately ten seconds, the printer screen lights up, runs a media setup routine, enters Testmode, and three of the LEDs start to flash one at a time (green, red, and then blue).
Chapter 3 — Troubleshooting and Maintaining the Printer All three LEDs flash rapidly four times to signal that Extended Testmode is active. SELECT MEDIA TEST 4 Release the Print button and lower the printhead. You are now in Extended Testmode and the following screen appears. • Press to cycle through the different options. • Press to select a test function. • Press to exit Extended Testmode. 5 Lower the printhead.
Chapter 3 — Troubleshooting and Maintaining the Printer Understanding the Functions in Extended Testmode Function Description Exit Exit Extended Testmode. Adjusting the Printer Use this section to perform adjustments to help solve problems related to print quality. Preventing Ribbon Wrinkling If you have problems with thermal transfer ribbon getting wrinkled, try adjusting the the ribbon tension or the ribbon shield. To adjust the ribbon tension 1 Push in on the end knob of the ribbon supply hub.
Chapter 3 — Troubleshooting and Maintaining the Printer Test Label A Test Label B 1234567890 1234567890 Low Quality Printouts Caused by Ribbon Wrinkling To adjust the ribbon shield 1 If the label printout matches: • Test Label A, turn screw A clockwise. • Test Label B, turn screw B clockwise. A B 2 Twist the screw a half-turn and perform a new test print.
Chapter 3 — Troubleshooting and Maintaining the Printer 3 Continue adjusting the ribbon shield screws until you achieve good printout quality. Note: Do not exceed two full turns of a ribbon shield screw or the media may not feed smoothly. If this situation happens, turn the screws counterclockwise completely and start over. Clearing Media Jams Common causes of media jams include media not being loaded properly or the printer not being maintained properly. To clear a media jam 1 Turn off the printer.
Chapter 3 — Troubleshooting and Maintaining the Printer • printhead balance. • printhead pressure. • printhead dotline. Adjusting Printhead Balance The printer is adjusted at the factory for full-width media. If you are using media that is less than full-width, Intermec recommends that you adjust the position of the printhead balance boxes so that the printhead is correctly pressured against the media.
Chapter 3 — Troubleshooting and Maintaining the Printer 3 Move the balance boxes: • outward for wider media. • inward for narrower media. Balance box 4 Close the printhead and load the ribbon. 5 Test and readjust the balance boxes if necessary. Adjusting Printhead Pressure The pressure of the thermal printhead against the platen roller is adjusted at the factory.
Chapter 3 — Troubleshooting and Maintaining the Printer To adjust the printhead pressure 1 If you have installed thermal transfer ribbon, remove it. 2 Pull out on the printhead lever and turn it counterclockwise to lift the printhead. 3 Using a slotted screwdriver, turn the screw at the top of the balance boxes: • clockwise to increase pressure. • counterclockwise to decrease pressure. 4 Close the printhead and load the ribbon. 5 Test and readjust the pressure if necessary.
Chapter 3 — Troubleshooting and Maintaining the Printer To adjust the printhead dot line 1 If you have installed thermal transfer ribbon, remove it and close the printhead. 2 Use a slotted screwdriver to turn the two screws at the top of the printhead bracket counterclockwisea single turn. 3 Pull out on the printhead lever and turn it counterclockwise to lift the printhead. 4 Carefully turn both screws, at the front of the printhead, clockwise a quarter of a turn at a time.
Chapter 3 — Troubleshooting and Maintaining the Printer Note: Be sure you make identical adjustments on both screws. If you are unsure, tighten both screws completely by turning them counterclockwise as far as they will go, and then start over. 5 Close the printhead and using the slotted screwdriver to turn the two screws at the top of the printhead bracket clockwise a single turn. 6 If you are using thermal transfer ribbon, load it. 7 Test and readjust if necessary.
Chapter 3 — Troubleshooting and Maintaining the Printer To adjust the label stop sensor position 1 Pull out on the printhead lever and turn it counterclockwise to lift the printhead. 2 Use the sensor lever at the rear side of the print mechanism to move the sensor inward or outward. Sensor lever 3 Check the point of detection from the front with the printhead lifted.
Chapter 3 — Troubleshooting and Maintaining the Printer Point of detection If you are having detection problems, you can test the label stop sensor in Setup mode. The label stop sensor tests can determine whether the sensor is in the right position, if it is blocked by dust or stuck labels, or if it is defective in some way. Setup mode has these two test functions: • LSS Auto: Checks to make sure that the label stop sensor is working properly and can detect gaps, slots, and black marks.
Chapter 3 — Troubleshooting and Maintaining the Printer 4 Make sure that the media runs as close to the center of the printer as the guides will allow. 5 Press Setup ( ). 6 Go to Print Defs > LSS Test > LSS Auto. The cursor will in the center of the screen as shown below. LSS AUTO 7 For gap or slot detection: Lift the printhead and slowly pull out the media in the media feed direction. When the label stop sensor detects a gap or a detection slot, the cursor moves to the right.
Chapter 3 — Troubleshooting and Maintaining the Printer If the cursor does not detect a gap, slot, or black mark, check the following: • Is the label stop sensor laterally aligned with the slots or black marks? • Is the transfer ribbon properly loaded so it does not interfere with the label stop sensor? For help, see “Loading Thermal Transfer Ribbon” on page 17. • Are the label stop sensor guides clean? If not, clean them as described in the next section “Maintaining the Printer.
Chapter 3 — Troubleshooting and Maintaining the Printer Cleaning the Printhead Cleaning the printhead on a regular basis prolongs the life of the printhead and ensures that you maintain high print quality. You should clean the printhead with cleaning cards or a cotton swab moistened with isopropyl alcohol. Ideally, you should clean the printhead every time you load a new supply of thermal transfer ribbon. Isopropyl alcohol is a highly flammable, moderately toxic, and mildly irritating substance.
Chapter 3 — Troubleshooting and Maintaining the Printer Use a soft cloth moistened with isopropyl alcohol to clean the inside of the printer. Isopropyl alcohol is a highly flammable, moderately toxic, and mildly irritating substance.
Chapter 3 — Troubleshooting and Maintaining the Printer 82 PD41 and PD42 Commercial Printer User’s Guide