
User's Manual Part 2
Chapter 2 — Connecting and Configuring the Printer
PD41 and PD42 Commercial Printer User’s Guide 35
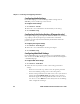
5 If you are using certificates for validation, here are some
commands you may need to use.
• Send the following commands to set a certificate and enable
validation:
setup "8021x","CA_CERT","c:/test.pfx@export"
setup "8021x","VALIDATE","ON"
where c:/test.pfx is the location and name of the certificate and
export is the passphrase.
• Send the following commands to set a common name for
server 1 and server 2:
setup "8021x",".SERVER_CN1","xxxxxxxxxx"
setup "8021x",".SERVER_CN2","xxxxxxxxxx"
where xxxxxxxxxx can be a value from 0 to 64 characters.
• Send the following command to make sure your values match
those used by the access point:
setup write "8021x","uart1:"
• You may need to send the following command several times for
the wireless station to connect:
setup "wlan","ACTIVE","1"<ETX>
Connecting Peripherals to the USB Host Port
You can connect these peripheral devices to the USB host interface
port on the printer:
• USB mass storage device
• Keyboard
• Bar code scanner
• USB hub
Connecting a USB Mass Storage Device to the USB Host Port
You can use a USB mass storage device to store additional fonts and
images for the printer. You can also use the device to upgrade your
firmware. For more information on using the mass storage device to
upgrade the printer, see“Upgrading the Firmware” on page 54.