PB50 User’s Guide Mobile Label and Receipt Printer
Intermec Technologies Corporation Worldwide Headquarters 6001 36th Ave.W. Everett, WA 98203 U.S.A. www.intermec.com The information contained herein is provided solely for the purpose of allowing customers to operate and service Intermec-manufactured equipment and is not to be released, reproduced, or used for any other purpose without written permission of Intermec Technologies Corporation.
Document Change Record This page records changes to this document. The document was originally released as Revision 001. iii Version Number Date Description of Change 002 11/2008 These changes were made for the current release: • Support for the ESC/P programming language. • Addition of a radioless PB50 printer. • Change to the Ready-to-Work indicator behavior. • Addition of linerless media support. • New icons for Bluetooth radio and addition of printhead lifted error message.
PB50 Mobile Label and Receipt Printer User’s Guide iv
Contents Contents Before You Begin. . . . . . . . . . . . . . . . . . . . . . . . . . . . . . . . . . . . . . . . . . . . . . . . . . . . . . . . . . . . . . . . . vii Safety Information . . . . . . . . . . . . . . . . . . . . . . . . . . . . . . . . . . . . . . . . . . . . . . . . . . . . . . . vii Global Services and Support . . . . . . . . . . . . . . . . . . . . . . . . . . . . . . . . . . . . . . . . . . . . . . vii Warranty Information. . . . . . . . . . . . . . . . . . . . . . . . . . . . . . . . .
Contents Changing Configuration Settings From PrintSet . . . . . . . . . . . . . . . . . . . 25 Changing Configuration Settings Using the Command Line . . . . . . . . 25 Changing Configuration Settings From the Printer Home Page . . . . . . 26 Changing Configuration Settings From SmartSystems Console. . . . . . 26 Establishing Communications With a Host . . . . . . . . . . . . . . . . . . . . . . . . . . . . . . . . . . . . . . . . 27 Setting Up Bluetooth Communications. . . . . . . . . . . . . . . . . . .
Before You Begin Before You Begin This section provides you with safety information, technical support information, and sources for additional product information. Safety Information Your safety is extremely important. Read and follow all warnings and cautions in this document before handling and operating Intermec equipment. You can be seriously injured, and equipment and data can be damaged if you do not follow the safety warnings and cautions.
Before You Begin Web Support Visit the Intermec web site at www.intermec.com to download our current manuals (in PDF). To order printed versions of the Intermec manuals, contact your local Intermec representative or distributor. Visit the Intermec technical knowledge base (Knowledge Central) at intermec.custhelp.com to review technical information or to request technical support for your Intermec product. Telephone Support In the U.S.A. and Canada, call 1-800-755-5505. Outside the U.S.A.
Before You Begin Who Should Read This Manual This user’s guide is for the person who is responsible for installing, configuring, and maintaining the PB50 printer. This guide provides you with information about the features of the PB50, and how to install, configure, operate, maintain, and troubleshoot it. Before you work with the PB50, you should be familiar with your network and general networking terms, such as IP address.
Before You Begin x PB50 Mobile Label and Receipt Printer User’s Guide
1 Using the PB50 Mobile Label and Receipt Printer Use this chapter to familiarize yourself with the PB50 and PB50C Mobile Label and Receipt Printers.
Chapter 1 — Using the PB50 Mobile Label and Receipt Printer Learning About the PB50 Printer The PB50 and PB50C are rugged direct thermal label and receipt printers designed for use with the CK31, 700 series, CK61, CN2B, CN3, and CN3e mobile computers as well as the SF51 and SR61 scanners. Throughout this manual, both models of the printer are referred to as PB50 unless the information is specific to one model. The PB50 provides: • print resolution of 203 dpi.
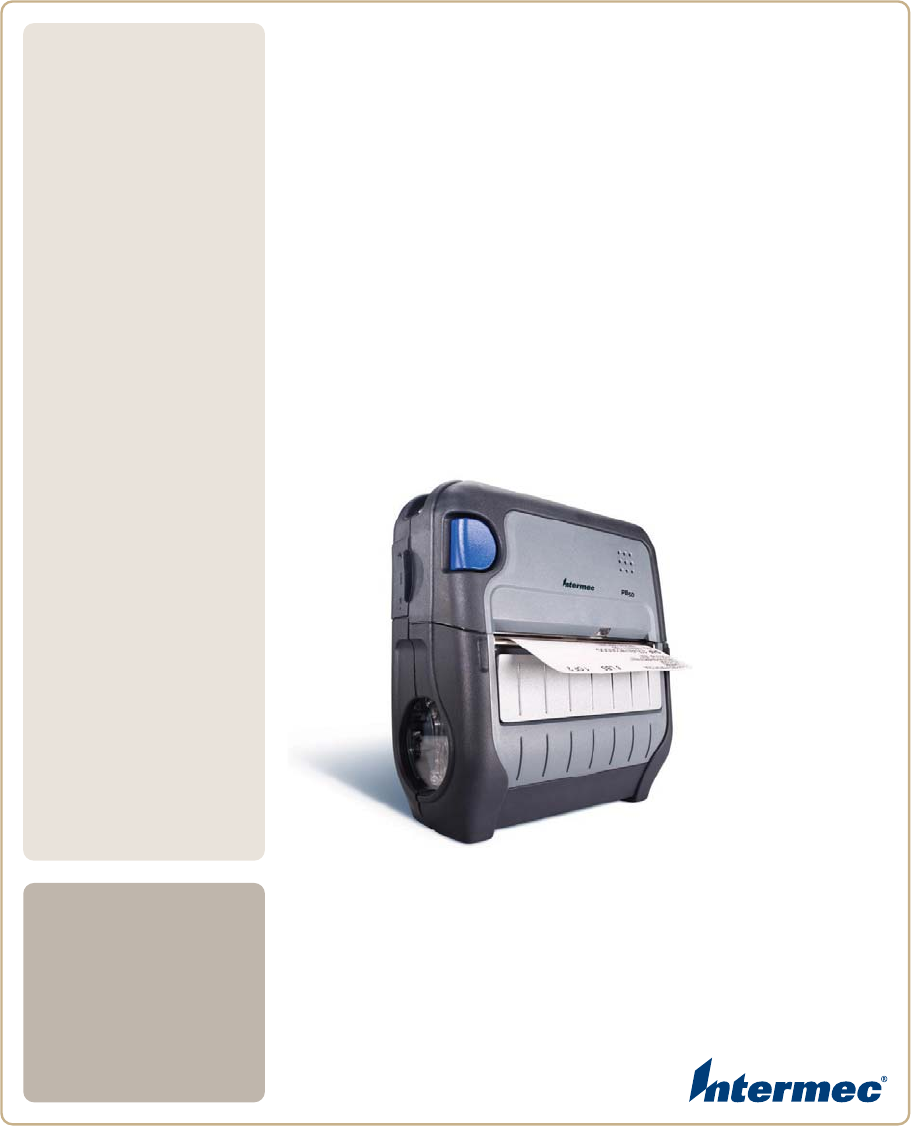
Chapter 1 — Using the PB50 Mobile Label and Receipt Printer Identifying the Parts of the Printer Use this illustrations to familiarize yourself with some of the features of the PB50. Self-strip door Media cover release button Control panel Ready-to-Work indicator Communications port PB50 Printer: This illustration shows the important features of the PB50 printer. A weather-resistant flap protects the communications ports and the external power connector.
Chapter 1 — Using the PB50 Mobile Label and Receipt Printer Understanding the Control Panel The PB50 control panel contains four buttons, a liquid crystal display (LCD), and one LED indicator. Use the four buttons to navigate the menu system and perform functions on the PB50 printer. See the following tables to understand the buttons, the menu system, and what the LED means.
Chapter 1 — Using the PB50 Mobile Label and Receipt Printer Understanding How to Use the PB50 Buttons (continued) Button Name Button Function Standby (Power) Press to put the printer in Standby mode. In Standby mode, power to the radio, the display, and the backlight are turned off. Press to turn the printer back on and put in Ready mode. Info Press to display a summary of error conditions, serial port settings, USB connection status, and wireless information (Bluetooth and WiFi).
Chapter 1 — Using the PB50 Mobile Label and Receipt Printer There is only one LED on the PB50 printer: the Ready-to-Work™ indicator. Understanding the Ready-to-Work Indicator Indicator State Description Off When the light is off, it can mean one of several conditions: • The printer is in Standby mode. • The printer is in Info mode. • The printer is in Setup mode. On The PB50 is powered on and operating. Blinking A blinking light can mean one of several conditions: • The printer is out of paper.
Chapter 1 — Using the PB50 Mobile Label and Receipt Printer Managing Power on the PB50 Use the power options on the PB50 to manage and conserve battery power. From the Power option in Setup menu, you can set Low Battery, Sleep Timer, and Standby Timer. Use the Low Battery option to set the battery voltage at which the low battery warning appears. The values for Low Battery range from 12.1 V to 16.8 V in 0.1 V increments. The default setting is 13.5 V.
Chapter 1 — Using the PB50 Mobile Label and Receipt Printer Using the Batteries The PB50 uses a rechargeable 2200 mAh lithium-ion battery (Model AB13) for power. You must fully charge the battery before you can use the PB50. A fully charged battery can last up to one week without needing to be recharged when the printer is in Standby mode. Use Intermec Model AB13 battery only. Use of another battery may present a risk of fire or explosion.
Chapter 1 — Using the PB50 Mobile Label and Receipt Printer 3 Insert the edge of the battery under the lip of the PB50 and then push down until you hear the battery latch click. Charging the Batteries There are two ways to charge the PB50 battery: • Connect AC power to the printer and charge the battery while it is in the PB50. • Charge the battery in the AC18 4-bay battery charger.
Chapter 1 — Using the PB50 Mobile Label and Receipt Printer Understanding the Battery Icons The easiest way to tell the status of your battery is to look at the battery icons on the control panel of the PB50. Battery Icon Status Icon Status Battery is fully charged. Battery has a medium charge. You should be able to work for several more hours before charging or replacing the battery. Battery is low. You need to replace the battery soon. Battery is critically low. You need to replace the battery now.
Chapter 1 — Using the PB50 Mobile Label and Receipt Printer • Do not operate the PB50 in extremely cold temperatures. Using the PB50 in temperatures below freezing reduces the overall battery life. Remember that any rechargeable battery loses its ability to maintain a charge over time. You can only recharge it a finite number of times before you must replace it. Loading Media You can use roll or fanfold receipt media with the PB50 printer.
Chapter 1 — Using the PB50 Mobile Label and Receipt Printer 2 Press down on the media adjust guide and slide the two media supports apart. 3 Insert a roll of media and press the media adjust guide until the roll is held firmly in place. Make sure you load the media clockwise so that it pulls off the core from the bottom of the printer. 4 Pull out approximately 8 cm (3 inches) of the media.
Chapter 1 — Using the PB50 Mobile Label and Receipt Printer 5 Close the media cover until it latches. The printer emits the hardware sound to tell you that the media door closed correctly. 6 Press down on the self-strip door to make sure the media cover is completely latched. Note: The linerless printer does not have a self-strip door. Instead, the self-strip door is molded plastic and part of the media cover. 7 Press and hold the Feed button for more than two seconds to calibrate the media.
Chapter 1 — Using the PB50 Mobile Label and Receipt Printer To load media for self-strip printing 1 Complete Steps 1 through 4 in the previous procedure. 2 Open the self-strip door in the media cover. Self-strip door Self-strip bar 3 Remove a label from the roll of media so that you are left with several inches of label liner. 4 Feed the label liner over the self-strip bar and out the back of the self-strip door.
Chapter 1 — Using the PB50 Mobile Label and Receipt Printer 7 Press and hold the Feed button for more than two seconds to calibrate the media. Printing a Testprint After you have loaded media in the printer, you are ready to print a testprint. You can choose from several testprint options for each type of firmware. If you cannot get the testprint information to print, see “Troubleshooting the PB50” on page 42. To print a testprint with a PB50 loaded with IPL firmware 1 Press the Setup button.
Chapter 1 — Using the PB50 Mobile Label and Receipt Printer 16 PB50 Mobile Label and Receipt Printer User’s Guide
2 Configuring the PB50 In this chapter you will find these sections: • Configuring the PB50 • Establishing Communications With a Host • Upgrading the Firmware • Downloading Fonts and Graphics 17
Chapter 2 — Configuring the PB50 Configuring the PB50 You can change the configuration settings of the PB50 printer directly from the display, by sending commands from your PC, by using the web pages, or remotely from the SmartSystems console. For more information on the IPL and Fingerprint menu systems, see“IPL and Fingerprint Setup Menus” on page 57.
Chapter 2 — Configuring the PB50 To enter Information mode • Press the Information button on the control panel. Understanding Pause Mode Use Pause mode to momentarily stop printing or to cancel a current print job. Once you pause the printer, the Pause mode screen appears. Use the Feed button to both pause and resume printing. PAUSE X The PB50 in Pause Mode To enter Pause mode • Press the Feed button while the printer is printing. To resume printing • Press the Feed button (or soft key).
Chapter 2 — Configuring the PB50 Once you enter Setup mode, there are two editing modes: normal and enhanced. Editing Settings in Setup Mode Editing Mode To Navigate To Accept Value Normal • Press Press . Enhanced • Press to move within Press the editable fields. When the field blinks, you can edit it. • Press to increase the value of the field. . to move among choices. • Press to go up a level in menu system.
Chapter 2 — Configuring the PB50 PAPER FAULT Sample Error Mode Screen If you encounter an error message, see “Understanding Error Messages” on page 42 for information on how to fix the problem. Understanding Test Mode Use Test mode to verify printer settings, print test labels, restore factory default settings, or enter Dump mode for troubleshooting purposes. Two test modes are available: Test mode and Extended Test mode.
Chapter 2 — Configuring the PB50 Using Extended Test Mode Use Extended Test mode to run additional diagnostic tests, including printing specific test labels, entering Dump mode, and resetting to factory defaults. TEST LABELS CHESS Sample Extended Test Mode Screen To enter Extended Test mode 1 Make sure that the printer is loaded with media. 2 Press the media cover release button to open the media cover. 3 Press the Standby button to turn the printer off.
Chapter 2 — Configuring the PB50 Options in Extended Test Mode (continued) Function Description Dump Mode This options enters Dump mode. For more information on Dump mode, see “Troubleshooting Communication Problems” on page 46. Factory Default This option restores the factory default settings. Press to select this option and then follow the instructions on the screen. Setup and Exit This option exits Extended Test mode and puts the printer in Setup mode. Exit This option exits Extended Test mode.
Chapter 2 — Configuring the PB50 Note: If you have a Bluetooth or radioless printer, you will not see the NETWORK setup menu in Fingerprint or IPL.
Chapter 2 — Configuring the PB50 Changing Configuration Settings From PrintSet PrintSet Version 4.2 (or higher) is a printer configuration tool that you can download from the Intermec web site. PrintSet can communicate with your printer through a serial cable or a network connection. It works on all PCs running Windows 98 (or later). PrintSet allows you to easily change all of the setup parameters. It also includes setup wizards to guide you through some common configuration tasks.
Chapter 2 — Configuring the PB50 Changing Configuration Settings From the Printer Home Page If you have an 802.11 radio in your PB50 printer and it is connected to the network, you can use your web browser to open the printer home page and make configuration changes. To connect to a wireless network, follow the procedure in “Setting Up 802.11 Radio Communications” on page 28. The PB50 Printer Home Page To make changes to the configuration • From the home page, click Configuration.
Chapter 2 — Configuring the PB50 Establishing Communications With a Host The PB50 must establish communications with a host that will send the data for the printer to print. The PB50 provides four ways to communicate with a host: • Bluetooth radio communications • 802.
Chapter 2 — Configuring the PB50 To set up Bluetooth communications with a mobile computer • Follow the procedure to discover and connect to Bluetooth devices in your mobile computer user’s manual. Note: For maximum security, you need to configure a Bluetooth passcode for the PB50C. The default passcode for the PB50C is “1234.” To set up Bluetooth communications with a scanner 1 Download and install EasySet.
Chapter 2 — Configuring the PB50 The PB50 supports these authentication modes: none, WEP, WPA Personal and Enterprise mode (802.1x authentication), WPA2 Personal and Enterprise mode (802.1x authentication). Note: WPA and WPA2 Enterprise mode currently support PEAP, TTLS, and LEAP. For LEAP authentication, the PB50 supports Open EAP, but does not support Network EAP.
Chapter 2 — Configuring the PB50 4 From the host PC, check the wireless settings.
Chapter 2 — Configuring the PB50 Understanding the 802.11 Radio Icons (continued) Icon Description Weak signal Poor signal No signal Use the following sections to set most of your wireless communication settings. For help with additional commands and information, see either the Fingerprint Command Reference Manual (P/N 937-005-xxx) or the IPL Command Reference Manual (P/N 937-007-xxx). You can download both documents from the Intermec web site at www.intermec.com.
Chapter 2 — Configuring the PB50 To configure the printer to use WPA-PSK or WPA2-PSK mode 1 Send the following commands to login as an admin and set the SSID: .x,su -p pass admin ws,SSID,xxxxx where xxxxx can be from 0 to 32 alphanumeric characters. 2 Send one of the following commands to turn on WPA or WPA2 authentication.
Chapter 2 — Configuring the PB50 where xxxx is the unique username and the unique password for this protocol. 4 If you are using TTLS, you may need to send this command to set the TTLS outer name: ws,TTLS_USER, xxxx where xxxx is the outer name. 5 If you are using certificates for validation, here are some commands you may need to use. • Send the following commands to set a certificate and enable validation: ws,CA_CERT,c:/testCA.
Chapter 2 — Configuring the PB50 To configure the printer to use WEP authentication 1 Send the following commands to login as an admin and set the SSID: run"su -p pass admin" setup write "wlan","uart1:" setup "wlan","SSID","xxxxx" where xxxxx can be from 0 to 32 ASCII characters, not including the double quote. Note: The default password for logging in as an admin is “pass.” If you have changed the password, you will need to use your password instead of “pass.
Chapter 2 — Configuring the PB50 run"su-p pass admin" setup write "wlan","uart1:" setup "wlan","SSID","xxxxx" where xxxxx can be from 0 to 32 alphanumeric characters. 2 Send one of the following WPA/WPA2 ON commands to set up WPA-802.1x or WPA2-802.1x authentication. You should also send the WPA_PSK command that does not contain a value: setup setup setup setup • "wlan","WPA","ON" "wlan","WPA2","ON" "wlan","WPA_PSK","" write "wlan","uart1:" To view the 802.
Chapter 2 — Configuring the PB50 where xxxxxxxxxx can be a value from 0 to 64 characters.
Chapter 2 — Configuring the PB50 To connect the PB50 to a PC or mobile computer 1 Connect the 8-pin circular DIN connector to the serial port on the PB50. 2 Connect the other end of the serial cable to a serial port on the back of your PC or to a serial adapter on your mobile computer. Serial cable Serial port Upgrading the Firmware The latest firmware and software is always available for download from the Intermec web site at www.intermec.com.
Chapter 2 — Configuring the PB50 You have options for upgrading the firmware based on whether your PB50 has a Bluetooth radio, an 802.11 b/g radio, or no radio. Use one of the following procedures to upgrade your printer firmware. Your printer should reboot after you finish upgrading the firmware. If it does not reboot, you will need to cold boot the printer. For help, see “Cold Booting the PB50” on page 48.
Chapter 2 — Configuring the PB50 Downloading Fonts and Graphics The easiest way to download fonts and graphics is to use the free Intermec printer application called PrintSet. You can download PrintSet from the downloads page for the PB50 printer on the Intermec web site at www.intermec.com. Follow the procedures in the PrintSet online help to download fonts and graphics. You can also use Fingerprint, IPL, or ESC/P commands to send fonts and graphics to the printer.
Chapter 2 — Configuring the PB50 40 PB50 Mobile Label and Receipt Printer User’s Guide
3 Troubleshooting and Maintaining the PB50 Use this chapter to solve problems you may encounter while using the PB50. You will also find information on booting the printer and routine maintenance.
Chapter 3 — Troubleshooting and Maintaining the PB50 Troubleshooting the PB50 You may have printer operation, print quality, or printer communication problems at some time during the life of the PB50 printer. It is easy to fix most of the problems and you will find solutions in “Troubleshooting Printer Problems and Finding Solutions” on page 44. If you cannot find the answer to your problem, you may need to contact Product Support.
Chapter 3 — Troubleshooting and Maintaining the PB50 Possible PB50 Error Icons and Messages Error Icon Error Message Description Pause The print job is paused. Paper out (IPL) Out of Paper (Fingerprint) The printer is out of paper. Load a new roll of media. For help, see “Loading Media” on page 11. Testfeed not done The printer did not perform a testfeed before it printed out test labels. It is important to perform a testfeed because it calibrates the sensor.
Chapter 3 — Troubleshooting and Maintaining the PB50 Possible PB50 Error Icons and Messages (continued) Error Icon Error Message Description Field out of label You are attempting to print in an area that extends beyond the print window. See the command reference manual for your type of firmware (IPL, Fingerprint, or ESC/P) for information on how to set the media parameters. Printhead lifted The printer is not completely closed. Press down on the media cover to make sure it is latched.
Chapter 3 — Troubleshooting and Maintaining the PB50 Printer Problems and Solutions (continued) Problem Possible Solution The printer is not • Verify that the wireless settings are correct. For printing with an 802.11 help, see “Setting Up 802.11 Radio wireless connection. Communications” on page 28. • Make sure the printer has an IP address. • Make sure the printer is connected to the network. • Make sure the printer is in Ready mode. The printer is not printing with a Bluetooth connection.
Chapter 3 — Troubleshooting and Maintaining the PB50 Printer Problems and Solutions (continued) Problem Possible Solution The test pages do not print. • Make sure that the blue light is not blinking. If Print quality is poor. • Clean the printhead. For help, see “Cleaning it is, make sure your printer has media and that the media cover is closed. • Make sure that you can advance media by pressing the Feed button. the Printer” on page 48. • Check the battery and recharge or replace as necessary.
Chapter 3 — Troubleshooting and Maintaining the PB50 Printable characters are printed in black-on-white. Control characters and space characters (ASCII 000 to 032 dec) are printed in white-onblack. As long as a continuous string of characters is being received, the program wraps the lines until the label is full and then starts to print another label.
Chapter 3 — Troubleshooting and Maintaining the PB50 Cold Booting the PB50 You rarely need to cold boot the PB50 printer, unless you are upgrading the firmware. If your printer occasionally locks up, you will want to cold boot it. A cold boot reinitializes the 802.11 radio and clears the working memory. Note: The Setup menu is not affected by a cold boot. Your printer retains all of your configuration settings after the printer powers back up.
Chapter 3 — Troubleshooting and Maintaining the PB50 Tear bar Label taken sensor Paper sensor Printhead Platen roller Label gap sensor Parts of the PB50 to Clean Regularly Cleaning the PB50 Printer Printer Part Cleaning Method Cleaning Interval Printhead Use 70% isopropyl alcohol on a cotton swab to clean the print elements from end to end. After every five rolls of media or more often if necessary.
Chapter 3 — Troubleshooting and Maintaining the PB50 50 PB50 Mobile Label and Receipt Printer User’s Guide
A Specifications 51
Chapter A — Specifications Specifications Physical Dimensions Depth: 78.7 mm (3.1 in) Height: 174.5 mm (6.9 in) Width: 159.5 mm (6.3 in) Weight: 1190 g (2 lb) with battery Power Specifications AC power adapter voltage: 100 to 240V Printer voltage: 100V to 240V and 50 Hz to 60 Hz Operating power: Rechargeable 16.
Chapter A — Specifications Media Specifications Core inside diameter, standard: 19 mm (0.75in) Core inside diameter, with adapter: 10.2 mm (0.4 in) Maximum roll outside diameter: 67.3 mm (2.65 in) Media width, label with liner/receipt: 49mm (1.9 in) to 111.5 mm (4.4 in) Media length, label: 25.4 mm (1.0 in) to 609.6 mm (24 in) Media length, receipt: Continuous Media caliper, label with liner/receipt: 0.05 mm (0.002 in) to 0.165 mm (0.0065 in) Media caliper, tag (maximum): 0.15 mm (0.
Chapter A — Specifications External Fanfold Media Specifications Stack height: 70 mm (2.75 in) Page length: 152 mm (6 in) to 305 mm (12 in) Note: A 6-inch page length is supplied in 12-inch long stacks (two 6inch stacks of equal height with the bottom page linked). Specialty media is required for unique customer environments, including printer operating temperature extremes. Media performance is format and environment dependent. Not all media will work in all customer applications.
Chapter A — Specifications Recommended Media Sensitivity, Constant, Factor, and Print Speed (continued) Sensitivity Constant Factor Description Max Print Speed North American Label Media (continued) 103 110 45 Direct Thermal Linerless Dependent on format and environment North America Receipt Media 401 45 40 Duratherm TC 2 ips 102 32 40 Duratherm NTC - 2 2 ips 101 30 40 Duratherm NTC 2 ips European Label Media 440 47 30 Thermal Eco 2 ips 140 70 40 Thermal Top 4 ips Accesso
Chapter A — Specifications Cart Dock Use the cart dock to easily attach the PB50 to a movable cart or a flat surface. Forklift Power Supply Kit Use the forklift power supply kit to connect the PB50 and vehicle cradle to a truck or forklift. Handstrap Use the PB42 and PB50 handstrap to conveniently carry your PB50 printer. With the handstrap attached, you can also attach the shoulder strap. Power Supply (Model AE19) Provides power to the PB50 and the 4-bay battery charger (Model AC18).
B IPL and Fingerprint Setup Menus 57
Chapter B — IPL and Fingerprint Setup Menus IPL Setup Menu SETUP SER-COM BAUDRATE DATA BITS PARITY STOPBITS IP ADDRESS NETMASK DEFAULT ROUTER DATA DUMP MEMORY RESET LSS TEST LBL LENGTH DOTS LBL WIDTH DOTS PROTOCOL NETWORK IP SELECTION NAMESERVER MAC ADDRESS SENSITIVITY DARKNESS TEST/SERVICE TESTPRINT CONFIG TEST LABELS FORMAT PAGE UDC FONT MEDIA TESTFEED MODE MEDIA TYPE LBL REST POINT FORM ADJ DOTS X FORM ADJ DOTS Y CONFIGURATION PWRUP EMULATION PRINT SPEED LTS CALIBRA
Chapter B — IPL and Fingerprint Setup Menus Fingerprint Setup Menu SETUP SER-COM,UART1 CHAR LENGTH BAUDRATE PARITY STOPBITS FLOWCONTROL NEW LINE REC BUF TRANS BUF RTS/CTS NET-COM NET 1 ENQ/ACK NEW LINE XON/XOFF DATA TO HOST DATA FROM HOST NETWORK IP SELECTION IP ADDRESS DEFAULT ROUTER NETMASK NAMESERVER MAC ADDRESS FEEDADJ STARTADJ STOPADJ MEDIA MEDIA SIZE XSTART WIDTH LENGTH MEDIA TYPE PAPER TYPE LABELS (w GAPS) DIRECT THERMAL TICKET (w MARK) CONTRAST TESTFEED TESTFEED M
Chapter B — IPL and Fingerprint Setup Menus 60 PB50 Mobile Label and Receipt Printer User’s Guide
Worldwide Headquarters 6001 36th Avenue West Everett, Washington 98203 U.S.A. tel 425.348.2600 fax 425.355.9551 www.intermec.com © 2008 Intermec Technologies Corporation. All rights reserved.