
Use and Care Manual

Turn new furniture into heirlooms by creating a vintage, timeworn look. Antiquing is
accomplished as follows: After applying your base color and letting it dry, sand the areas
you want antiqued with a random orbital sander, following with 100 grit sandpaper by
hand to enhance certain areas along the edges, around doorknobs, etc. The look you are
trying to obtain is a slightly distressed piece, so don't hold the sander in one spot too
long. DO NOT sand corners or moldings with a power sander - these areas should be
done by hand. Do one side at a time. After you have finished a section, wipe it down with
a slightly damp cloth to remove dust and reveal either the bare wood or under coat of
finish beneath, creating the look of slightly worn areas. After you have sanded all
surfaces inside and out with power sander (using either a #220 gray foam sanding pad or
#400 grit sandpaper), you are ready to hand sand the edges, corners, and door. You will want to be thinking about
where extra wear would be from using the doorknobs, etc. You will notice as you go along that different pressures will
bring out more of the undercoat. The doors of furniture get the most wear, so open and close the door and take notice
of where your hands are. Imagine over time how much the areas are used and touched. This should help you decide
what areas need to be more distressed. Be careful not to sand too hard after you have wiped a section with the damp
cloth. When the furniture is sanded while damp, too much paint will come off. It's important to gradually sand all
areas.
Follow with Glazing if desired. The trick is to really slather it on (and we mean slather), keeping the surface wet as
you apply the glaze. Then just wipe off the excess until you achieve the look you want. You could use an earth-tone
glaze such as Van Dyke Brown applied to the sanded areas and moldings of a piece of furniture to create a
discolored and aged look. Or you can use glazes to create soft layers of colors. Make the layers of color as intense
as you want.
Finish with 3 coats of Waterbase PolyAcrylic following instructions in brochure.
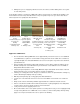
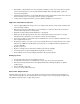
Distressing with Milk Paints and Glaze Effects
Apply Glaze Effects over Milk Paints or any of the other water based products to achieve a distressed
look. Choose furniture with some character such as raised panel doors or decorative molding - most pine
pieces will work well. This is an excellent kitchen cabinet finish as well.
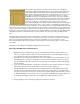
Begin with two coats of Milk Paint painted on for a base coat. Let dry for 2-4 hours and buff between coats
with #400 grit paper or a super fine sanding pad. You have the option of painting a second color over the
first, and sanding through to allow the first color to show through (color washing), or simply sanding though
to the wood below.
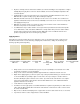
Using coarse #100-#120 grit paper, sand all edges of raised panels, doors, drawers and corners of cabinet
all the way through to bare wood. Sand heavily if you want a more rustic looking piece.
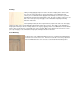
Liberally apply Glaze Effects (really get the surface wet) with foam brush or Handipainter pad over entire
area. Wipe off excess with a lint free cloth to achieve desired look. The glaze will color your sanded areas
and give the painted sections an aged look. Let dry 2-4 hours. Apply PolyAcrylic, High Performance topcoats
for additional durability or increased sheen. (For more design ideas using Milk Paints and Glaze Effects, Use
the feather again to lightly accentuate the veins using Black Wood Stain. Allow this to dry 2 hrs.
Finish by applying 3 coats of Polyacrylic, sanding as instructed in the brochure.