Cordless Air Compressor Operator's Manual WARNING: Read carefully and understand all INSTRUCTIONS before operating. Failure to follow the safety rules and other basic safety precautions may result in serious personal injury. Save these instructions in a safe place and on hand so that they can be read when required. Keep these instructions to assist in future servicing.
AIR COMPRESSOR SAFETY WARNINGS For your own safety, always follow these basic precautions when using this appliance. 1. Read the user Manual carefully for operating instructions. Read all instructions in this manual before use. 2. DO NOT use attachments other than those available from the manufacturer. 3. DO NOT alter this product in any manner; doing so is dangerous and will void all warranties. 4. DO NOT operate under the influence of drugs or alcohol. 5.
19. Risk of Bursting. Do not adjust the regulator output pressure greater than he marked maximum pressure of attachment accessory. Do not use at a pressure greater than 135 psi. 20. Inspect tanks yearly for rust or other imperfections that could cause them to become unsafe. Never weld or drill holes in the air tanks. 21. Use the air compressor only for its intended use. Do not alter or modify the unit from the original design or function. 22.
General Specification Battery Flow Rate Tank Capacity Motor Power Battery Socket Sound Level Charger Li-lon 48V 2Ah 2.0CFM@90PSI 2Gal 0.7hp 2 65dB Input 110V~240V 50/60Hz Output 50.4V 1A READY FOR OPERATION To Charge the Battery for First Use 1. Connect the charger to a standard 110 - 240volt outlet; a red light should appear on the charger. NOTE: Always connect the charger to a standard 110 - 240volt outlet before connecting the battery. 2.
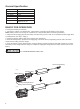
Installation and Removal of the Battery 1. Completely insert the battery into the powerhead along with the card slot until the battery button bounces up. (See Fig. 3 & Fig. 4) Note: Second battery can be installed if necessary. Battery Button Fig3 Fig4 2. To remove the battery, press the battery button with the thumb, grab other sides of the battery with other four fingers, and then pull the battery out.
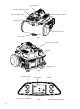
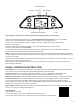
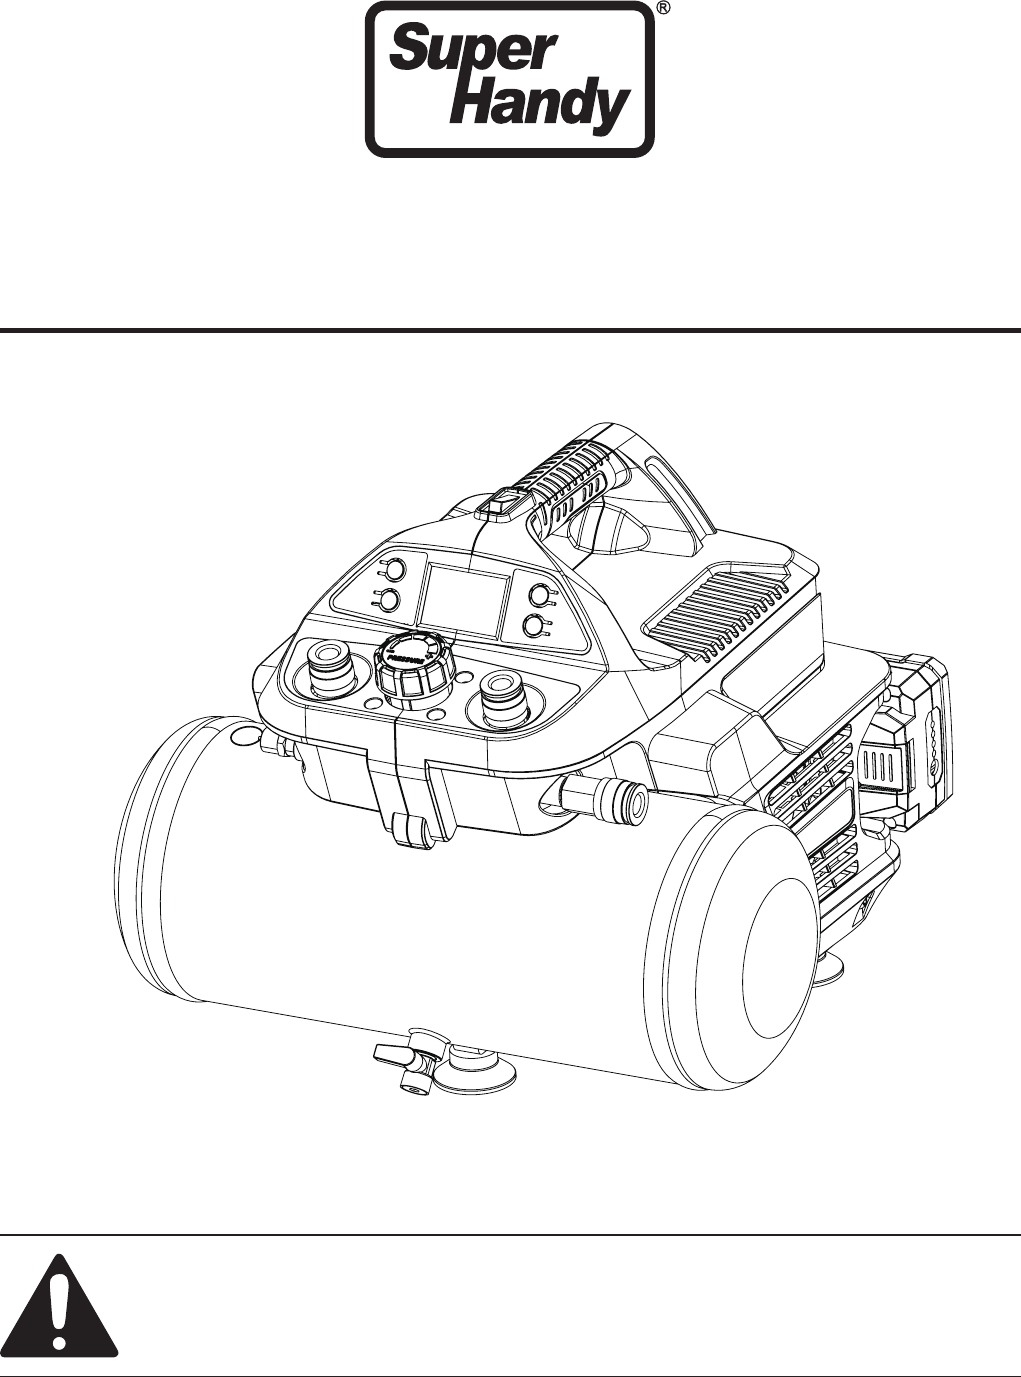
Power switch Pressure adjustment knob Pressure gauge (input) Pressure gauge (Output) Safety valve Quick Connector Drain valve Fig5 Battery switch button Muffler Battery pack Fig6 Pressure Setting LCD Display On/Off INPUT OUTPUT High/Low Speed Switch 3 Fig7 Wifi & Network Connection
Pressure Display Pressure Setting WIFI Display INPUT OUTPUT High/Low Speed Display Fig8 Ensure that the switch is in the OFF position and the battery packs are not installed Attach air hose following the instructions in Connecting/Disconnecting Air Hose (hose not provided). Attach 1/4 in. NPT quick-connect air fitting to the accessory or tool you intend to use. Insert the other end of the quick-connect air fitting to the quick coupler on the open end of the hose. Install the battery packs.
REGISTER If you don’t have an App account, please register an account first. 1. Tap to enter registration page, select your country code. Enter the mobile number and tap “Obtain verification code”. 2. Then enter the verification code from the message, and enter the password, tap “Confirm” to finish your registration. ADD DEVICE 1. Enter the App, tap “Add Device” or “+”, then select “Others”. Others(Wi-Fi). 2.
Air Compressor Control Panel 5. Device Control Screen: You are now ready to use your product. NOTE:Always use the minimum amount of pressure necessary for your application. Using higher pressure than needed will drain air from the tank more rapidly, cause the unit to cycle on more frequently, and reduce battery run time between charges. Following all safety precautions in this manual and the manufacturer’s instructions in the air tool manual, you may now proceed to use your air-powered tool.
DRAINING THE TANK To help prevent tank corrosion and keep moisture out of the air used, the air tank of the compressor should be drained daily. To drain:Turn the air compressor off and remove the battery packs. Turn the drain valves 90° counterclockwise to the ON(open) position. Tilt tank to drain moisture from the tank into a suitable container. MAINTENANCE AND STORAGE Place the Auto On/Off switch in the off position. Remove battery packs. Disconnect the air hose and air tool from the product.
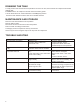
PARTLIST 1 3 2 Part No. 1 2 3 Description Air compressor Battery pack 48V 2Ah Muffler QTY 1pc 1pc 1pc Assembly Assembly Assembly North America Contact Infomation UK&EU Contact Infomation Great Circle USA Support Line: 1-866-493-0524 help@greatcircleus.com www.greatcircleus.com Great Circle USA Service@greatcircleus.com www.greatcircleus.com Size: 210x285mm 157克双铜 REV 05/25/21 2.09.05.01.
FCC Warning This device complies with part 15 of the FCC rules. Operation is subject to the following two conditions: (1) this device may not cause harmful interference, and (2) this device must accept any inte rference received, including interference that may cause undesired operation. Changes or modifications not expressly approved by the party responsible for compliance could void the user's authority to operate the equipment.