
Manual


Table Of Contents
- Package Contents
- System Requirements
- Overview
- Rack Mounting
- Grounding
- Open/Close Console
- Installation
- Connect to a KVM
- External Console Ports (Optional)
- USB External Mouse Port (Optional)
- LCD Configuration
- LCD Adjustment Setting
- Reset Button
- Keyboard Function Keys
- Hotkey Commands
- Mac Keyboard Emulation
- Sun Keyboard Emulation
- Firmware Upgrade
- Upgrade Fail
- Safety Instructions
- Specifications
- Federal Communications Commission (FCC) Statement
- CE Statement
- SJ/T 11364-2006
- Limited Warranty
- Contact
Final Step
After the rear brackets are
completely secured, tighten
the front brackets’ screws.
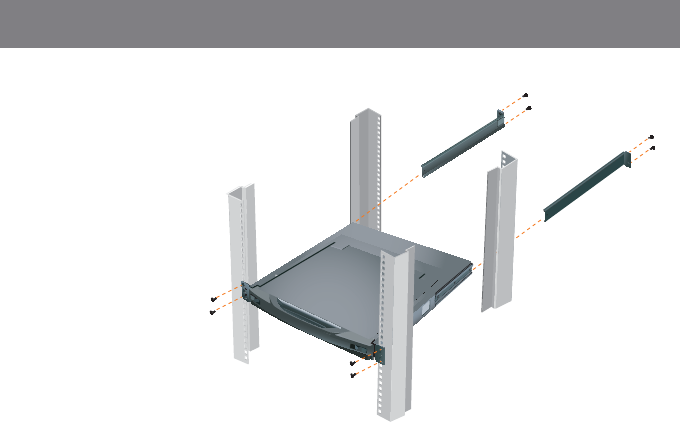
Step 2
While the person continue holding the position of
the LCD Console, the second person can slide the
L brackets from the back of the rack into the Slide
Mounting Brackets. Then, you can lock the screws
through the rear bracket onto the back of the rack.
10
11
M4 x 6 Phillips
Head Screws