
User`s manual


Installing Your ScreenPlay Pro HD 3
Connecting Directly to a Computer
Follow the instructions in this section to load media files from your computer to the
ScreenPlay Pro HD before you connect it to your TV.
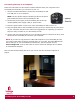
1. Use the included USB cable to connect the ScreenPlay Pro HD
to a USB port on your computer.
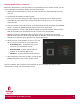
HINT: Use the square USB port located just above the power
jack towards the base of the ScreenPlay Pro HD.
2. Connect the power supply to the ScreenPlay Pro HD and an
uninterruptible power supply (UPS) or power outlet.
3. Press the power button on the front of the ScreenPlay Pro HD to turn it on.
4. Copy and paste files to the ScreenPlay Pro HD just as you would with any other drive
on your computer. See the user’s manual for suggestions on organizing your files so
they’ll be easy to locate on your ScreenPlay Pro HD.
5. Use the safe removal procedure for your operating system to unmount the drive, then
disconnect the ScreenPlay Pro HD from your computer.
NOTE: If you want to copy files from a Mac OS computer to your ScreenPlay Pro HD,
you need to reformat it to FAT32. Use Disk Utility on your Mac, and select MS-DOS as
the format type. If you need additional instructions, visit the support area on
www.iomega.com. Look for the article on how to format an Iomega drive to FAT32
on a Macintosh computer.
Next connect the ScreenPlay Pro HD to your TV set. See the connection options on
page 6.