
User`s manual


Installing Your ScreenPlay Pro HD 5
Wireless Network Connection
If you have a wireless network, you can use a supported WiFi adapter to connect the
ScreenPlay Pro HD.
NOTE: The package does not include a WiFi adapter. See the support area on
www.iomega.com for a list of supported wireless adapters.
Follow the instructions below to set up the wireless connection for your ScreenPlay
Pro HD.
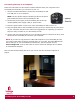
1. Connect the WiFi adapter to the USB host port on the back of
the ScreenPlay Pro HD drive.
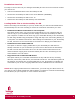
2. If you haven’t already done so, connect the ScreenPlay Pro HD
to your TV set. See the connection options on page 6.
3. Connect the power supply to the ScreenPlay Pro HD and an
uninterruptible power supply (UPS) or power outlet.
4. Press the Standby/Power button on the front of the ScreenPlay Pro HD to turn it on,
or press the STANDBY key on the ScreenPlay Pro HD remote control.
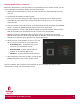
5. From the main ScreenPlay menu, select
Setup and press the ENTER key on the
ScreenPlay Pro HD remote control.
6. Select
Network and press the ENTER key.
7. Select Wireless Setup and press the ENTER key.
8. Select Modify and press the ENTER key.
9. Select your network from the list of available wireless networks and press the
ENTER key.
NOTE: If you need to enter a username and password to login to a network volume,
use the virtual keyboard on the ScreenPlay Pro HD TV display. The password can use
any combination of numbers and letters (lower case or caps). It can also use periods.
It cannot use extended punctuation characters (such as !, @, #, $, %, &, etc.)
10. When the configuration is complete, the ScreenPlay Pro HD will automatically connect
to the wireless network. If it connects successfully, you will see a message indicating
“Test complete”, and the Nework Setup menu will display showing the IP address used
by the ScreenPlay Pro HD.
11. Press the
HOME key to return to the ScreenPlay Pro HD main menu.
Now you’re ready to enjoy media files on your TV! See the instructions on page 7.