
User`s manual


Installing Your ScreenPlay Pro HD 7
Playing Media Files on Your TV
Before the ScreenPlay Pro HD will respond to commands from the remote control, it must
first be activated for playback. Follow the instructions below.
1. Make sure the ScreenPlay Pro HD is correctly connected to video and audio input on
your TV.
2. Connect the ScreenPlay Pro HD to power.
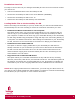
3. Turn on your TV and change the input setting as needed to receive input from the
ScreenPlay Pro HD. Refer to the manual that came with the TV if you are uncertain
how to do this.
4. Point the remote control at the front of the ScreenPlay Pro HD and press the STANDBY
button, or press the Standby/Power button on the front of the drive.
5. During activation, the blue LED will blink brightly for several seconds. When the blue
LED glows steadily, the ScreenPlay Pro HD is ready to use for playback.
NOTE: Pressing the STANDBY button again will return the ScreenPlay Pro HD to
Standby mode and turn off the blue LED. While in Standby mode, the ScreenPlay Pro
HD will not respond to other navigation or command buttons.
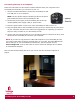
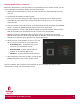
6. When the main menu displays on the TV, you can
select a source to browse for your media files.
•
ScreenPlay Pro – browse for files you’ve
copied to your ScreenPlay Pro HD
•
External USB – browse folders and files
located on an external USB device
• Network – browse shared network volumes
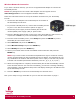
7. After navigating to the file you want, just press the
ENTER (Play/Pause) key on the remote control.
See the complete user’s manual on the Solution CD or the Iomega web site for more
information on using your ScreenPlay Pro HD!