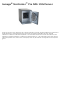
Iomega® StorCenter™ Pro NAS 150d Server Iomega, the stylized "i" logo, StorCenter, and all Iomega brand blocks are either registered trademarks or trademarks of Iomega Corporation in the United States and/or other countries. Microsoft and Windows are either registered trademarks or trademarks of Microsoft Corporation in the United States and/or other countries. Mac, Macintosh, and AppleTalk are registered trademarks or trademarks of Apple Computer Inc. in the United States and/or other countries.
Safety Information Observe the following guidelines when performing any work on your Iomega ® StorCenter™ Pro: 1. Follow all instructions marked on the Iomega StorCenter Pro and in the documentation. 2. Use only the power supply cable provided with the Iomega StorCenter Pro. Always use the appropriate power supply cable for your country. 3. Unplug the Iomega StorCenter Pro from the Uninterruptible Power Supply (UPS) before cleaning. Do not use liquid or aerosol cleaners. Use a damp cloth for cleaning. 4.
About the Iomega® StorCenter™ Pro NAS 150d Server Key Features Key Benefits Ports and Indicators Default Settings Key Features Network sharing Ethernet connectivity (10/100/1000Base-TX) Built-in USB printer sharing No server or host required Active Directory Services (ADS) Support Array support: JBOD, RAID 0, RAID 0+1, RAID 5 Supports mixed networks (Windows, Mac OS, and Linux/UNIX systems) Supports SMB/CIFS (Windows), AFP (AppleTalk), NFS (UNIX/Linux), and FTP protocols.
1. Drive Access Door—The door can be locked to protect the disks from accidental removal. 2. Status Indicator—Displays the current operational status of the StorCenter Pro Server. Off: StorCenter Pro is not running. Solid red: StorCenter Pro not ready (powering up or firmware flashing) Flashing red: StorCenter Pro not ready, busy (formatting drive, resetting to default settings, repairing drive, or powering down) Solid green: Iomega StorCenter Pro Server is running.
. Drive Bays—The StorCenter Pro Server has four user-serviceable drive bays. See Using the Iomega StorCenter Pro 150d RAID for more information on replacing hard drives. Rear Panel 1. High Speed USB 2.0 Connectors—Supports devices such as USB storage devices and printers.
USB storage devices with other systems on your network. 2. Ethernet Connector—(10/100/1000Base-TX). Automatically detects your network speed. 3. AC Power—Plug the correct power cable into this connector and a UPS to power your StorCenter Pro. 4. AC Selector Switch—Make sure the voltage on the AC selector swtich on the back of the StorCenter Pro Server matches the power requirements for your country. 5. Power Supply Switch—Your StorCenter Pro Server has a power supply switch on the rear panel.
Connecting the Iomega® StorCenter™ Pro Check Package Contents Initial Setup Check Package Contents Verify that the box contains the following items: Iomega ® StorCenter ™ Pro NAS 150d Server (Models may vary) Power cables Solutions CD and Quick Start Guide Ethernet Cable NOTE: Package contents may vary. The illustrations may not match your package contents.
Connecting the Iomega® StorCenter™ Pro Check Package Contents Initial Setup Initial Setup 1. Remove the packing foam from inside the drive access door. 2. Use the included network cable to connect the StorCenter Pro Server to a network hub or switch. — or — Use the included network cable to connect the StorCenter Pro Server directly to a computer. 3. Connect the included power cord to the back of the Iomega StorCenter Pro and an Uninterruptible Power Supply (UPS).
operating system or result in data loss. 4. Power on the StorCenter Pro using the power button on the front panel. 5. Start your computer, wait for the operating system to load, then insert the Solutions CD. NOTE: If the software doesn't run automatically, double click on the Solutions CD icon, then double click the Start icon. 6. Click on the Discovery Tool Pro Software button to run the software. NOTE: Iomega Discovery Tool Pro will automatically scan your network when launched.
StorCenter Pro. Mac Users: You can also use Bonjour to discover and configure the StorCenter. See Using Bonjour for more information. 7. The Iomega Discovery Tool Pro software will list all discovered Iomega StorCenter Pro servers. Select the StorCenter Pro you would like to configure from the Discovery window, then click the Manage button. NOTE: See Troubleshooting if Iomega Discovery does not list your StorCenter Pro. 8. Log into the StorCenter Pro.
Configuring the Iomega® StorCenter™ Pro Installing Discovery Tool Running Discovery Tool Using Bonjour Device Settings Using Iomega® Discovery Tool Installing Iomega Discovery Tool Pro Iomega Discovery Tool Pro software installs and runs automatically when you install the software from the Solutions CD using either Automatic Install or Custom Install. You can also run the Iomega Discovery Tool Pro software directly from the CD without installing.
Bookmark pane on the right-hand side. Double click the StorCenter to enter Device Settings.
Using Iomega® Discovery Tool Installing Discovery Tool Running Discovery Tool Using Bonjour Device Settings Device Settings Accessing Device Settings 1. Run the Iomega Discovery Tool Pro software. 2. When the server list has finished loading, double click on your StorCenter Pro. A new browser window will open, directing you to Device Settings. NOTE: The default name for your StorCenter Pro is Iom-xxxxxxxxxxxx (where xxxxxxxxxxxx represents the StorCenter Pro MAC address). 3.
Disk Backup Print Server | top of page |
Device Settings Home User Management Group Management Shared Folder Management Disk Management Network Disk Backup Print Server Home Status Summary Machine Name—Displays the name of your StorCenter Pro server. When you browse the network, the StorCenter Pro server will appear under this name. The default name of the StorCenter Pro server is Iomega-xxxxxx (where xxxxxx is the last 6 digits of the device's MAC address). LAN IP—Displays the StorCenter Pro server's LAN IP address, if applicable.
Language—Select a language for the Device Settings Web Administration pages. The default is English. Factory Reset Button—Enable/Disable the Factory Default button on the StorCenter Pro server. Disable the Factory Reset Button to prevent other people who have physical access from resetting the device. Resetting the device changes the device password to its default and removes all users and shares.
NOTE: You will receive disk error notifications hourly until the problem is resolved. Authenticate—Use this option if your email server requires authentication to send email. SSL—Use this option of your email requires SSL authentication. User Name—This is the user name required by your mail server. Password—This is the password required by your mail server. SMTP Server—Simple Mail Transfer Protocol. The address of the SMTP Server that will be used to send the logs. SMTP Port—Port used by your SMTP server.
| top of page | UPS Monitor The UPS Monitor reports information about your UPS including battery status and charge. Shutdown when battery is low—The StorCenter Pro will monitor the UPS battery and shutdown safely before the battery loses charge.
Device Settings Home User Management Group Management Shared Folder Management Disk Management Network Disk Backup Print Server User Management The User Management screen displays the names and descriptions of all users. It also allows you to Add, delete, or edit users. You can change the Administrator password using the Change Password tool on the Basic page. NOTE: You cannot manage domain users from this device. Domain users must be managed on the domain controller.
| top of page |
Device Settings Home User Management Group Management Shared Folder Management Disk Management Network Disk Backup Print Server Group Management The Group Management screen displays the name and description of all groups. It also allows you to create, delete, or update groups. NOTE: You cannot manage domain groups from this device. Domain groups must be managed on the domain controller. You can create a local group made of domain and local users. Edit a Group—Links to the Edit Group screen.
Device Settings Home User Management Group Management Shared Folder Management Disk Management Network Disk Backup Print Server Shared Folder Management The Shared Folder Management screen displays the name and supported protocols of each shared folder. It also allows you to create, delete, or update shares. Edit a share—Links to the Edit Shared Folder screen. Delete a share—Click the Delete link next to the share you wish to delete. Create Shared Folder—Links to the Create Shared Folder screen.
set the permissions for the entire 169.254.1.x range by adding the IP address 169.254.1.*. OK/Cancel—Your settings will NOT be updated unless you click the OK button. Click the Cancel button to reset the form.
Device Settings Home User Management Group Management Shared Folder Management Disk Management Network Disk Backup Print Server Disk Management Displays the name, capacity, status, and type of each disk connected to the StorCenter Pro server. NOTE: Some status conditions and RAID options are available only on StorCenter Pro server that have more than one internal disk. Volume Name—Change the volume name. Capacity—Displays the total capacity (used and unused) of the volume.
hard disks. Striped (RAID 0)—RAID 0 uses a technique called data striping. Multiple hard disks are combined to make one large volume. RAID 0 can read and write faster than a simple configuration, since it splits the data and accesses all disks in parallel. RAID 0 does not provide any data redundancy. RAID 0 requires two or more hard disks. RAID 0+1—RAID 0+1 Creates a mirror (RAID 1) out of two Striped (RAID 0) volumes.
Device Settings Home User Management Group Management Shared Folder Management Disk Management Network Disk Backup Print Server Network LAN IP Address—Displays the StorCenter Pro server's LAN IP address. MAC Address—Media Access Control Address. Displays the MAC address for the StorCenter Pro LAN interface. The MAC address is unique for each network interface. Settings—Links to the LAN screen. Workgroup/Domain Mode—Displays whether the StorCenter Pro server is the member of a workgroup or domain.
Subnet Mask—Specify the subnet mask for the StorCenter Pro server. The Subnet mask must be the same for all devices on the same subnet of the network. The default subnet setting is 255.255.0.0. Keep this default setting if your LAN has an IP address range in the format of 169.254.x.x. Gateway—If your network has a router or gateway, enter its address here. Domain Name—Internet Search Domain. Enter the internet search domain for your ISP account. This is usually in the form of mycompany.com.
Admin Password—Enter the password for a domain admin user. This is NOT the user name for your StorCenter Pro server. NOTE: You will not be able to modify the NT domain from the StorCenter Pro server. All domain tasks such as domain user and group creation and deletion and password changes must be performed on a different device. Active Directory Services Select the Active Directory Services button to configure your server to join an Active Directory. Active Directory membership is off by default.
Device Settings Home User Management Group Management Shared Folder Management Disk Management Network Disk Backup Print Server Print Server Print Server—Enable/Disable the print server. The StorCenter Pro server is capable of sharing one USB printer with other systems on your network. Printer sharing is automatic and the StorCenter Pro server does not require any special configuration; however, each client computer must be configured to use the printer.
Device Settings Home User Management Group Management Shared Folder Management Disk Management Network Disk Backup Print Server Applications This screen provides a quick status report for all available StorCenter Pro applications. Disk Backup—Displays the number of scheduled backup jobs. NOTE: Disk Backup is currently the only application available. Save System Settings—Saves the current StorCenter Pro settings as a file on the client computer.
NOTE: For best results, Iomega recommends that you only perform one backup task at a time. Please schedule your backup jobs with sufficient time to complete before the next backup starts. Not Scheduled—Allows you to create an unscheduled job. You will have to use the Run link on the Disk Backup page to execute this job. Run Daily—This job will run daily at the time specified below. Time—Enter the time at which you would like to execute the job.
Not Found The requested URL /support/manuals/250dseries/en/consolidated/linux-access was not found on this server.
Using the Iomega® StorCenter Network Hard Drive Accessing Shares Filenaming Conventions Protecting Your Data StorCenter Pro Drives and Arrays Using Device Settings Backing Up With the StorCenter Pro Sharing a USB Storage Device Sharing a USB Printer Filenaming Conventions When sharing files on a network, you must choose filenames that are compatible with all devices that will use the file.
Using the Iomega® StorCenter™ Pro Server Accessing Shares Filenaming Conventions Protecting Your Data StorCenter Pro Drives and Arrays Using Device Settings Backing Up With the StorCenter Pro Sharing a USB Storage Device Sharing a USB Printer Protecting Your Data Follow these guidelines to protect your data against potential disasters: During Normal Operation Always: Back up your Iomega StorCenter Pro As with any computer hardware or peripheral, it is highly recommended that you back up your StorCenter P
Never: Remove more than one hard drive at a time The StorCenter Pro can continue operating after a single drive failure. Do NOT remove any other drives while there is a failed drive in the system or while the replacement drive is being restored. Insert a spare hot-swappable hard drive until the StorCenter Pro operating system shows the missing drive When a hard drive is removed, the system may take a few minutes to recognize the removal.
Using the Iomega® StorCenter™ Pro Server Accessing Shares Filenaming Conventions Protecting Your Data StorCenter Pro Drives and Arrays Using Device Settings Backing Up With the StorCenter Pro Sharing a USB Storage Device Sharing a USB Printer StorCenter Pro Drives and Arrays What What What What is is is is an Array? JBOD? RAID 0? RAID 0+1? What is RAID 5? Changing the Default Array Type Replacing a Hard Drive in the Iomega StorCenter Pro Why Can't I Rebuild the array in my Iomega StorCenter Pro? The I
RAID 0 uses a technique called data striping. Multiple hard drives are combined to make one large volume. RAID 0 can read and write faster than a simple configuration, since it splits the data and accesses all disks in parallel. RAID 0 does not provide any data redundancy. RAID 0 requires two or more hard drives. | top of page | What is RAID 0+1? RAID 0+1 Creates a mirror (RAID 1) out of two Striped (RAID 0) volumes.
Replacing a Hard Drive in the Iomega StorCenter Pro Your Iomega StorCenter Pro has been configured so that you can lose any single drive and the system will remain operational. However, your data may be lost if you are not using an array type that provides redundancy. To replace a StorCenter Pro hard drive, simply remove the failed drive from the system and wait for the system to indicate a successful removal.
4. Slide the drive completely out of the bay. 5. Wait a couple of minutes while the Iomega StorCenter Pro recognizes that the drive has been removed. 6. Slide the replacement drive into the open bay. CAUTION! Use Iomega replacement drives only! Failure to do so will void your warranty. 7. After inserting a new drive, the Iomega StorCenter Pro performance will be degraded until the RAID has been rebuilt. The RAID may take several hours to rebuild your data.
Using the Iomega® StorCenter™ Pro Server Accessing Shares Filenaming Conventions Protecting Your Data StorCenter Pro Drives and Arrays Using Device Settings Backing Up With the StorCenter Pro Sharing a USB Storage Device Sharing a USB Printer Backing Up With the StorCenter ™ Pro What Should I Back Up? How Should I Back Up? Where Should I Keep My Backups? Backing Up a Client Computer Backing Up the StorCenter Pro What Should I Back Up? Data files and folders change the most, and therefore should be backed
| top of page | Backing Up a Client Computer Iomega recommends that you perform a full system backup once a week. The following steps will help you create a full system backup and schedule your daily backups. Using Roxio Retrospect Express Roxio Retrospect Express is a full-featured backup program. For more information on using Retrospect Express, read the Retrospect manual or visit the Roxio support website.
19. Name your backup script, then click Next. 20. Review the backup summary, then click Finish to schedule your backup. NOTE: For best results, Iomega recommends that you always verify that your backup sets and scripts are correctly configured. 21. If you will be using this backup for disaster recovery, you will need to create a Retrospect Disaster Recovery boot CD. See "Creating a Boot Disc" below for more information.
2. In the Windows installation wizard select the partition to which you would like to restore, then hit Enter. 3. Once the Windows installation has completed, the computer will reboot from the hard drive. 4. When Retrospect launches automatically, cancel out of the Disaster Recovery window and exit Retrospect. At this point the computer will reboot. 5. After the reboot, the Windows install screen will display. Allow Windows to finish its install and reboot the computer. 6.
3. Under the Immediate tab, select Duplicate. NOTE: Duplicate makes an exact copy of the selected folder without compression. 4. Select the volume or folder you would like to backup, then click OK. NOTE: To select a folder rather than a volume, you will need to click the Subvolume... button and define the folders you would like to copy. 5. Select your StorCenter Pro as the destination, then click OK. 6. Click on the Duplicate button.
Using the Iomega® StorCenter™ Pro Accessing Shares Filenaming Conventions Protecting Your Data StorCenter Pro Drives and Arrays Using Device Settings Backing Up With the StorCenter Pro Sharing a USB Storage Device Sharing a USB Printer Sharing a USB Storage Device You can increase the capacity of the StorCenter Pro by connecting up to four additional USB mass storage devices (such as hard drives and flash drives).
Using the Iomega® StorCenter™ Pro Accessing Shares Filenaming Conventions Protecting Your Data StorCenter Pro Drives and Arrays Using Device Settings Backing Up With the StorCenter Pro Sharing a USB Storage Device Sharing a USB Printer Sharing a USB printer The StorCenter Pro is capable of sharing a USB printer with other systems on your network. Printer sharing is automatic and the StorCenter does not require any special configuration; however, each client computer must be configured to use the printers.
Windows XP/2000 1. Log in to the Device Settings web Interface. 2. If necessary, enable the print server. 3. Connect a USB printer to the StorCenter. 4. Install the printer drivers on the client computer. 5. Click on the Start icon and select Printers and Faxes. 6. Double click on Add a Printer. 7. Click Next. 8. Select A network printer, or a printer attached to another computer, then click Next. 9. Select Connect to this printer.
6. In the Printer List, click the Add button. 7. In the Printer Browser, Click the IP printer button. 8. Select Line Printer Daemon - LPD from the Protocol drop down list 9. Enter the IP address of your StorCenter Pro in the Address field. 10. Enter Printer1 in the Queue field. 11. Select your printer from the Print Using drop down list. 12. Click the Add button. Mac OS X (10.5.x Leopard) 1. Log in to the Device Settings web Interface. 2. If necessary, enable the print server. 3.
Troubleshooting If you encounter a problem while connecting or using your Iomega StorCenter Pro Server, check the topics listed below for possible solutions. Click on any of the following topics to expand or close the troubleshooting information. Drive does not power on Make sure you are using the power cable that came with your drive. Ensure that it is correctly connected. 1. Verify that the power cable is connected to the drive. 2. Verify that the power cable is plugged into a working power outlet. 3.
returns to solid green, run Iomega Discovery Tool again. NOTE: If you set the configuration option to disable the factory reset button, you cannot return the drive to default settings. | top of page | I forgot my password There are several things you can do to reduce the risk of forgetting your password and minimize the impact of a forgotten password. 1. Back up the data on all shares frequently. 2.
2. Double click Entire Network 3. Double click Microsoft Windows Network 4. Double click Workgroup Your Iomega StorCenter Pro Server should have a default name similar to Iomega-xxxxxx (where xxxxxx is an alpha-numeric listing) Windows 98/ME: 1. Double click Network Neighborhood 2. Double click Entire Network 3. Double click Workgroup Your Iomega StorCenter Pro Server should have a default name similar to Iomega-xxxxxx (where xxxxxx is an alpha-numeric listing) Mac Users: OS X, version 10.2.7 or higher: 1.
Discovery Tool The StorCenter Pro may not have received new IP settings from the DHCP server on the new network. Reboot the StorCenter to force it to renew its DHCP settings. | top of page | How do I change the name of my StorCenter Pro Server? Always use Iomega Discovery Tool's Device Settings to change the drive's name. Changing the name on your host computer does not change the name on the network.
2. From the Tools menu, select Internet Options. 3. Select the Connections Tab. 4. Select the LAN Settings button. If you have a proxy server enabled, either: Select Bypass proxy server for local addresses. Or Un-check the Use a proxy server for your LAN checkbox. Mozilla: 1. Open Mozilla. 2. From the Edit menu, select Preferences. 3. From the Advanced category, select Proxies.
| top of page | I made changes to the StorCenter Pro Settings, but they don't show up This is an issue with web browsers default caching of web pages. To resolve this issue in Internet Explorer, set your cache settings to always update the page: 1. Open Internet Explorer. 2. Select Tools→Internet Options. 3. Under Temporary Internet Files, select the Settings button. 4. Set the default action for "Check for newer versions of stored pages:" to "Every visit to the page". 5. Select OK, then OK again.
CAUTION! Do not connect or disconnect printers while the StorCenter is performing a data transfer. When the connection is severed, the data transfer will be interrupted and data may be lost. | top of page | USB printer not recognized The StorCenter should automatically set up a print server when a USB printer is connected. The StorCenter will create a queue for one printer. 1. Make sure the USB printer is plugged into an electrical outlet or UPS and that the power is ON. 2.
Can I upgrade the StorCenter Pro Server? All StorCenter Pro NAS servers are fully tested, configured and optimized using only the hardware that ships inside the NAS. Upgrading or modifying the hardware in your Iomega NAS server, such as RAM, CPU, Hard Disks, Fans, Network Adapters, etc. is not supported and will void your warranty. | top of page | For additional information about your Iomega StorCenter Pro Server, including more Tips and Troubleshooting, please visit the Support & Downloads area on www.
How to Get Help Iomega is committed to providing excellent customer support. To meet this goal, Iomega offers a variety of support options designed to meet the needs of a wide range of users. For complete information on the support options available for your Iomega product, check our website at www.iomega.com. Please select your region carefully.
Limited Warranty (Drives and Media) Coverage Commercial Product Excluded Products and Problems Remedies Obtaining Warranty Service Limitations Coverage Iomega warrants this Iomega ® StorCenter Pro NAS (Network Attached Storage) product to be free from defects in materials and workmanship for the period specified below. This warranty is non-transferable and applies only to you, the first end-user purchaser, and only when the product is used for commercial purposes.
Iomega or Iomega's authorized service provider will void this warranty. Remedies Your sole and exclusive remedy for a covered defect is repair or replacement of the defective product, at Iomega's sole option. Iomega may use either new parts or products or refurbished parts or products that Iomega has determined to be equivalent to new in performance to satisfy its warranty obligations.
Limited Warranty (Drives and Media) Coverage Excluded Products and Problems Additional Excluded Problems for Network Attached Storage (NAS) Products Remedies Obtaining Warranty Service Limitations Coverage Iomega warrants this hardware product to be free from defects in materials and workmanship for the warranty period. This non-transferable, limited warranty is only to you, the first end-user purchaser.
| top of page | Obtaining Warranty Service You must notify Iomega within the warranty period to receive warranty service. Contact Information for Iomega Customer Service can be obtained on our Support website at www.iomega.com/europe/support. Currently your warranty entitles you to free technical support for all Iomega products throughout the warranty period. Iomega reserves the right to change the above stated conditions without any advance notice.
Limited Warranty (Drives and Media) Coverage Commercial Product Excluded Products and Problems Remedies Obtaining Warranty Service Limitations Coverage Iomega warrants this Iomega ® StorCenter™ Pro (Network Attached Storage) product to be free from defects in materials and workmanship for the period specified below. This warranty is non-transferable and applies only to you, the first end-user purchaser, and only when the product is used for commercial purposes.
defective product, at Iomega's sole option. Iomega may use either new parts or products or refurbished parts or products that Iomega has determined to be equivalent to new in performance to satisfy its warranty obligations. If Iomega is unable to repair or replace a defective product, your alternate exclusive remedy, at Iomega's sole option, shall be a refund of the original purchase price. The above is Iomega's entire obligation to you under this warranty.
Regulatory Information FCC (United States) The computer equipment described in this manual generates and uses radio frequency (RF) energy. If the equipment is not installed and operated in strict accordance with the manufacturer's instructions, interference to radio and television reception might result. This equipment complies with Part 15 of the FCC Rules.
CE (European Community) This Iomega product conforms to the following European Directive(s)and Standard(s): Application of Council Directives: 73/23/EEC, 89/336/EEC. Standards to which Conformity is declared: EN60950, EN55022, EN55024, EN61000-3-2, EN61000-3-3. Importer’s Name: Iomega International, S.A. Type of Equipment: Information Technology Equipment.
Using This Manual Expanding Submenu Topics In the left hand menu, click a plus sign to reveal the submenu topic links. If there is no plus sign next to the title, there are no submenu links. Click the minus sign to hide the submenu. Expanding Page Topics Some pages show a list of topics in blue text. Click a topic to show the information. Click the topic again to collapse the topic.