PORTABLE DJ STATION WITH EFFECTS Quick Start Owner’s Manual BOX CONTENTS • • iCD04FX POWER CORD Manual de inicio rápido del usuario (ESPAÑOL) CONTENIDO DE LA CAJA • • iCD04FX CABLE DE ALIMENTACIÓN Schnellbedienungsanleitung (DEUTSCH) INHALT DER SCHACHTEL • • iCD04FX Genormtes STROMKABEL Guide d’utilisation simplifié (FRANÇAIS) CONTENU DE LA BOÎTE • • iCD04FX CÂBLE D’ALIMENTATION Manuale Rapido di Utilizzazione (ITALIANO) CONTENUTO DELLA CONFEZIONE: • • iCD04FX CAVO DI ALIMENTAZIONE
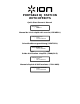
QUICK SETUP 1. Make sure all items listed on the front of this guide are included in the box. 2. READ SAFETY INSTRUCTION BOOKLET BEFORE USING THE PRODUCT. 3. Study this setup diagram. 4. Make sure all devices are turned off and all faders and volume knobs are set to “zero” 5. Connect microphone (optional) as indicated in the diagram. 6. Connect an external amplifier or home stereo as indicated in the diagram (optional) 7. Plug all devices into power. 8. Switch everything on in the following order.
BATTERY COMPARTMENT: load 6 “D” “UM1” batteries for use without AC power input. FRONT PANEL 1. LINE OUTPUT: This output is for connecting an external audio system such as a PA speaker system, powered monitors, or a home stereo. When a device is attached, the internal speakers will shut off automatically. The level of the master stereo output signal is controlled by the master fader. 2. MIC INPUT: Plug a 1/4” connector style Microphone in here. 3. POWER: Use this switch to turn on the unit.
19. 20. 21. 22. 23. 24. 25. MODE: Allows all tracks to play in order (default), just a single track to play (SINGLE) or repeat tracks (REPEAT). SEARCH: Used to quickly move through the music. When music is paused, you can step through the music slowly in order to set a cue point. TRACK SELECT: Used to select the track to be played. PITCH: The pitch can be continuously changed up to +/-10% by moving the knob. By changing pitch you can change the feeling of the music.
ESPAÑOL INSTALACIÓN RÁPIDA 1. Asegúrese de que todos los artículos incluidos al inicio de este manual están incluidos en la caja. 2. LEA LAS INSTRUCCIONES DEL FOLLETO DE SEGURIDAD ANTES DE UTILIZAR EL PRODUCTO. 3. Estudie este diagrama de instalación. 4. Asegúrese de que todos los dispositivos están apagados y de que todos los faders están en posición «cero». 5. Conecte el micrófono (opcional) como se indica en el diagrama. 6.
PANEL FRONTAL 1. SALIDA DE LÍNEA: Esta salida sirve para conectar un sistema de audio externo tal como un sistema de altavoces de potencia, monitores de potencia o un estéreo hogareño. Cuando se conecta un equipo, los altavoces internos se apagan automáticamente. El nivel maestro de salida de la señal estéreo es controlado por el fader maestro. 2. Entrada de micrófono (Mic): Enchufe aquí un micrófono con conector tipo ¼”. 3. ALIMENTACIÓN: Use este interruptor para encender la unidad.
17. 18. 19. 20. 21. 22. 23. 24. 25. PUERTA DEL CD: Presione la puerta para insertar o retirar el CD. Cada presión abrirá o cerrará la puerta. TIEMPO: Conmuta la pantalla de tiempo entre el tiempo transcurrido del tema, y el tiempo remanente de todo el CD. MODO: Permite reproducir todos los temas en orden (predeterminado), reproducir sólo una pista (SINGLE) o repetir pistas (REPEAT). BÚSQUEDA: Se usa para buscar rápidamente por la música.
DEUTSCH SCHNELLAUFBAU 1. Überprüfen Sie, dass sich alle auf der Vorderseite dieser Anleitung aufgeführten Gegenstände in der Schachtel befinden. 2. LESEN SIE DAS SICHERHEITSVORSCHRIFTENHEFT VOR INBETRIEBNAHME DES PRODUKTS. 3. Sehen Sie sich dieses Aufbaudiagramm genau an. 4. Stellen Sie sicher, dass alle Geräte ausgeschaltet sind und alle Fader und Lautstärkenregler auf “null” stehen. 5. Schließen Sie das Mikrofon (wahlweise) wie im Diagramm gezeigt an. 6.
VORDERSEITE 1. LINE-AUSGANG: Dieser Ausgang dient zum Anschluss von externen Audiosystemen wie z. B. ein PA-Lautsprechersystem, aktive Monitoren oder eine Heimstereoanlage. Ist ein Gerät angeschlossen, schalten sich die internen Lautsprecher automatisch aus. Der Pegel des Master-Stereoausgabesignals wird über den Master-Fader gesteuert. 2. MIC-EINGANG: Schließen Sie hier ein Mikrofon mit einem 6,3 mm-Stecker an. 3. EIN-AUS: Schalten Sie hier das Gerät ein.
19. 20. 21. 22. 23. 24. 25. MODUS: Zum Abspielen der Musikstücke in Reihenfolge (Standard), nur eines bestimmten Musikstücks (SINGLE) oder zum wiederholten Abspielen der Musikstücke (REPEAT). SUCHE: Zum schnellen Absuchen der Musikstücke. Wird der Abspielbetrieb pausiert, können Sie langsam die Musikstücke absuchen, um einen Cue-Punkt festzulegen. MUSIKSTÜCKAUSWAHL: Zur Auswahl eines abzuspielenden Musikstücks.
FRANÇAIS Guide d’installation rapide 1. Assurez-vous que tous les articles énumérés sur la page couverture de ce guide sont inclus dans la boîte. 2. VEUILLEZ LIRE LE LIVRET DES CONSIGNES DE SÉCURITÉ AVANT D'UTILISER LE PRODUIT. 3. Examinez bien le schéma d'installation. 4. Assurez-vous que tous les appareils sont hors tension et que tous les atténuateurs et les boutons de réglages pour le volume sont réglés à « zéro ». 5. Branchez le microphone (optionnel) tel qu'indiqué sur le schéma. 6.
PANNEAU AVANT 1. SORTIE LIGNE : Cette sortie sert à connecter un système audio externe tel qu'un système PA, des moniteurs amplifiés ou un stéréo maison. Lorsqu'un appareil est raccordé, les haut-parleurs internes se désactivent automatiquement. Le niveau du signal de la sortie stéréo principale est commandé par l’atténuateur principal. 2. ENTRÉE MICRO : Branchez un microphone doté d’un connecteur de ¼ po dans cette entrée. 3.
18. 19. 20. 21. 22. 23. 24. 25. Durée (Time) : Modifie le mode d'affichage de la durée entre le temps de lecture écoulé, le temps restant de la piste et le temps restant sur le disque. MODE : Permet à toutes les pistes de jouer dans l’ordre (défaut) une seule piste (SINGLE) ou de répéter des pistes (REPEAT). Recherche (SEARCH) : Pour défiler à travers la musique rapidement.
ITALIANO IMPOSTAZIONE RAPIDA 1. Assicurarsi che tutti gli elementi elencati sul frontespizio di questo manuale siano inclusi nella confezione. 2. PRIMA DI UTILIZZARE IL PRODOTTO LEGGERE IL LIBRETTO DELLE ISTRUZIONI DI SICUREZZA. 3. Esaminare attentamente lo schema di montaggio. 4. Assicurarsi che tutti i dispositivi siano spenti e che i fader e le manopole di regolazione del volume siano su “zero” 5. Collegare il microfono (opzionale) come indicato nello schema. 6.
PANNELLO ANTERIORE 1. USCITA DI LINEA: questa uscita serve al collegamento di un sistema audio esterno quale un sistema di altoparlanti PA, un monitor oppure un home stereo. Quando il dispositivo è collegato, gli altoparlanti interni verranno spenti automaticamente. Il livello del segnale di uscita stereo master è regolato dal fader master. 2. INGRESSO MIC: inserire un microfono dotato di connettore da 1/4” a questo livello. 3. ALIMENTAZIONE: servirsi di questo interruttore per accendere l’apparecchio.
18. 19. 20. 21. 22. 23. 24. 25. TIME: commuta il display del tempo tra tempo trascorso della traccia, tempo rimanente della traccia e tempo rimanente sull’intero CD. MODE: permette la riproduzione di tutte le tracce in ordine (predefinito), di una singola traccia (SINGLE) o di ripetere le tracce (REPEAT). SEARCH: serve a muoversi rapidamente all’interno della musica. Quando la musica è in pausa, si può far scorrere lentamente i brani per impostare un punto cue.