USER GUIDE ENGLISH ( 3 – 8 ) GUÍA DEL USUARIO ESPAÑOL ( 9 – 14 ) GUIDE D’UTILISATION FRANÇAIS ( 15 – 20 ) GUIDA UTENTE ITALIANO ( 21 – 26 ) BEDIENUNGSANLEITUNG DEUTSCH ( 27 – 32 ) GEBRUIKERSHANDLEIDING NEDERLANDS ( 33 – 38 )
WELCOME Thank you for purchasing SLIDES 2 PC film and slide scanner. Please take a moment to read through this manual in order to get the most out of your SLIDES 2 PC. PRECAUTIONS Before using SLIDES 2 PC, please ensure that you read and understand the safety precautions described below. Always ensure that the SLIDES 2 PC is operated correctly: Never operate SLIDES 2 PC inside of an aircraft or anywhere else where operation of such devices is restricted.
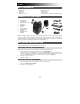
BOX CONTENTS SLIDES 2 PC Software CD Slide holder Rapid slide feeder Negative roll feeder Cleaning brush Quickstart Poster Safety Instructions & Warranty Information Booklet SLIDES 2 PC FEATURES 1. 2. 3. 4. 5. 6. 7. 8. 9.
USING THE INCLUDED HOLDERS SLIDE HOLDER 1. 2. 3. Open the film holder by lifting the tab on the bottom. Insert the slide(s) into the slide slot(s) or lay the negative over the negative slot. Close the film holder. Be sure the latch and sides of the holder are securely in place. ROLL FILM HOLDER 1. 2. 3. Lay the film holder flat. Insert one end of the roll of film in the slot on the right-hand side of the holder. Gently push/pull the roll of film through the holder to move from picture to picture.
USING THE SLIDES 2 PC 1 Plug the USB cable of the SLIDES 2 PC into your computer’s USB port. Once connected, the power LED light will be blue. Note for Windows users: The first time you connect SLIDES 2 PC to your computer, wait a few seconds until you see a dialog box that says "Found New Hardware" (this means the computer recognizes the SLIDES 2 PC). After you see this, SLIDES 2 PC is ready to use. 2 3 Insert the loaded film / slide holder properly into the slot as shown.
EDITING YOUR PICTURES 1. Snapshot – To capture your previewed image, click "Snapshot." 2. Delete – Deletes a file selected from the list. 3. Mirror – Click this button to mirror the image. 4. Rotate – Rotates the image right 90º. 5. Brightness/Exposure – Click and drag the slider to adjust the image's brightness. 6. Color Balance – Click and drag the RGB (red, green, and blue) sliders to adjust the image's color. 7. Save – Click "Save" to save the picture to your computer. 8.
TROUBLESHOOTING ISSUE POSSIBLE CAUSE RESOLUTION My computer does not recognize the SLIDES 2 PC. SLIDES 2 PC not plugged into a high-speed USB port. Your computer must have a USB 2.0 to communicate with your SLIDES 2 PC. Check to see if USB 2.0 is installed on your computer. If you do not have a USB 2.0 installed on your computer you can upgrade your USB ports. This hardware is available at most electronic stores. I have a USB 2.
BIENVENIDO Gracias por adquirir un escáner de películas y diapositivas SLIDES 2 PC. Tómese un momento para leer este manual a fin de obtener lo máximo de su SLIDES 2 PC. PRECAUCIONES Antes de usar el SLIDES 2 PC, asegúrese de leer y entender las precauciones de seguridad descritas a continuación. Asegúrese siempre de operar correctamente el SLIDES 2 PC: Nunca opere el SLIDES 2 PC dentro de una aeronave ni en ningún otro lugar donde la operación de tales dispositivos esté restringida.
CONTENIDO DE LA CAJA SLIDES 2 PC CD software Soporte de diapositivas Alimentador rápido de diapositivas Alimentador de rollo de negativos Cepillo de limpieza Póster de inicio rápido Instrucciones de seguridad e información sobre la garantía CARACTERÍSTICAS DEL SLIDES 2 PC 1. 2. 3. 4. 5. 6. 7. 8. 9.
CÓMO USAR LOS SOPORTES INCLUIDOS SOPORTE DE DIAPOSITIVAS 1. 2. 3. Abra el soporte de diapositivas levantando la lengüeta de la parte inferior. Inserte las diapositivas en las ranuras para las mismas. Cierre el soporte de diapositivas. Asegúrese de que la traba y los costados del soporte estén colocados firmemente en su sitio. ALIMENTADOR DE ROLLO DE NEGATIVOS 1. 2. 3. Coloque el rollo de negativos en forma plana. Inserte un extremo del rollo de película en la ranura del lado derecho del soporte.
CÓMO USAR EL SLIDES 2 PC 1 Enchufe el cable USB del SLIDES 2 PC en el puerto USB de su computadora. Una vez conectado, el LED de encendido se ilumina con luz azul. Nota para usuarios de Windows: La primera vez que conecte SLIDES 2 PC a la computadora, espere algunos segundos hasta ver un cuadro de diálogo que diga "Found New Hardware" (Encontrado nuevo hardware) (esto significa que la computadora reconoce el SLIDES 2 PC). Cuando lo vea, SLIDES 2 PC está listo para usar.
CÓMO EDITAR LAS FOTOGRAFÍAS 1. Snapshot – Para capturar la imagen de la vista preliminar, haga clic "Snapshot" (instantánea). 2. Eliminar – Permite eliminar un archivo seleccionado en la lista. 3. Espejo – Haga clic en este botón para crear un espejo de la imagen. 4. Giro a izquierda o derecha – Permite girar la imagen 90º a la derecha. 5. Ajuste del brillo – Haga clic y arrastre el cursore para ajustar el brillo de la imagen. 6.
SOLUCIÓN DE PROBLEMAS PROBLEMA CAUSA POSIBLE RESOLUCIÓN Mi computadora no reconoce el SLIDES 2 PC no enchufado en un puerto USB de alta SLIDES 2 PC. velocidad. Apareció un mensaje de Windows que dice "device not recognized" (Dispositivo no reconocido) Su computadora debe tener un puerto USB 2.0 para comunicarse con el SLIDES 2 PC. Verifique si está instalado USB 2.0 en su computadora. Si no lo tiene, puede actualizar sus puertos USB.
BIENVENUE Nous vous remercions d’avoir fait l’achat d’un numériseur SLIDES 2 PC pour film et diapositives. Veuillez prendre un moment pour lire ce manuel en entier afin de tirer le plus d’avantages possibles de votre SLIDES 2 PC. MISES EN GARDE Avant d'utiliser le SLIDES 2 PC, veuillez vous assurer de lire et comprendre les mises en garde relatives à la sécurité décrites ci-dessous. Il est important de s'assurer que le SLIDES 2 PC est utilisé de façon adéquate.
CONTENU DE LA BOÎTE SLIDES 2 PC CD du logiciel Porte-diapositive Porte-diapositive d'alimentation rapide Porte pour rouleau de pellicule Brosse de nettoyage Affiche de démarrage rapide Consignes de sécurité et information concernant la garantie FONCTIONS DU SLIDES 2 PC 1. TOUCHE COPY (COPIER) 2. DEL D'ALIMENTATION 3. FENTE POUR SUPPORT 4. PORT USB 5. CÂBLE USB 6. BROSSE 7. PORTE-DIAPOSITIVE 8. PORTE-DIAPOSITIVE D'ALIMENTATION RAPIDE 9.
UTILISATION DES SUPPORTS INCLUS PORTE-DIAPOSITIVES 1. 2. 3. Ouvrir le porte-diapositive en levant l’onglet du dessous. Faites glisser la ou les diapositives dans les emplacements. Fermez le porte-diapositive. Assurez-vous que le fermoir et les côtés du porte-diapositive sont bien fermés. SUPPORT POUR ROULEAU DE PELLICULE 1. 2. 3. Placez le support pour rouleau de pellicule à plat. Insérez l’extrémité du rouleau de pellicule dans la fente droite du support.
UTILISATION DU SLIDES 2 PC 1 Brancher le câble USB du SLIDES 2 PC dans le port USB de l’ordinateur. Une fois branché, le témoin d’alimentation DEL s’allume en bleu. Remarque pour les utilisateurs de Windows : La première fois que vous branchez le SLIDES 2 PC à votre ordinateur, attendez quelques minutes, jusqu’à ce que la boîte de dialogue « Ajout de nouveau matériel détecté » s'affiche indiquant que l’ordinateur reconnait le SLIDES 2 PC. Une fois ce message affiché, le SLIDES 2 PC est prêt à utiliser.
MODIFICATION DES IMAGES 1. Snapshot – Pour saisir votre image en aperçu, cliquez sur « Snapshot » (instantané). 2. Supprimer – Ce bouton permet de supprimer le fichier sélectionné. 3. Miroir – Cliquez ce bouton afin de présenter l’autre face. 4. Rotation – Ce bouton permet de pivoter l’image vers la droite de 90º. 5. Ajustement de la luminosité – Cliquez et faites glisser le contrôle afin de régler la luminosité de l’image. 6.
GUIDE DE DÉPANNAGE PROBLÈME CAUSE POSSIBLE SOLUTION Mon ordinateur ne reconnaît pas SLIDES 2 PC. SLIDES 2 PC n’est pas branché dans un port USB haute vitesse Votre ordinateur doit avoir un USB 2.0 pour communiquer avec votre SLIDES 2 PC. Vérifier pour voir si un USB 2.0 est installé sur votre ordinateur. Si vous ne possédez pas d’USB 2.0 installé sur votre ordinateur, vous pouvez mettre à jour vos port USB. Ce matériel est en vente dans la plupart des magasins d’électronique. Je possède un port USB 2.
BENVENUTI! Grazie per aver acquistato uno scanner SLIDES 2 PC per pellicole e diapositive. Dedichi un po’ di tempo alla lettura completa di questo manuale per ottenere il massimo dal Suo SLIDES 2 PC. PRECAUZIONI Prima di utilizzare SLIDES 2 PC, assicurarsi di aver letto e compreso a fondo le precauzioni d’uso descritte di seguito.
CONTENUTI DELLA CONFEZIONE SLIDES 2 PC CD recante software Support per diapositive Alimentatore rapido diapositive Alimentatore pellicole Spazzola per la pulizia Poster quickstart Istruzioni di sicurezza e garanzia CARATTERISTICHE DEL SLIDES 2 PC 1. 2. 3. 4. 5. 6. 7. 8. 9.
UTILIZZO DEI SUPPORTI IN DOTAZIONE PORTA DIAPOSITIVE 1. 2. 3. Aprire il supporto della diapositiva sollevando la linguetta posta sul fondo. inserire la/e diapositiva/e negli appositi supporti. Chiudere il supporto della diapositive. Assicurarsi che il dispositivo di chiusura e i lati del supporto siano saldamente in posizione. ALIMENTATORE PELLICOLE 1. 2. 3. Stendere l’alimentatore delle pellicole piatto. Inserire un capo della pellicola nello slot presente sul lato destro del supporto.
UTILIZZO DELLO SLIDES 2 PC 1 Collegare il cavo USB allo SLIDES 2 PC alla porta USB del computer. Una volta collegato, il LED di alimentazione sarà blu. Nota per gli utenti Windows: La prima volta che si connette SLIDES 2 PC al proprio computer, aspettare qualche secondo fino a quando non si vede una finestra di dialogo che dice "Trovato nuovo hardware" (questo significa che il computer ha riconosciuto SLIDES 2 PC). A questo punto, SLIDES 2 PC è pronto per essere utilizzato.
MODIFICA DELLE IMMAGINI 1. Snapshot – Per acquisire l'immagine visualizzata in anteprima, fare clic su "Snapshot" (istantanea). 2. Delete (cancella) – Cancella un file selezionato dall'elenco. 3. Mirror (specchio) – Cliccare su questo pulsante per girare l'immagine. 4. Rotate (ruota) – Ruota l'immagine a destra di 90º. 5. Brightness/Exposure – Cliccare e trascinare il cursore per regolare la luminosità. 6.
RISOLUZIONE DI PROBLEMI PROBLEMA POSSIBILE CAUSA SOLUZIONE Il computer non riconosce lo SLIDES 2 PC. Lo SLIDES 2 PC non è collegato ad una porta USB ad alta velocità. Il computer deve essere dotato di una porta USB 2.0 per comunicare con lo SLIDES 2 PC. Verificare che sul computer sia installata una porta USB 2.0. Se sul computer non è installata una porta USB 2.0 si possono aggiornare le porte USB. Questo tipo di hardware è disponibile nella maggior parte dei negozi di elettronica.
WILLKOMMEN Besten Dank, dass Sie sich zum Kauf dieses Film- und Diascanners SLIDES 2 PC entschieden haben. Bitte nehmen Sie sich im Interesse einer optimalen Nutzung Ihres SLIDES 2 PC die Zeit, diese Gebrauchsanweisung durchzulesen. ACHTUNG Bitte lesen Sie vor der Inbetriebnahme Ihres SLIDES 2 PC die Sicherheitsvorschriften unten gründlich durch.
INHALT DER VERPACKUNG Zuführgerät für Negativfilme Bürste zur Reinigung Schnellstart-Poster Sicherheitshinweise & Garantie-Booklet SLIDES 2 PC Software-CD Halter für Dias Schnell-Zuführgerät für Dias BESTANDTEILE DES SLIDES 2 PC 1. 2. 3. 4. 5. 6. 7. 8. 9.
GEBRAUCH DER MITGELIEFERTEN HALTER DIARAHMENHALTER 1. 2. 3. Öffnen Sie den Diarahmenhalter, indem Sie die Klappe an der Unterseite öffnen. Setzen Sie das/die Dia(s) in den/die Dia-Slot(s). Verschließen Sie den Diarahmenhalter. Vergewissern Sie sich, dass der Schnappverschluss und die Seiten des Halters sicher eingerastet sind. ZUFÜHRGERÄT FÜR NEGATIVFILME 1. 2. 3. Legen Sie das Zuführgerät für den Negativfilm flach auf.
BEDIENUNG DES SLIDES 2 PC 1 Schließen Sie das USB-Kabel des SLIDES 2 PC an den USB-Port Ihres Computers an. Wenn das Gerät angeschlossen ist, leuchtet die Leuchtdiode blau auf. Hinweis für Windows-Benutzer: Wenn SLIDES 2 PC zum ersten Mal an den PC angeschlossen wird, wartet man einige Sekunden bis das Dialogfenster mit der Nachricht „Neue Hardware gefunden“ (dies bedeutet, der PC hat SLIDES 2 PC erkannt) erscheint. Nachdem dieses Fenster erschienen ist, ist SLIDES 2 PC einsatzbereit.
BEARBEITEN VON BILDERN 1. Snapshot – Um Ihr Bild in der Voransicht zu digitalisieren, klicken Sie auf die Taste "Snapshot" (Schnappschuss). 2. Löschen – Löscht eine Datei, die aus der Liste. 3. Horizontal spiegeln – Klicken Sie auf diese Schaltfläche um das Bild horizontal spiegeln. 4. Drehen links/rechts – Dreht das Bild um 90 º nach rechts. 5. Brightness/Exposure – Klicken Sie bei gedrückter Maustaste auf die Schieberegler, um Helligkeit des Bildes anzupassen. 6.
FEHLERHILFE PROBLEM MÖGLICHE URSACHE Mein Computer erkennt SLIDES 2 PC nicht. LÖSUNG SLIDES 2 PC ist nicht an einen HochgeschwindigkeitsIch erhalte die Windows- USB-Port Fehlermeldung „Gerät angeschlossen. nicht erkannt”. Um mit Ihrem SLIDES 2 PC kommunizieren zu können, braucht Ihr Computer USB 2.0. Überprüfen Sie, ob USB 2.0 auf Ihrem Computer installiert ist. Wenn nicht, können Sie Ihre USB-Ports nachrüsten.
WELKOM Bedankt voor uw aanschaf van een SLIDES 2 PC film- en diascanner. Lees a.u.b. deze handleiding goed door om zo het meeste uit uw SLIDES 2 PC te halen. VOORZORGSMAATREGELEN Zorg ervoor dat u, voor u de SLIDES 2 PC gebruikt, onderstaande veiligheidsvoorzorgen gelezen hebt en begrijpt. Zorg ervoor dat de SLIDES 2 PC altijd juist bediend wordt: Bedien de SLIDES 2 PC nooit in een vliegtuig of ergens waar de bediening ervan beperkt of verboden is.
INHOUD VERPAKKING Lader voor filmnegatieven Borstel voor schoonmaken Snelstartgids Veiligheidsinstructies & garantie SLIDES 2 PC Software-CD Houder voor diafilms Snelle dialader KENMERKEN SLIDES 2 PC 1. 2. 3. 4. 5. 6. 7. 8. 9. KNOP 'KOPIËREN' STROOM-LED SLEUF VOOR FILM/DIAHOUDER USB-POORT USB-KABEL BORSTEL HOUDER VOOR DIAFILMS SNELLE DIALADER LADER VOOR FILMNEGATIEVEN N.B.
GEBRUIK VAN MEEGELEVERDE HOUDERS DIAHOUDER 1. 2. 3. Open de diahouder door het klepje aan de onderkant op te tillen. Plaats één of meerdere dia's in de diasleuven. Sluit de diahouder. Zorg ervoor dat de vergrendeling en de zijkanten van de houder veilig op hun plek zitten. LADER VOOR FILMNEGATIEVEN 1. 2. 3. Leg de lader voor filmnegatieven plat. Steek het ene uiteinde van het filmrolletje in de sleuf aan de rechterkant van de lader.
GEBRUIK VAN DE SLIDES 2 PC 1 Sluit de USB-kabel van de SLIDES 2 PC aan op een USB 2.0-poort van de PC. Na aansluiting zal de stroomLED blauw oplichten. N.B.: De eerste keer dat de SLIDES 2 PC wordt aangesloten op uw computer moet ene paar seconden gewacht worden tot een dialoogvenster verschijnt met "Nieuwe hardware gevonden" (dit betekent dat de SLIDES 2 PC wordt herkend door de PC). Na dit dialoogvenster is de SLIDES 2 PC klaar voor gebruik.
BEWERKEN VAN AFBEELDINGEN 1. Snapshot – Voor het vastleggen van uw beeld bekeken, klik op de knop "Snapshot." 2. Verwijderen –Verwijdert het bestand, geselecteerd uit de lijst. 3. Spiegelen – Klik op deze knop om het beeld horizontaal te draaien. 4. Draai rechts – Draait het beeld 90º naar rechts. 5. Brightness/Exposure – Klik en sleep de schuifregelaar om de helderheid aan te passen. 6. Kleuraanpassing – Klik en sleep de schuifregelaars om de RGB-parameters (rood, groen en blauw) aan te passen.
PROBLEEMOPLOSSING PROBLEEM MOGELIJKE OORZAAK OPLOSSING De SLIDES 2 PC wordt niet herkend door de PC SLIDES 2 PC niet aangesloten op een USB 2.0poort De PC dient over USB 2.0 te beschikken om met de SLIDES 2 PC te kunnen communiceren. Controleer of USB 2.0 op de PC is geïnstalleerd. Als dit niet het geval is kunnen de USB-poorten van een upgrade worden voorzien. Deze hardware is bij de meeste elektronicazaken verkrijgbaar. Mijn PC beschikt over USB 2.
APPENDIX SPECIFICATIONS Image Sensor 5 mega CMOS sensor, 5.17 megapixels Lens Specification Precision Glass Element Fixed Focus Color Balance Automatic + software Exposure Control Automatic + software Supported film size auto-converting Slide; color negative film; black/white negative film Focus Range Fixed focus PC interface USB 2.
www.ionaudio.com MANUAL VERSION 1.