SLIDES 2 PC 35MM SLIDE AND FILM SCANNER USER GUIDE ENGLISH ( 3 – 12 ) GUÍA DEL USUARIO ESPAÑOL ( 13 – 22 ) GUIDE D’UTILISATION FRANÇAIS ( 23 – 32 ) GUIDA UTENTE ITALIANO ( 33 – 42 ) BEDIENUNGSANLEITUNG DEUTSCH ( 43 – 52 ) GEBRUIKERSHANDLEIDING NEDERLANDS ( 53 – 62 )
WELCOME Thank you for purchasing a SLIDES 2 PC film and slide scanner. Please take a moment to read through this manual in order to get the most out of your SLIDES 2 PC. PRECAUTIONS Before using SLIDES 2 PC, please ensure that you read and understand the safety precautions described below. Always ensure that the SLIDES 2 PC is operated correctly: Never operate SLIDES 2 PC inside of an aircraft or anywhere else where operation of such devices is restricted.
BOX CONTENTS 1 SLIDES 2 PC 1 Driver / Software CD 1 USB cable 1 Slide tray holder 1 Negative tray holder 1 Negative tray holder (roll film) 1 Optics cleaning tool brush 1 Quickstart Poster 1 User Guide SLIDES 2 PC FEATURES COPY BUTTON 4. USB PORT 8. FILM HOLDER 2. POWER LED 5. USB CABLE 9. ROLL FILM HOLDER 3. FILM / SLIDE HOLDER SLOT 6. BRUSH 7. SLIDE HOLDER 1.
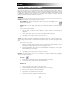
DRIVER AND SOFTWARE INSTALLATION To use the SLIDES 2 PC you must install the SLIDES 2 PC Scanner Driver and ArcSoft PhotoImpression 6 in advance. Both of these items can be found on the included CD. DRIVER INSTALLATION 1. Turn on the computer. 2. Insert the installation CD into the CD-ROM drive and the installation CD menu will appear. 3.
USING THE SLIDES 2 PC For first time users, do NOT plug the image copier into computer while the holder is inserted in the image copier. Please remove the film / slide holder before connecting to the computer, and click “calibrate” button to perform calibration the first time the image copier is used. 1 Plug the USB cable of the SLIDES 2 PC into your computer’s USB2 port. Once connected the power LED light will be red.
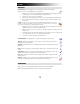
6 You can adjust the location of the film by moving the film holder; the film holder can be moved in both directions. (Insert through rear entrance). 7 Click “Snapshot” on the screen or press the COPY button on the image copier. A green frame will indicate the selected pictures in the preview area; the maximum is 12 pictures in the preview area. If there are more than 12 pictures scanned, the 13th pictures will overwrite the 1st picture.
EDITING YOUR PICTURES First, click on the picture to select it; then use the ArcSoft tools to edit the pictures as you wish. The Photo Editing Tools module includes a complete set of photo enhancement, editing and retouching controls. The windows can be stretched to provide a large size view of the active photo. Double click the module’s tool bar to maximize the window to fill the computer screen.
CROP – This feature enables you to trim photos for a dramatic effect or cut off the distracting parts of a picture. This feature enables you to trim photos for dramatic effect or cut off the distracting parts of a picture. How to use the crop function: 1. Choose the crop orientation (portrait or landscape). 2. Select a fixed proportion for the crop rectangle (4:6, 5:7, 8:10) or choose “Custom” if you want to use a different proportion. 3.
RETOUCH HEALING BRUSH – The Healing Brush is good for fixing dust, scratches and removing skin blemishes. How to use the Healing Brush to fix a skin blemish: 1. Establish a source point for the Healing Brush by holding the Shift key and clicking on an area of the skin that is close in color and texture to the area you want to heal. 2. Use the zoom control to zoom in on the blemish. 3. Adjust the size of the healing brush so the cursor (circle) is only slightly larger than the blemish. 4.
APPENDIX SPECIFICATIONS Image Sensor 1/2.5” 5 mega CMOS sensor, 5.17 mega pixels Lens Specification F=6.0, 4 Glass elements, half field angle=14.1º Color Balance Automatic Exposure Control Automatic Frame Rate 2592x1680 pixels @7.5 fps Focus Range Fixed focus PC interface USB 2.
TROUBLESHOOTING ISSUE POSSIBLE CAUSE RESOLUTION My computer does not recognize the SLIDES 2 PC. SLIDES 2 PC not plugged into a high-speed USB port. Your computer must have a USB 2.0 to communicate with your SLIDES 2 PC. Check to see if USB 2.0 is installed on your computer. If you do not have a USB 2.0 installed on your computer you can upgrade your USB ports. This hardware is available at most electronic stores.
BIENVENIDO Gracias por adquirir un escáner de películas y diapositivas SLIDES 2 PC. Tómese un momento para leer este manual a fin de obtener lo máximo de su SLIDES 2 PC. PRECAUCIONES Antes de usar el SLIDES 2 PC, asegúrese de leer y entender las precauciones de seguridad descritas a continuación. Asegúrese siempre de operar correctamente el SLIDES 2 PC: Nunca opere el SLIDES 2 PC dentro de una aeronave ni en ningún otro lugar donde la operación de tales dispositivos esté restringida.
CONTENIDO DE LA CAJA 1 SLIDES 2 PC 1 CD de driver / software 1 cable USB 1 soporte de diapositivas 1 soporte de negativos 1 soporte de negativos (rollo) 1 cepillo (de limpieza del sistema óptico) 1 póster de inicio rápido 1 guía de usuario CARACTERÍSTICAS DEL SLIDES 2 PC 1. BOTÓN DE COPIA 4. PUERTO USB 8. SOPORTE DE PELÍCULA 2. LED DE ENCENDIDO 5. CABLE USB 9. SOPORTE DE PELÍCULA (ROLLO) 3. RANURA PARA EL SOPORTE DE PELÍCULA O DIAPOSITIVAS 6. CEPILLO 7.
INSTALACIÓN DEL DRIVER Y EL SOFTWARE Para usar el SLIDES 2 PC, debe instalar previamente el driver del escáner del SLIDES 2 PC y el programa ArcSoft PhotoImpression 6. Ambos elementos se pueden encontrar en el CD incluido. INSTALACIÓN DEL DRIVER 1. Encienda la computadora. 2. Inserte el CD de instalación en el lector de CD-ROM —aparecerá el menú de instalación del CD. 3.
CÓMO USAR EL SLIDES 2 PC Los usuarios principiantes NO deben enchufar la copiadora de imágenes en la computadora mientras el soporte está insertado en la copiadora. Retire el soporte de película / diapositivas antes de conectarla a la computadora y haga clic en el botón “calibrate” (calibrar) para realizar la calibración la primera vez que se usa la copiadora de imágenes. 1 Enchufe el cable USB del SLIDES 2 PC en el puerto USB2 de su computadora.
6 Puede ajustar la ubicación de la película moviendo el soporte, que se puede desplazar en ambos sentidos). (Insértelo a través de la entrada trasera). 7 Antes de escanear la imagen, puede ajustar su brillo y balance de color (rojo, verde y azul) haciendo clic en "Color/Brightness Adjustment" y utilizando el botones "+" y "-" para hacer el ajuste. Haga clic en “Snapshot” (Instantánea) de la pantalla o pulse el botón COPY (Copiar) de la copiadora de imágenes.
CÓMO EDITAR LAS FOTOGRAFÍAS En primer lugar, haga clic en la fotografía para seleccionarla y luego use las herramientas ArcSoft para editarla como desee. El módulo Photo Editing Tools incluye un conjunto completo de controles de mejora, edición y retoque de fotografías. Las ventanas se pueden ampliar para brindar una vista de gran tamaño de la foto activa. Haga doble clic en la barra de herramientas del módulo para maximizar la ventana y llenar la pantalla de la computadora.
REPARACIÓN MANUAL 1. Use el cursor de zoom de la barra de herramientas para acercar la foto. 2. Arrastre el recuadro blanco pequeño que está dentro del navegador de zoom para llevarlo sobre el ojo rojo. 3. Coloque su cursor directamente sobre el ojo rojo y haga clic. 4. Repita el proceso hasta que repare todos los ojos rojos. 5. Haga clic en “Undo” (Deshacer) si comete un error o no le gusta el resultado.
RETOQUE HEALING BRUSH (“Curita”) – La bandita o “curita” es ideal para reparar polvo, rayaduras y eliminar manchas de la piel. Cómo usar la bandita para reparar una mancha de la piel: 1. Establezca un punto fuente para la bandita manteniendo pulsada la tecla Shift y haciendo clic en un área de la piel que sea de color y textura simulares a los del área que desea reparar. 2. Use el control de zoom para acercar la mancha. 3.
APÉNDICE ESPECIFICACIONES Sensor de imagen Sensor CMOS de 1/2.5” 5 mega, 5.17 mega pixels Especificación de la cubierta F=6.0, 4 elementos de vidrio, medio ángulo de campo =14.1º Balance de color Automático Control de exposición Automático Frecuencia de cuadros 2592x1680 pixels a 7.5 cuadros por segundo (fps) Rango de foco Foco fijo Interfaz de PC USB 2.
SOLUCIÓN DE PROBLEMAS PROBLEMA CAUSA POSIBLE RESOLUCIÓN Mi computadora no reconoce el SLIDES 2 PC. SLIDES 2 PC no enchufado en un puerto USB de alta velocidad. Su computadora debe tener un puerto USB 2.0 para comunicarse con el SLIDES 2 PC. Verifique si está instalado USB 2.0 en su computadora. Si no lo tiene, puede actualizar sus puertos USB. Este hardware está disponible en la mayoría de las tiendas de electrónica.
BIENVENUE Nous vous remercions d’avoir fait l’achat d’un numériseur SLIDES 2 PC pour film et diapositives. Veuillez prendre un moment pour lire ce manuel en entier afin de tirer le plus d’avantages possibles de votre SLIDES 2 PC. MISES EN GARDE Avant d'utiliser le SLIDES 2 PC, veuillez vous assurer de lire et comprendre les mises en garde relatives à la sécurité décrites ci-dessous. Il est important de s'assurer que le SLIDES 2 PC est utilisé de façon adéquate.
CONTENU DE LA BOÎTE 1 appareil SLIDES 2 PC 1 CD du logiciel/lecteur 1 câble USB 1 pochette à diapositives 1 pochette à négatifs 1 pochette à (pellicule) 1 brosse (de nettoyage optique) 1 affiche de démarrage rapide 1 guide d'utilisation FONCTIONS DU SLIDES 2 PC 1. TOUCHE COPY (COPIER) 6. BROSSE 2. DEL D'ALIMENTATION 7. POCHETTE À DIAPOSITIVES 3. PANIER À DIAPOSITIVE /NÉGATIFS 8. POCHETTE À NÉGATIFS 4. PORT USB 9. POCHETTE À NÉGATIFS (PELLICULE) 5.
INSTALLATION DU LECTEUR ET DU LOGICIEL Pour utiliser le SLIDES 2 PC, vous devez installer le lecteur numériseur SLIDES 2 PC et ArcSoft PhotoImpression 6 au préalable. Ces deux articles se retrouvent sur le CD inclut. INSTALLATION DU LECTEUR 1. Mettre l’ordinateur en marche. 2. Insérer le CD d’installation dans le lecteur CDROM et le menu du CD d’installation s’affiche. 3.
UTILISATION DU SLIDES 2 PC Pour les utilisateurs débutants, ne PAS brancher le numériseur dans l’ordinateur pendant que le support est inséré dans le numériseur. Veuillez retirer le panier de négatifs / diapositives avant de brancher à l'ordinateur et cliquer sur la touche « calibrate » (calibrer) pour effectuer une calibration la première fois que le numériseur est utilisé. 1 Brancher le câble USB du SLIDES 2 PC dans le port USB2 de l’ordinateur.
6 Vous pouvez régler l’emplacement du négatif en déplaçant le panier de négatif ; celui-ci peut être déplacé dans les deux directions. (Insérer par l’ouverture arrière). 7 Avant de scanner l'image, vous pouvez ajuster la luminosité et la balance des couleurs (rouge, vert, bleu) en cliquant sur « Color/Brightness Adjustment » (Ajustement Couleur / Luminosité) et en utilisant les bouton « + » et « - » afin de faire vos ajustements.
MODIFICATION DES IMAGES En premier lieu, cliquer sur l’image pour la sélectionner ; puis, utiliser l’outil ArcSoft pour modifier les images comme souhaité. Le module sur Photo Editing Tools (Outils de modification des images) inclut un ensemble complet de commandes d'amélioration, de modification et de retouches des photos/images. Les fenêtres peuvent être agrandies pour obtenir un aperçu de grande taille pour la photo sélectionnée.
RÉPARATION MANUELLE 1. Utiliser la barre coulissante d’agrandissement sur la barre d’outils pour agrandir l’image. 2. Faire glisser la petite case blanche à l’intérieur du navigateur d’agrandissement pour placer sur l'œil à réparer. 3. Placer le curseur directement sur l’œil rouge et cliquer. 4. Répéter le procédé jusqu’à ce que tous les yeux rouges soient éliminés. 5. Cliquer sur « Undo » (Annulation de commande) si vous avez fait une erreur ou n'aimez pas le résultat.
RETOUCHE BROSSE DE GUÉRISON - La brosse de guérison est bonne pour éliminer la poussière, les égratignures et éliminer les pâleurs ou imperfection de la peau. Comment utiliser la brosse de guérison pour éliminer les imperfections de la peau : 1. Établir le point source pour la brosse de guérison en enfonçant la touche Shift et cliquant sur la zone de la peau qui est près de la couleur et de la texture de la zone à guérir. 2. Utiliser la commande d’agrandissement pour agrandir la zone d'imperfection. 3.
APPENDICE SPÉCIFICATIONS Capteur d’image 1/2.5” 5 méga capteur CMOS, 5.17 mégapixels Spécification de lentille F=6.0, 4 éléments de verre, demi angle de champ=14.1º Équilibre des couleurs Automatique Intégrateur de lumière Automatique Cadence de prise de vue 2592x1680 pixels à7.5 fps profondeur de foyer Mise au point fixe Interface PC USB 2.
GUIDE DE DÉPANNAGE PROBLÈME CAUSE POSSIBLE SOLUTION Mon ordinateur ne reconnaît pas SLIDES 2 PC. SLIDES 2 PC n’est pas branché dans un port USB haute vitesse Votre ordinateur doit avoir un USB 2.0 pour communiquer avec votre SLIDES 2 PC. Vérifier pour voir si un USB 2.0 est installé sur votre ordinateur. Si vous ne possédez pas d’USB 2.0 installé sur votre ordinateur, vous pouvez mettre à jour vos port USB. Ce matériel est en vente dans la plupart des magasins d’électronique.
BENVENUTI! Grazie per aver acquistato uno scanner SLIDES 2 PC per pellicole e diapositive. Dedichi un po’ di tempo alla lettura completa di questo manuale per ottenere il massimo dal Suo SLIDES 2 PC. PRECAUZIONI Prima di utilizzare SLIDES 2 PC, assicurarsi di aver letto e compreso a fondo le precauzioni d’uso descritte di seguito.
CONTENUTI DELLA CONFEZIONE 1 SLIDES 2 PC 1 CD recante Driver / Software 1 cavo USB 1 porta diapositive 1 porta pellicole 1 porta pellicole (rullino) 1 spazzola (per la pulizia degli elementi ottici) 1 poster quickstart 1 guida d'utente CARATTERISTICHE DEL SLIDES 2 PC 1. TASTO COPIA 5. CAVO USB 2. LED DI ALIMENTAZIONE 6. SPAZZOLA 3. SLOT PER PORTA PELLICOLE / PORTA DIAPOSITIVE 7. PORTA DIAPOSITIVE 8. PORTA PELLICOLE 9. PORTA PELLICOLE (RULLINO) 4.
INSTALLAZIONE DRIVER E SOFTWARE Per utilizzare lo SLIDES 2 PC bisogna innanzitutto installare SLIDES 2 PC Scanner Driver e ArcSoft PhotoImpression 6. Entrambi si trovano nel CD in dotazione. INSTALLAZIONE DEI DRIVER 1. Accendere il computer. 2. Inserire il CD d’installazione nel drive CDROM: apparirà il menu d’installazione CD. 3. Quando appare la schermata seguente, scegliere Driver Installation e poi scegliere 32-bit Windows Operating System o 64-bit Windows Operating System, a seconda del sistema.
UTILIZZO DELLO SLIDES 2 PC Al momento del primo utilizzo, NON collegare il dispositivo di copia delle immagini al computer mentre il supporto è inserito nel dispositivo di copia stesso. Rimuovere il porta negativi / porta diapositive prima di collegarlo al computer e cliccare sul tasto “calibrate” (calibra) per effettuare una calibrazione la prima volta che viene utilizzato il dispositivo di copia delle immagini. 1 Collegare il cavo USB allo SLIDES 2 PC alla porta USB2 del computer.
6 Si può regolare l’ubicazione della pellicola spostando il supporto: questo può essere spostato in entrambe le direzioni. (Inserire tramite l’ingresso posteriore.) 7 Prima della scansione l'immagine, è possibile regolare la sua luminosità e il bilanciamento del colore (rosso, verde e blu) facendo clic su "Color/Brightness Adjustment" e con il "+" and "-" per apportare modifiche. Cliccare su “Snapshot” sullo schermo o premere il tasto COPY sul dispositivo di copia delle immagini.
MODIFICA DELLE IMMAGINI Innanzitutto, cliccare sull’immagine per selezionarla, quindi servirsi degli strumenti ArcSoft per modificare le immagini come desiderato. Il modulo Photo Editing Tools include un set completo per il miglioramento delle immagini, la modifica e comandi di fotoritocco. Le finestre possono essere allargate per offrire una visuale di dimensioni maggiori della foto attiva. are doppio clic sulla barra degli strumenti del modulo per massimizzare la finestra a schermo intero.
MANUAL FIX (aggiustamento manuale) 1. Servirsi del cursore zoom sulla barra degli strumenti per ingrandire l’immagine. 2. Trascinare la casellina bianca che si trova all’interno del navigatore dello zoom per posizionarsi su un occhio rosso. 3. Posizionare il cursore direttamente sull’occhio rosso e fare clic. 4. Ripetere il procedimento fino a quando tutti gli occhi rossi non sono stati sistemati. 5. In caso di errore o se il risultato non è gradito, cliccare su “Undo” (annulla).
RITOCCO HEALING BRUSH (pennello di aggiustamento) – Il pennello Healing Brush è utile per sistemare polvere, graffi e rimuovere macchie cutanee. Come utilizzare il pennello Healing Brush per sistemare una macchia cutanea: 1. Stabilire un punto sorgente per il pennello tenendo premuto il tasto Shift e cliccando su un’area cutanea che sia prossima, in quanto a colore e a consistenza, all’area che si desidera sistemare. 2. Servirsi del comando zoom per ingrandire la macchia. 3.
APPENDICE SPECIFICHE TECNICHE Sensore immagini Sensore CMOS ½,5” 5 mega, 5,17 mega pixel Specifiche relative alla lente F=6.0, 4 elementi in vetro, angolazione mezzo campo =14,1º Bilanciamento dei colori Automatico Controllo esposizione Automatico Frequenza fotogrammi 2592x1680 pixel @7,5 fps Gamma di messa a fuoco Fuoco fisso Interfaccia PC USB 2.0 Risoluzione di scansione elevata 5M pari a 1.800 dpi (migliora a 3.
RISOLUZIONE DI PROBLEMI PROBLEMA POSSIBILE CAUSA SOLUZIONE Il computer non riconosce lo SLIDES 2 PC. Lo SLIDES 2 PC non è collegato ad una porta USB ad alta velocità. Il computer deve essere dotato di una porta USB 2.0 per comunicare con lo SLIDES 2 PC. Verificare che sul computer sia installata una porta USB 2.0. Se sul computer non è installata una porta USB 2.0 si possono aggiornare le porte USB. Questo tipo di hardware è disponibile nella maggior parte dei negozi di elettronica.
WILLKOMMEN Besten Dank, dass Sie sich zum Kauf dieses Film- und Diascanners SLIDES 2 PC entschieden haben. Bitte nehmen Sie sich im Interesse einer optimalen Nutzung Ihres SLIDES 2 PC die Zeit, diese Gebrauchsanweisung durchzulesen. ACHTUNG Bitte lesen Sie vor der Inbetriebnahme Ihres SLIDES 2 PC die Sicherheitsvorschriften unten gründlich durch.
PACKUNGSINHALT 1 SLIDES 2 PC 1 CD mit Treiber und Software 1 USB-Kabel 1 Diahalter 1 Filmhalter 1 Filmhalter (rolle) 1 Bürste (zur Reinigung der Optik) 1 Schnellstart-Poster 1 Bedienungsanleitung BESTANDTEILE DES SLIDES 2 PC 1. KOPIERTASTE 2. LEUCHTDIODE 3. AUFNAHMESCHLITZ DIAHALTER 4. USB-PORT FÜR FILM- / 5. USB-KABEL 6. BÜRSTE 7. DIAHALTER 8. FILMHALTER 9.
INSTALLATION VON TREIBER UND SOFTWARE Um mit Ihrem SLIDES 2 PC arbeiten zu können, müssen Sie zuerst den Scannertreiber des SLIDES 2 PC und ArcSoft PhotoImpression 6 installieren. Beide Programme finden sich auf der beigelegten CD. INSTALLATION DES TREIBERS 1. Schalten Sie den Computer ein. 2. Legen Sie die Installations-CD ins CD-ROMLaufwerk ein. Hierauf erscheint das Menü der Installations-CD. 3.
BEDIENUNG DES SLIDES 2 PC Wenn Sie das Gerät zum ersten Mal benutzen, stecken Sie den Bildkopierer bitte NICHT an den Computer an, solange der Halter sich im Bildkopierer befindet. Nehmen Sie den Film- / Diahalter aus dem Gerät, bevor Sie dieses an den Computer anschließen, und klicken Sie auf die Schaltfläche “Calibrate (Kalibrieren)”, damit der Bildkopierer bei der Erstbenutzung kalibriert wird. 1 Schließen Sie das USB-Kabel des SLIDES 2 PC an den USB2-Port Ihres Computers an.
6 Die Position kann geregelt werden, indem man den Filmhalter vorwärts und rückwärts schiebt. (Benutzung des Aufnahmeschlitzes auf der Geräterückseite) 7 Vor dem Scannen Sie Ihre Bilder, können Sie die Helligkeit und Farbbalance (Rot, Grün und Blau), indem Sie auf "Color/Brightness Adjustment" und die "+" und "-"-Taste, um Anpassungen vorzunehmen. Klicken Sie auf dem Bildschirm auf “Snap Shot (Schnappschuss)” oder betätigen Sie die Kopiertaste auf dem Bildkopierer.
BEARBEITEN VON BILDERN Um ein Bild auszuwählen, klicken Sie dieses an. Jetzt können Sie die Bilder mit Hilfe des ArcSoft-Tools nach Belieben bearbeiten. Das Modul Bildbearbeitungstools bietet ein umfassendes Angebot von Hilfsmitteln zum Optimieren, Aufbereiten und Retuschieren von Fotos. Die Fenster können skaliert werden, so dass das aktive Foto in Großansicht zu sehen ist.
MANUELLE KORREKTUR 1. Vergrößern Sie mit Hilfe des Zoomreglers auf der Symbolleiste die gewünschte Stelle. 2. Ziehen Sie das kleine weiße Kästchen im Zoomnavigator über das rote Auge. 3. Bewegen Sie den Cursor direkt über das rote Auge und klicken Sie es an. 4. Wiederholen Sie diese Schritte, bis alle roten Augen korrigiert sind. 5. Wenn Sie einen Fehler machen oder das Ergebnis Ihnen nicht gefällt, klicken Sie auf „Undo (Rückgängig machen)“.
RETUSCHIEREN REPARATURPINSEL – Der Reparaturpinsel dient dazu, Staub und Kratzer auszugleichen und Schönheitsfehler zu retuschieren. In unserem Beispiel beseitigen wir eine Hautunreinheit: 1. Bestimmen Sie den Aufnahmebereich für den Reparaturpinsel, indem Sie die Umschalttaste (SHIFT) gedrückt halten und auf einen Hautbereich klicken, die dem zu behandelnden Bereich in Farbe und Beschaffenheit annähernd entspricht. 2. Vergrößern Sie mit dem Zoomregler die Stelle mit der Unreinheit. 3.
ANHANG TECHNISCHE DATEN Bildsensor 1/2.5” 5 Mega CMOS-Sensor, 5,17 Megapixel Linse F=6.0, 4 Glas-Elemente, Halbfeldwinkel: 14,1º Farbausgleich Automatisch Belichtungssteuerung Automatisch Bildfrequenz 2592x1680 Pixel bei 7,5 fps Brennweitenbereich Fixfokus PC-Schnittstelle USB 2.
FEHLERHILFE PROBLEM MÖGLICHE URSACHE LÖSUNG Mein Computer erkennt SLIDES 2 PC nicht. SLIDES 2 PC ist nicht an einen HochgeschwindigkeitsIch erhalte die Windows- USB-Port angeschlossen. Fehlermeldung „Gerät nicht erkannt“. Um mit Ihrem SLIDES 2 PC kommunizieren zu können, braucht Ihr Computer USB 2.0. Überprüfen Sie, ob USB 2.0 auf Ihrem Computer installiert ist. Wenn nicht, können Sie Ihre USB-Ports nachrüsten.
WELKOM Bedankt voor uw aanschaf van een SLIDES 2 PC film- en diascanner. Lees a.u.b. deze handleiding goed door om zo het meeste uit uw SLIDES 2 PC te halen. VOORZORGSMAATREGELEN Zorg ervoor dat u, voor u de SLIDES 2 PC gebruikt, onderstaande veiligheidsvoorzorgen gelezen hebt en begrijpt. Zorg ervoor dat de SLIDES 2 PC altijd juist bediend wordt: Bedien de SLIDES 2 PC nooit in een vliegtuig of ergens waar de bediening ervan beperkt of verboden is. Onjuist gebruik vergroot het risico op letsel.
INHOUD VERPAKKING 1 SLIDES 2 PC 1 driver- en software-CD 1 USB kabel 1 diahouder 1 filmhouder 1 filmhouder (rolfilm) 1 borstel (voor schoonmaken optisch hulpmiddel) 1 snelstartgids 1 gebruikershandleiding KENMERKEN SLIDES 2 PC 1. KNOP 'KOPIËREN' 6. BORSTEL 2. STROOM-LED 7. DIAHOUDER 3. SLEUF VOOR FILM/DIAHOUDER 8. FILMHOUDER 4. USB-POORT 9. FILMHOUDER (ROLFILM) 5. USB-KABEL N.B.
INSTALLATIE VAN DRIVER EN SOFTWARE Om de SLIDES 2 PC te gebruiken dienen de SLIDES 2 PC scannerdriver en ArcSoft PhotoImpression 6 vooraf geïnstalleerd te worden. Deze beide onderdelen zijn te vinden op de meegeleverde CD. INSTALLATIE DRIVER 1. Schakel de PC in. 2. Plaats de installatie-CD in het CD-ROMstation en het installatiemenu zal verschijnen. 3.
GEBRUIK VAN DE SLIDES 2 PC Voor nieuwe gebruikers: sluit het apparaat NIET aan op de PC wanneer de houder zich in het apparaat bevindt. Verwijder de film-/diahouder voor aansluiting op de PC; klik op knop "kalibreren" om de eerste keer dat het apparaat wordt gebruikt een kalibratie uit te voeren. 1 Sluit de USB-kabel van de SLIDES 2 PC aan op een USB 2.0-poort van de PC. Na aansluiting zal de stroomLED rood oplichten. 2 3 Plaats de geladen film-/diahouder juist in de sleuf zoals weergegeven.
6 De locatie van de film kan worden ingesteld door het verplaatsen van de filmhouder; deze kan in beide richtingen worden bewogen (Plaatsen via de achterzijde). 7 Voor het scannen van uw afbeelding, kunt u de helderheid en kleur saldo (rood, groen en blauw) door te klikken op "Color/Brightness Adjustment" en met behulp van de" + "en" - "knoppen om aanpassingen aan te brengen. Klik in het scherm op "Snapshot" of druk op knop COPY op het apparaat.
BEWERKEN VAN AFBEELDINGEN Klik eerst op een afbeelding om deze te selecteren; gebruik hierna de hulpmiddelen in ArcSoft om de afbeeldingen naar wens te bewerken. Module Photo Editing Tools bevat een complete set bedieningselementen voor verbetering, bewerking en retoucheren van foto's. De vensters kunnen worden uitgerekt naar een grote afbeelding van de actieve foto. Dubbelklik op de werkbalk in de module om het venster het gehele scherm te laten vullen.
HANDMATIG HERSTELLEN 1. Gebruik schuifbalk 'zoom' op de werkbalk om in te zoomen op de foto. 2. Sleep het kleine witte venster in de zoomnavigator om deze over een rood oog te plaatsen. 3. Plaats de cursor direct over het rode oog en klik. 4. Herhaal het proces tot alle rode ogen hersteld zijn. 5. Klik op "Undo" (herstel) als u een fout maakt of het resultaat u niet bevalt.
RETOUCHEREN HEALING BRUSH – De Healing Brush kan zaken als stof, krassen en oneffenheden in de huid herstellen. Gebruik van de Healing Brush bij oneffenheden in de huid: 1. Stel een bronpunt vast voor de Healing Brush door toets Shift ingedrukt te houden en te klikken op een gebied van de huid dat qua kleur en structuur overeenkomt met het gebied dat u wilt bewerken. 2. Gebruik 'zoom' om in te zoomen op de oneffenheid. 3.
BIJLAGE SPECIFICATIES Beeldsensor 1/2,5" 5 mega-CMOS-sensor, 5,17 megapixel specificatie lens F=6,0, 4 glaselementen, halve veldhoek = 14,1º Kleurenbalans Automatisch Belichtingscontrole Automatisch Beeldweergavetempo 2592 x1680 pixels @7,5 fps Focusbereik Vaste focus PC-interface USB 2.0 Scannen in hoge resolutie 5M, gelijk aan 1.800 dpi (versterkt tot 2.
PROBLEEMOPLOSSING PROBLEEM MOGELIJKE OORZAAK OPLOSSING De SLIDES 2 PC wordt niet herkend door de PC SLIDES 2 PC niet aangesloten op een USB 2.0poort De PC dient over USB 2.0 te beschikken om met de SLIDES 2 PC te kunnen communiceren. Controleer of USB 2.0 op de PC is geïnstalleerd. Als dit niet het geval is kunnen de USB-poorten van een upgrade worden voorzien. Deze hardware is bij de meeste elektronicazaken verkrijgbaar. Er verschijnt een windowsbericht "Windows kan Omni SuperCam niet laden".
MANUAL VERSION 1.
www.ion-audio.