ioSafe® Solo Hawk Waterproof Portable Storage Device User Manual
ioSafe Solo Hawk User Manual Table of Contents Section 1 General Information Page Number 3 1.1 Package Contents 3 1.2 Solo Hawk at a Glance 3 1.3 LED Behavior 4 1.4 Warnings and Notices 4 2 Connecting the ioSafe Solo Hawk 5 3 Usage with Windows® and Mac® Operating Systems 6 3.1 Usage with Windows Operating Systems 3.1.1 Formatting the Solo Hawk 3.1.2 Accessing or Disconnecting the Solo Hawk in Windows 3.2 Usage with macOS® 6 6 8 9 3.2.1 Formatting the Solo Hawk 9 3.2.
ioSafe Solo Hawk User Manual 1 General Information 1.1 Package Contents Check the package contents to verify that you have received the items below. Please contact CRU® if any items are missing or damaged. USB Type C Cable USB Type A-to-C Cable ioSafe Solo Hawk 1.
ioSafe Solo Hawk User Manual 1.3 LED Behavior LED Name Status Color Blue State Description Solid The unit is powered on and ready to go Blinking Indicates that the Solo Hawk is in use. 1.4 Warnings and Notices Please read the following before using the product. General Care • Avoid placing the unit close to large magnetic devices, high voltage devices, or near a heat source.
ioSafe Solo Hawk User Manual 2 Connecting the ioSafe Solo Hawk a. Connect a USB Type-C cable into the ioSafe Solo Hawk’s type C port. b. Connect the other end of the USB cable into your computer. After a moment, the Solo Hawk will be detected by your computer. Your Solo Hawk is now ready to use! If you are using the Solo Hawk with a Mac, you will need to reformat it so that you can write files to it. See Section 3 for information on how to format the SSD using macOS.
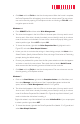
ioSafe Solo Hawk User Manual 3 Usage with Windows and Mac Operating Systems 3.1 Usage with Windows Operating Systems 3.1.1 Formatting the Solo Hawk Following the steps below for your specific Windows operating system to reformat your Solo Hawk. The Solo Hawk will work with Windows right out of the box without needing to format it. You may skip this section if you are setting up the Solo Hawk to work with Windows. Windows 10 a. Right-click on the Start Button and then select Disk Management. b.
ioSafe Solo Hawk User Manual 7 e. Click Next and then Finish to start the format process. When the format is complete, the Drive Properties Box will update to show the new volume name. The new volume can now be found by opening a File Explorer window and clicking on This PC in the navigation pane to the left. Windows 8.1 a. Press WINKEY + X and then select Disk Management. b. The drive should appear in the list of Disks in the lower pane. You may need to scroll down to see it.
ioSafe Solo Hawk User Manual Figure 8. The Disk Management pane in Windows 7. d. Unless you wish to customize the settings in these dialog prompts, click Next on the Select Partition, Specify Volume/Partition Size, and Assign Drive Letter or Path dialog prompts, leaving the default settings. e. Choose your preferred file system from the file system selection window that appears and enter a name for the new volume.
ioSafe Solo Hawk User Manual correct icon. Windows will indicate when it is safe to disconnect the USB cable from the Solo Hawk. Figure 9. The USB Plug icon in the Windows 10 Desktop task bar. Disconnecting the Solo Hawk while Windows is actively reading or writing to the volume can result in data loss. Wait for the Status Light to stop blinking before disconnecting it. 3.2 Usage with macOS 3.2.
ioSafe Solo Hawk User Manual 3.2.2 Accessing or Disconnecting the Solo Hawk in macOS If the Solo Hawk is already formatted, an icon representing it will appear on the desktop. You can begin using the Solo Hawk right away. If it’s unformatted, a message will appear on the desktop saying that the disk is unreadable. Use Disk Utility to easily format the drive (see Section 3.2.1).
ioSafe Solo Hawk User Manual 4 Securing the ioSafe Solo Hawk For drive security, the ioSafe Solo Hawk is equipped with a Kensington security slot, which supports a standard Kensington security cable (sold separately). For more information on the Kensington security slot and available products, visit kensington.com.
ioSafe Solo Hawk User Manual 5 Backup Software Upon proper activation of your Data Recovery Service, qualified users can download: Genie Timeline Professional ($60 Value) — Award winning backup software for Windows. Simple, block level, open file and OS Continuous Data Protection (CDP) software for Windows users. DRS Activation is required at iosafe.com to validate purchase prior to downloading software and install code (see Section 6.1).
ioSafe Solo Hawk User Manual 13 6 Product Support Congratulations! You are now ready to manage and enjoy all the features of your ioSafe Solo Hawk device. For more information regarding specific features, please refer to our online resources available at iosafe.com. 6.1 Activate Data Recovery Service Protection Register your product to activate your Data Recovery Service protection plan and warranty by visiting iosafe.com/activate. 6.
ioSafe Solo Hawk User Manual c. Follow ioSafe team instructions on proper packaging. d. CRU will recover all data which is recoverable according to the terms of the Data Recovery Service Terms and Conditions. e. CRU will then place any recovered data on a replacement ioSafe device. f. CRU will ship the replacement ioSafe device back to the original user. g.
ioSafe Solo Hawk User Manual 7 Technical Specifications Product Model ioSafe Solo Hawk Water Protection IP68 compliant Fully submersed, fresh or salt water, 10 foot depth, 72 hours No cap is required over the connector to retain data protection. Protection is maintained even if the drive is plugged into a host computer Drop/Shock Protection Compliant with MIL-STD-810G Method 516.
©2019 CRU Acquisition Group LLC, ALL RIGHTS RESERVED. CRU®, ioSafe®, Protecting Your Data™ and No-Hassle™ are trademarks of CRU Acquisition Group, LLC and are protected by trademark law. Kensington® is a registered trademark of Kensington Computer Products Group. Apple®, Mac®, macOS®, and Time Machine® are registered trademarks of Apple. Product Warranty CRU warrants this product to be free of significant defects in material and workmanship for a period of two (2) years from the original date of purchase.