
Installation Guide
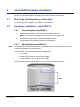
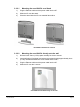
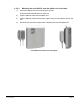
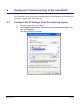
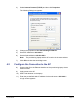
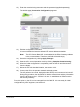
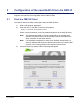
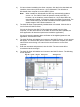
Table Of Contents
- nano3GAP Installation Manual
- 1 Introduction
- 2 Installation Requirements
- 3 nano3GAP Hardware Installation
- 4 Deployment Commissioning of the nano3GAP
- 5 Configuration of the nano3GAP-4 from the OMC-R
- 6 Troubleshooting
- 7 nano3GAP and PSU Regulatory Information
- 8 Appendices
- 8.1 Appendix A - Example AP Configuration File
- 8.2 Appendix B - Licenses and Copyright Notices
- 8.2.1 asn1c
- 8.2.2 bash
- 8.2.3 BusyBox
- 8.2.4 cramfs
- 8.2.5 dropbear
- 8.2.6 glibc
- 8.2.7 gmp
- 8.2.8 ipkg
- 8.2.9 iproute2
- 8.2.10 iptables
- 8.2.11 libcurl
- 8.2.12 libgcc
- 8.2.13 libpcap
- 8.2.14 libxml2
- 8.2.15 Linux Kernel
- 8.2.16 mtd.utils
- 8.2.17 ncurses
- 8.2.18 NTP daemon
- 8.2.19 pcre
- 8.2.20 procps
- 8.2.21 SSL Stack
- 8.2.22 StrongSwan
- 8.2.23 TCL
- 8.2.24 tcpdump
- 8.2.25 thttpd
- 8.2.26 U-Boot
- 8.2.27 zlib
- 8.2.28 General Licenses

nano3GAP Installation Manual Configuration of the nano3GAP-4 from the OMC-R
© ip.access Ltd Page 15
5 Configuration of the nano3GAP-4 from the OMC-R
The nano3GAP-4 needs to be configured before it is brought into service. The NOC
engineer must perform the configuration via the OMC-R Client.
5.1 Start the OMC-R Client
The OMC-R Server provides a web page to start the OMC-R Client.
1) Start a web browser application.
2) Enter the URL for the OMC-R server’s web page as:
http://<server-hostname>/omcr
Where <server-hostname> is the fully qualified hostname of the OMC-R server.
Note: This assumes that DNS is correctly configured on the management
network: the OMC-R server can be found by using its host name from
client computers on the same network.
Note: If a redundant configuration is used, the IP address entered here is a
virtual IP address that will ensure that the connection to the active OMC-
R Server can be set up without further actions from the client.
3) Press the Enter key and the OMC-R web page will appear.