IPitomy 1000 User Guide
Table of Contents Introduction .................................................................................................................................... 1 About the IPitomy 1000................................................................................................................ 1 Benefits of VoIP Technology........................................................................................................ 1 How This Guide Works ......................................................
Networking ................................................................................................................................. 13 TCP/IP Settings ...................................................................................................................... 14 DDNS ..................................................................................................................................... 18 MAC Clone ..............................................................................
Appendix 1: IP Telephones....................................................................................................... 106 IPitomy 480i ............................................................................................................................. 106 IPitomy 9133i ........................................................................................................................... 106 IPitomy 9112i ................................................................................
Introduction About the IPitomy 1000 The IPitomy 1000 is a powerful business communications platform. It is a pure IP PBX designed to use IP networks for voice calls. Engineered to support from 10 to 150 users, the system will work with analog lines and T1 /PRI lines for traditional Public Switched Telephone Network (PSTN) connectivity.
How This Guide Works Web-based System Setup This is a Reference Guide designed to help you install and use the IPitomy 1000. Each section of the guide provides easy-to-follow instructions regarding installation of the system. Within each section of the Reference Guide you will find: Step-by-Step Instructions – Use these easy-to-follow steps as part of any system implementation. Advanced Settings – These options are settings for handling some of the more sophisticated capabilities of the IPitomy 1000.
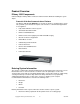
Product Overview IPitomy 1000 Components Understanding the IPitomy 1000’s architecture and how it works will make installing the system simple. Powerful All-In-One Communications Platform The IPitomy 1000 IP PBX (Diagram 1) is an all-in-one business communications system.
Groups and extensions will be populated for creating automated attendant (menu) routing. Destinations will be populated for use in setting up providers and hardware trunks. System Administration IPitomy 1000’s administration menus are a series of Web pages accessible from a Web browser. To the left of the Menu is a navigation bar that allows users to click on and administer each section of the system. Administration of the IPitomy 1000 is simple and intuitive.
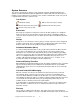
System Overview The system is designed to be quick to setup and install. Using the Installation Worksheet to organize system information and plan the application in advance will reduce the time it takes to install the system. Most businesses will have some common communication needs. The system is organized based on these common needs. Icon System - Edit main settings. - Edit an extension’s phone settings. - Delete an item from the system. - Download a file from the system.
name of the party they would like to reach. Names that match these three letters are played and the caller selects the extension to which they want to be transferred. Names are stated in the directory as they have been recorded by users in their voicemail box. Direct Inward Dialing (DID) Numbers A Direct Inward Dialed (DID) number is a telephone number assigned by a service provider (i.e., T1 line, PRI or VoIP). DIDs allow direct routing of a call to a destination within the system.
Before Getting Started Planning before getting started will make the setup and installation of the IPitomy 1000 simple. IPitomy has created an Installation Worksheet to assist in recording business and system information used in planning system setup and installation. This Checklist can be downloaded from IPitomy.com in the Dealer Section of the Web site. Connecting the System Hardware Setup The IPitomy 1000 comes assembled and ready to install.
Expandable Analog Line/Phone Card The IP1000 equipped an expansion slot: Analog Line Card − This card supplies four analog lines to expand the PSTN connectivity. The card supporting these connections is already installed and completely configured. Simply connect the phone lines to the RJ11 jacks at the rear of the IP1000 and start making calls. These connections are single pair; one line per jack. Connecting Using an External Gateway PSTN lines are connected to a Gateway device.
Connecting to a LAN Copyright © IPitomy Communication, LLC 9 0007VRF
System Requirements Network Requirements Making preparations for the network in advance will assure there are no surprises. If you are going to have remote extensions, you will need access to the router to setup a network address translation (NAT) and port forwarding. A LAN with a broadband connection is required for operation of the system. It is must be on fast Ethernet (100baseT or better). The system must also use Ethernet data switches.
As part of the installation it will be important to know the: Name of Providers Type of Service Provided (i.e., POTS or SIP) Phone Numbers Associated with the Service Password and Login Information for SIP Service Record this information on the IP1000 Installation Worksheet.
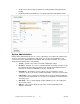
System Administration About the Administration Menu IP1000’s online administration makes it simple to meet the demands of a frequently changing business. It is also designed to be quick to setup and install. The Administration Menu is located in the Navigation Bar to the left of the page. This menu contains the administration pages used to configure the system. The Administration Menu is divided into six sections. To navigate to an Administration Page click on the menu section and page to be changed.
schedule. For example, to add a new extension, click the Add New button on the extension administration page. Advanced – In several sections of the online administration there is an Advanced button where the most sophisticated capabilities of the IPitomy 1000 can be configured. The Advanced button is located on the lower left side of each page. About Us – Located at the bottom left corner of each page, this link provides additional information about IPitomy.
TCP/IP Settings The Networking Setup Menu defines the Internet Setup for the system’s hardware. Either to get IP address through DHCP or PPPoE, or to be assigned by user, the system must operate using an IP address. The TCP/IP Settings section configures the IP PBX for your Internet connection type. This information can be obtained from the service provider.
Setting Internet Connection Type The IP1000 supports six connection types: Automatic Configuration – DHCP, Static IP, PPPoE, PPTP, L2TP, and Telstra Cable. Each setup screen and available features will differ depending on what kind of connection type you select. Automatic Configuration (DHCP) – By default, the IP1000’s Internet Connection Type is set to Automatic Configuration (DHCP), and it should be used only if your ISP supports DHCP or you are connecting through a dynamic IP address.
PPPoE –Some DSL service providers use PPPoE (Point-to-Point Protocol over Ethernet) to establish Internet connections for end-users. If DSL connection to Internet is using, check service provider for the connection provisioning type. Enable it if PPPoE is used. o User Name and Password – Enter the user name and password provided by service provider. User name and password will be used for authentication while establishing PPPoE connection.
o User Name and Password – Enter the user name and password provided by service provider. User name and password will be used for authentication while establishing PPTP connection. o Max Idle Time and Connect on Demand – If the connection stay inactive for over a specific period time (Max Idle Time) the PPPoE connection may be cut off. Assign 0 to Max Idle Time field will always keep the connection no matter it is active or not.
192.168.1.1, the Start IP Address must be one between 192.168.1.2 and 192.168.1.254. The default Start IP Address is 192.168.1.100 Minimum Number of Users – The maximum number of IP addresses that allow the DHCP server to assign to. This number cannot exceed 253. The default number is 50. Client Lease Time – The Client Lease Time is the amount of time a network device will be allowed to use the dynamically assigned IP address by IP1000.
DynDNS.org o User Name, Password and Host Name – Enter the settings of the account you set up with DynDNS.org. o System – Select the DynDNS service you use: Dynamic, Static, or Custom. o Mail Exchange – Enter the settings of the account set up with DynDNS.org. o Backup MX – This feature allows the mail exchange server to be a backup. By default, this feature is Enabled. To disable this feature, select Disabled. o WildCard – This setting is for enabling or disabling wildcards.
o E-mail Address, TZO Password, and Domain Name – Enter the settings of the account set up with TZO. o Internet IP Address – The IP1000’s Internet IP address is displayed here. o Status – The status of the DDNS service connection is displayed here. o Update – To manually trigger an update, click this button. MAC Clone A MAC address is a 12-digit code assigned to a unique piece of hardware for identification, like a social security number.
NAT If IP1000 is hosting your network’s connection to the Internet, select Enabled. If another Router exists in front of IP1000, select Disabled. When the NAT setting is disabled, dynamic routing will be enabled. Dynamic Routing (RIP) This feature enables the IP1000 to automatically adjust to physical changes in the network’s layout and exchange routing tables with the other router(s).
Interface – Select LAN or WAN (Internet) depending on the location of the final destination. Delete This Entry To delete a route, select its number from the drop-down menu, and click this button. Show Routing Table Click the Show Routing Table button to open a screen displaying how data is routed through your local network. For each route, the Destination LAN IP address, Subnet Mask, Gateway, and Interface are displayed. Click the Refresh button to update the information.
Allow Remote IAX Clients – Enabling Allow Remote IAX Clients setting will allow the IAX packets to pass through the firewall. This will allow the IP1000 to setup a peer-to-peer connection with another IP1000. To enable the IAX peer-to-peer communication with remote IP PBX, select Enabled. Otherwise, select Disabled. Internet Filter Filter Anonymous Internet Requests – When enabled, this feature protects the network behind IP1000 from being “pinged” or detected by other Internet users.
IPSec Passthrough – IPSec (Internet Protocol Security) is a suite of protocols used to implement secure exchange of packets at the IP layer. L2TP Passthrough – Layer 2 Tunneling Protocol is the method used to enable Point-to-Point Protocol (PPP) to be tunneled through an IP network. PPTP Passthrough – PPTP (Point-to-Point Tunneling Protocol) Passthrough allows the Point-to-Point Protocol (PPP) to be tunneled through an IP network.
Access Restriction Copyright © IPitomy Communication, LLC 25 0007VRF
Internet Access Policy The Internet Access Policy screen allows you to block or allow specific kinds of Internet applications and traffic such as Internet access, designated services, websites, and inbound traffic during specific days and times. Access Policy – Access can be managed by a policy by using the settings on this screen to establish an access policy. Selecting a policy from the drop-down menu will display that policy’s settings.
Application Forwarding Single Port On this screen, forwarding applications per port basis to specified network servers is customized. Once configured, the requests received from Internet for the configured application and through the specified port will be forwarded to the appropriate servers (computers). Before using forwarding, static IP addresses should be assigned to the designated servers (use the DHCP Reservation feature on the Networking/TCP/IP Settings screen).
Application Application screen sets up public services on local network, such as web servers, ftp servers, e-mail servers or other specialized Internet applications. (Specialized Internet applications are any applications that use Internet access to perform functions such as videoconferencing or online gaming. Some Internet applications may not require any forwarding.
Port Range This screen instructs the IP1000 to watch outward data for specific port numbers. The IP address of the computer that matched is remembered by IP1000, so that when the requested data returns through the IP PBX, the data is sent to the proper computer by way of IP address and port mapping rules. To add an application, complete the following fields: Application Name – Enter the name of the application Triggered Range – Enter the range of port numbers.
DMZ The DMZ screen allows one local user to be exposed to the Internet for use of a special purpose service such as Internet gaming and videoconferencing. DMZ hosting forwards all the ports at the same time to one PC. The Port Range Forwarding is more secure because only the configured ports are opened. If DMZ hosting opens all the ports of one computer, it exposes the computer to the Internet.
Internet Access Priority Select Enabled to use the QoS policy and system will allow user to setup the QoS policy. Administrators can choose to manually set the Internet bandwidth or let system to determine it automatically. Category There are four categories available. Select one of the following: Applications, Online Games, MAC Address, Ethernet Port, or Voice Device. In this section, you can select the bandwidth priority for a variety of applications and devices.
o Enter a Name – Enter any name to indicate the name of the entry. o Port Range – Enter the port range that the application will use. For example, if administrators want to allocate bandwidth for FTP, enter 21-21; if need services for an application that uses from 1000 to 1250, then enter 1000-1250. There are totally up to three ranges to define for this bandwidth allocation. Port numbers can range from 1 to 65535. Check your application’s documentation for details on the service ports used.
Priority – Select the appropriate priority: High, Medium, Normal, or Low. Click the Add button to save your changes. New entry will appear in the Summary List Summary This lists the QoS entries you have created for your applications and devices Priority – This displays the bandwidth priority of High, Medium, Normal, or Low. Name – This displays the application, device, or port name. Information – This displays the port range or MAC address entered for your entry.
Administration Administration The Administration screen allows user to change the IP PBX’s access settings and configure the UPnP (Universal Plug and Play) features as well as to backup and restore the IP PBX’s configuration data. Web Access Web Utility Access – HTTP (HyperText Transport Protocol) is the communications protocol used to connect to servers on the World Wide Web. HTTPS uses SSL (Secured Socket Layer) to encrypt transmitted data for higher security.
Web Utility Access – HTTP (Hyper Text Transport Protocol) is the communications protocol used to connect to servers on the World Wide Web. HTTPS uses SSL (Secured Socket Layer) to encrypt transmitted data for higher security. IP1000 supports two types of protocols, HTTP or HTTPS, for web access. Remote Upgrade – If remote upgrade from outside the local network is allowed, select Enabled. (You must have the Remote Management feature enabled as well.) Otherwise, keep the default setting, Disabled.
Log – To access activity logs, select the Enabled radio button. While logging is enabled, users can choose to view temporary logs. Click the Disabled button to disable this function View Log – To view the logs, click View Log, a new screen will appear with logged information shown on it. Four types of logging are supported, Incoming Log, Outgoing Log, Security Log or DHCP Client Log, choose one from the Type dropdown menu.
Ping Test – The Ping test will check the status of a connection. Enter the IP address or URL of the PC whose connection you wish to test, the packet size (default is 60 bytes), and how many times you wish to test it. Then, click the Start to Ping button. The Ping screen will then display the test results. Click the Close button to return to the Diagnostics screen.
Router Information Firmware Version – This shows version number of the IP1000’s firmware Current Time – This shows the time set on the IP1000 Internet MAC Address – This is the IP1000’s MAC address. Host Name – The Host Name entered when set TCP/IP Settings screen. Domain Name – The Domain Name entered when set TCP/IP Settings screen Internet Connection Connection Type – This indicates the type of Internet connection you are using.
MTU – Show the MTU (Maximum Transmission Unit) setting for the IP1000. IP Release – It is available for a DHCP connection, click this button to release the current IP address got from DHCP server. IP Renew – It is available for a DHCP connection, click this button to release the current IP address and get a new IP address from DHCP server. Local Network The local Network screen displays the information about the local network.
Analog Interface The Analog Interface screen is used to configure the on-board analog ports. In IP1000, it includes 2 FXS ports and 6 FXO ports. Each analog port uses SIP protocol to register to the SIP proxy server embedded in IP1000 SIP Settings This screen lets you configure the SIP server and the related parameters that the analog ports will register to. The SIP server address is the same gateway address of IP PBX, so you don’t need to specify the SIP server address.
Voice The Voice Settings screen is for selecting and configuring the FXO line settings. Answer Time – Specify the time in seconds that the analog ports wait for the called party to answer the call. If the called party does not answer the call within this time period, the call is terminated automatically. The default value is 180 seconds. Call Limit – Specify the maximum number of seconds for a call conversation. When the duration of a call exceeds this value, the call is terminated automatically.
Rx Gain –The FXO ports may increase or attenuate the power level of the telephony port, changing gain level manually may be required. This field allows user to set the receiver gain level in dB DTMF Power – Enter the desired value for the DTMF power that FXO ports dial toward PSTN. Each level for changing is 0.1dBm.The default value is -130*0.1 dB. This setting will only affect the DTMF tones sent by SIP INFO. Tone On – Specify the Tone-On time in millisecond for an out dialing DTMF digit.
Codec This screen is for selecting and configuring the voice codec, voice parameters. Codec Prefer Type – Select this preferred voice codec that analog ports (FXO and FXS ports) used to negotiate with SIP sever for determining the voice codec. Available codecs are G.711u, G.711a, and G.729. G711u_pkt – Select this packetization time for G.711u. The packetization time is the duration that the analog port samples voice signal and compresses it into a packet before sending to the remote SIP device.
Out_wait – Enter the time in milliseconds that the FXO port keeps waiting after seizing a telephony port and before dialing out DTMF signals. The default value is 1000 millisecond. Bat_vol – Before seizing a FXO port for dialing out, the FXO port detects voltage level on the port to ensure that the port is connected and available.
High Cutoff Frequency – Input the high cut-off frequency that the CP tone detection will take. The default value is 550 Hz Low Cutoff Frequency – Input the low cut-off frequency that the CP tone detection will take. The default value is 260 Hz. Reset Analog The Reset Analog button allows administrators to reset the analog ports including all FXS and FXO ports.
SIP Providers SIP Providers are VoIP service provider accounts or other SIP-based devices that provide PSTN connectivity. SIP provider accounts can have multiple phone numbers or Direct Inward Dialing numbers (DIDs). The individual numbers can be routed to different destinations within the system just like a trunk (T1 or plain old telephone line). SIP Provider settings vary widely. To simplify the provisioning process a list of SIP providers and their settings are below.
Add a New SIP Provider 1. Click on Providers and SIP Providers. The SIP Providers landing page will appear. 2. Click on Add Provider. The Edit SIP Providers page appears. 3. Assign a Name to the SIP Provider. 4. Select the User Type associated with the SIP Provider. 5. Select DTMF Mode associated with the SIP Provider.
6. For the Host enter the domain or IP address associated with the SIP Provider. 7. Select the Register option needed for the SIP Provider. Yes – automatically registers with provided settings. No – Doesn’t register. Custom – Allows for any special registration rules needed for the SIP provider. 8. Select Authentication Mode for the SIP Provider. Yes – automatically generates based upon provided settings. No – Doesn’t use authentication for the SIP Provider.
for reconnecting the call mid stream. 18. Select Insecure option from provided drop down list. This specifies how to handle connections with peers. Port - ignore the port number where authentication came from. INVITE do not require initial invite to authenticate. Port.Invite - do not require initial invite to authenticate and ignore the port where the request came from. Yes - To match a peer based by IP address only and not port. Very - To allow registered hosts to call without re-authenticating. 19.
23. Click the Save Changes button. 24. Click Apply Changes when ready to implement these changes to the system. Edit an Existing SIP Provider 1. Click on Providers and SIP Provider. The SIP Providers landing page will appear. 2. Select a provider from the list in the SIP Provider Window on the landing page. 3. Select a Provider by clicking on the Provider Name or Edit. 4. Make changes to the provider. 5. Click on Save Changes. 6. Click on Apply Changes when ready to implement these changes to the system.
number or you can check the messages by going through the voicemail gateway or dialing 924. Schedules route callers to different destinations or people in the organization during specified times and dates. Branch Office connections provide broadband access to other branch locations by dialing a short access code followed by the extension number. Branch Extensions can also be defined as part of a branch office.
are dictated by CODECs. Different CODECs compress voice packets differently. G.711 is the most common and highest quality, but consumes the most bandwidth. G.729 requires license fees to use in conjunction with the IPitomy 1000 services like voicemail, conferencing and music on hold. Voicemail Settings – Manages voicemail messaging and routing. Calling Permissions – Defines types of calls that can be originated, received and some advanced options like park and record calls.
Create Create new extensions for No selected phones. You can upload extension details in a file or manually enter information. Assign Assign existing extensions No to selected phones. Unassign Removes the configuration No file for the phone and all association between the extension and the phone. Unassign & Default Same as Unassign but also Yes sends a Factory Default instruction to the phone.
Select All, None, Invert Check or uncheck multiple No checkboxes with the click of a button. Refresh Scan the network for No devices. Scanning is done using the Advanced settings Scan in Settings. The scan results displayed depend on the active filters (controlled via Advanced Filter Settings). Filter Only Displays results of the last No network scan after applying the filters set in Advanced Filter Settings.
Advanced Filter Settings Filtering does not change how the network scanning is performed. It only limits the list of items displayed. This means that if you only want to change filters it is not necessary to re-scan the network. All of the network information from the last network scan is retained and used by filters. Sort Order Determine what order items are listed in. Hover your cursor over the help icon next to the Sort Order fields for options. Hide You can hide different device types from view.
attempt to scan the network more often than this you only get results stored from a previous scan. Maximum wait Maximum number of seconds to wait for all packets to return. Packet Count Number of packets to send. TX Interval Transmission interval between packets. Only meaningful when Packet Count is greater than 1. Minimum allowed value is 0.2 Batch Size Divide scanning range into batch jobs. Jobs are run sequentially. Each job will have at most pings running in parallel at a time.
commands. User Password Phone’s Web User Name & Password may have to be specified if the phone is not using factory default settings for these items. When these fields are blank Auto-Discovery uses default settings. Factory Default Wait Maximum seconds to wait for the phone to signal completion of a Factory Default. Troubleshooting Network Scanning Problems Scan settings have been tuned to work in a network environment with two switches and a router between the PBX and the phone.
the “Create” button. This takes you to the Extension Creation page. 3. Enter the new extension information or upload a CSV file for the extensions. Then Click the “Create” button. If successful, Click the “Return to Extensions” button. 4. Click the “Auto-Discovery” button. 5. All of the phones you are attempting to setup are highlighted. Click the checkboxes next to these phones (verifying that you are only checking the ones from step 2.). 6. Click the “Factory Default”.
5. Check the Auto Number check box. 6. If Auto-Discovery is going to be used skip to Step7. If Auto Discovery is not going to be used than fill in all the pertinent information for each extension. 7. Click the Create button. 8. The screen that follows displays the results of each extension. If satisfied with the results click “Return to Extensions”. Phone Settings This tool allows you to modify a phone’s keys. It includes support for all Aastra model phones.
(Add up to 180 keys) 57i 30 Yes 536EM & 560EM (Add up to 180 keys) Phones with top and bottom key areas will display shortcut links for Top & Bottom. The total number of keys displayed on the phone at any moment depends not only on the display area available, but also on the state of the phone lines (see Key State for more information). Expansion modules display a fixed number of keys and are not limited by state.
Fwd Off Forwarding Off Set Fwd Set Forwarding Number Fwd Gateway Park Menu Intercom Directory Callers Services Tip: Keys will only work if the System Administrator has configured the system for the particular function. Key Label The label is the display name to use for the key. It is visible on the phone’s LCD screen (except for models 9112i and 9113i). Key Value The value completes a key’s function. It may contain a number to dial special codes or allow you to select an extension from a dropdown list.
Incoming A call is ringing the extension. Outgoing A call is being placed from the extension. To program a key’s state: Check the desired boxes (any of: Idle, Connected, Incoming, Outgoing). If no boxes are available for checking it means that the key will always be active. Advanced Settings Custom Sip Settings Network *LAN *WAN *Custom Server The IP address or name of the server to use for the Network type selected. A user must use the Custom Network type to set a user defined Server.
*US-Pacific *US-Alaska *US-Aleutian *US-Hawaii Volume Controls Headset Transmit Gain This is the audio volume level (dB) transmitted by the PBX to the phone. Headset Side Tone Gain This is the audio volume level (dB) of your voice signal sent back into your ear so you can hear yourself talk and know that the line is not dead. Handset Transmit Gain This is the audio volume level (dB) transmitted by the PBX to the phone.
When a phone has a Module Type set you will see the Module Type name and quick links to module keys at the top of the page. The most advanced module is the 560 EM. Its LCD screen displays button names in two columns. Each column can be given a name via Phone Settings. Module Descriptions and Options: o 560 Expansion Module This module has 60 keys. It has a LCD screen split into two columns. There are 20 physical keys (10 per column) plus buttons to switch screens.
3. Insert the Name or department associated with the extension being created. 4. Create an Extension Number for this person or department. 5. Populate the Email address for the person or extension. This will allow the system to forward email messages to the address of the person at the extension. 6. Select a status from the drop-down menu. An extension can be: -Active – Currently in use. -Disabled – Not currently in use. 7. Create a voicemail PIN for the extension.
Groups can answer calls to this extension. 11. Create a Pickup Group. This number must match the Call Group number(s). It defines the Call Group Numbers this extension can pickup remotely by pressing 99. 12. Click Apply Schedule. When an extension is created, a schedule destination is created. This schedule is not activated until the Apply Schedule box is selected.
4. Enter the telephone number. Changing a Forwarding Number While Away from an Extension Only unconditional forwarding can be changed from a touch-tone keypad. When it is necessary to modify the forwarding setting while away from the office, the IPitomy 1000 has a forwarding application built into the system. It is necessary to have an automated attendant menu accessible from outside the system. The forwarding gateway is selectable as an option from the menu.
Copyright © IPitomy Communication, LLC 68 0007VRF
Phone Type It is necessary to enter the MAC address of each telephone. The telephones have a barcode with the MAC ID printed on them. The phone type is a drop down list for selecting which IP phone hardware is being used on the extension. IPitomy supports Aastra® and Polycom® phones and will be adding additional phone types in the future. When the phone type is selected, another configuration option is available to program the button mapping of each telephone model.
CODEC Permissions (Allow CODECs) These transmission speeds are delivered by the service provider and automatically register in the extension through the system. These extension defaults should not be changed. Voicemail Settings These settings manage voicemail messaging and routing. When a voicemail box is created with an extension, it is not possible to change the voicemail box in the extension screen.
Allow Incoming Intercom Paging – Permits a page to be heard through this extension. Allow Outgoing Intercom Paging – Permits a page to be made through this extension. Allow User to Forward Calls – Permits an extension to forward a call or voicemail message to another extension on the system. Allow User to Record Calls – Permits the extension to record phone conversations. Allow User to Monitor Calls – Permits a user to listen to another extension’s (person’s) phone calls.
Park- This key will park the call in an available park assignment. Voicemail- This button will take the caller to their voicemail login. Pause- Is a BLF Key that can be assigned to a letter and the Extension number to indicate when an Agent in the ACD is paused. Pause is the equivalent of DND except it refers to Agents in a queue.
Create an extension or extensions to be used by IP550 phones by browsing to Destinations and then Extensions and create either a single extension or a group of extensions to be utilized. You can also use the Import .CSV feature. This import feature is particularly relevant with Auto-Provisioning as you can in almost a single step import the Extensions list and create extensions.
For further instruction on the .CSV feature please refer to the Product Installation Manual for the PBX product that you are installing. Once you have created your extensions then edit the extensions, and browse to Advanced and set the phone type to IP550. The remainder of the configuration is done via the Phone interface. You must access the Menu button of the phone to be Auto-Provisioned. Then select option 7. You can do this without using the scroll keys by just pressing Menu then 7.
interface It should also be noted that you can always perform the standard Auto-Discovery that has been available for Aastra Phone sets. This process can now be performed on IP550 also. It is the same as discussed in the Auto-Discovery section of the Manual. Make you appropriate button changes from this screen and then select Save and Restart the Phone. Once the phone restarts the new buttons should be accessible.
mapping feature via the Smart Personal Console simply log in to your SPC, then browse to My Account and then access the My Phone Settings Link. Groups The Group function allows incoming calls to be distributed to a group of extensions rather than just one extension. Within the Group function, different distributions strategies may be selected based on the call coverage required by the application. Groups can be intercom paging groups too.
Service Cathy Caldwell 123 Gretchen Goodall 134 David Dawson 124 Peter Polk 135 Susan Smith 125 Robert Reed 126 Using this ring group scenario the Menu would look like: Sales (Destination - Group 1). Customer Service (Destination - Group 2). Office Manager (Destination - Ext. 113). The menu prompt for this menu and group arrangement would read as follows: Thank you for calling ATI Connect a leading manufacturer of cable assemblies and wiring harnesses.
East Coast Sales, press 1. West Coast Sales, press 2. Customer Service, press 3. Accounting, press 4. Calls sent to these groups might use different ring strategies. The East Coast Sales group might answer calls Round Robin, distributing the calls to each Sale Representative consecutively. If a sales person is missing from the West Coast team this group might set phones to Ring All in the group so that calls don’t get missed.
Ring All – Ring all phones in the group. Round Robin – Distributes calls to extensions consecutively one after the other. Delivers a new call to the first person in the group only after the last person in the group has taken a call. If an extension is busy the call will automatically be routed to the next extension in the group. Round Robin (with memory) – Distributes calls to extensions consecutively one after the other.
5. Click Apply Changes when ready to implement changes to the system. Delete a Group 1. Click on Destinations and Groups. The Groups page will appear. 2. Click Delete. The Group will be removed. Menus Menus direct callers to destinations within a business. A menu can route a caller to a destination once a number on a key-pad has been pressed. A menu prompt tells a caller what number to press to get to a desired destination.
This menu example is used to automatically route callers to the destination (person or group) they would like to speak to. The automated attendant helps minimize the number of calls to the receptionist and frees up time for other tasks. A Main Menu for this company might be listed as follows: Sales (Destination - Group 1). Customer Service (Destination - Group 2). Office Manager (Destination - Ext. 113).
When a caller pressed “1” they would hear a menu prompt for Menu 2: For sales in: New York, press 1. Florida, press 2. California, press 3. Arizona, press 4. In Menu 1 Customer Service might use a Ring All strategy, which would allow the first available Customer Service Representative to pick up a call. In Menu 2 calls would be directed to specific Representatives. The Company can set the fail over Destination to Group 1 (Sales) and set the ring strategy for this group to Ring All.
Advanced Menu Settings Advanced menu settings create rules by which the menu will operate. They also permit other dialing options if callers do not want to use the menu to reach a destination within the business. Response Time Out Enter the number of seconds the system will wait for a menu selection from the caller after the greeting (prompt). Digit Time Out Enter the number of seconds the system will wait for a digit to be pressed by a caller after the greeting (prompt).
can also control how callers enter the conference. If the “Announce on enter” checkbox is checked, callers will be prompted to record their name as they enter the conference room. The new participants name will be announced to other participants in the conference. If the “Enter Muted” checkbox is checked, conference callers will enter the conference with their phones muted. Users may press the (*1) to disable muting or enable muting on their telephones during the conference call.
5. Check “Announce on enter” if caller’s should announce their names to other participants in the conference. 6. Check “Enter Muted” if callers should enter the conference with their phones muted. 7. Click on Save Changes. 8. Click on Apply Changes when ready to implement the changes to the system. Meet-me Conferences Features Conference Calling offers several features that are available to participants in the conference.
Creating a Voicemail Box Without An Associated Extension 1. Click Destinations and Voicemail. The Voicemail page will appear with any extensions that have already been created. 2. Click Add Mailbox. The Edit Voicemail page will appear. 3. Enter the Mailbox Number. Be sure to verify that the number you select is not being used for a conference (extensions 901 and 902), a group or an existing extension within the organization. 4. Enter the User’s Name of the Mailbox. 5. Enter a Password for the Mailbox. 6.
Delete a Voicemail Box 1. Click on Destinations and Voicemail. The Menus page will appear. 2. Click Delete. The Voicemail box will be removed. Schedules A schedule is a destination. A schedule defines the destination to which calls are to be routed for a specified time period. A schedule can be used to define when a business, department, group or extension is open, closed or out to lunch. The IPitomy 1000 automatically creates a schedule when an extension is provisioned in the system.
Groups, Extensions, Locations in the Business (Conference Rooms), People, Voicemail Boxes, or Branch Offices (other office locations). 6. Check Apply Forward Settings. This will apply the Forward Settings established within each destination. Note there are only forwarding settings on extensions currently, so this will not effect destinations that do not have forwarding settings. 7. Select a destination for calls that are “Outside of Hours.” 8. Check Apply Forward Settings. 9.
Deleting a Holiday 1. Click on Destinations and Schedules. The Schedules page will appear. 2. Click the Schedule Name containing the Holiday to be deleted. 3. In the Holidays section, highlight the Holiday name you want to delete. 4. Click the “remove” button. 5. Click the “Save Changes” button. Branch Offices Branch Offices is a powerful tool that is used to link up multiple PBX’s located in external offices.
8. Leave qualify at 30000. 9. Click Save Changes 10. Click Apply Changes Configuring Office 2 1. Click on Destinations and Branch Offices. The Branch Offices page will appear. 2. Click on Add Office. 3. Name should match that given to the Office 1 PBX. The name should only contain alpha-numeric characters and no spaces. 4. Host needs to be the external IP address or domain corresponding to the IP of the main office PBX. 5. Create a unique dialing prefix for the extensions connected to the Office 2 PBX. 6.
Branch Extensions can also be added to a branch office. These extensions are created through the add extension field at the bottom of the branch office edit page. Branch extensions can be dialed directly without a prefix, provided that these extensions are properly configured on the PBX for which the branch extensions are defined. Branch extensions will appear in call routing drop down lists throughout the system after they are created. Configuring Office 2 with branch extensions 1.
destination for all calls. Setting the Default Incoming Destination To set the Default Incoming Destination: 1. Click on Call Routing and Incoming. The Incoming Call Routing page will appear. 2. Select a Default Incoming Destination from the drop-down box. 3. Click the Set button. 4. Click the Save Changes button. Defining the Service Provider Destination A service provider destination can also be defined. The service provider destination acts as the default incoming destination for a particular provider.
10 digit dialing 11 digit (1+ dialing) International Emergency Calls Custom Dialing These routes cannot be deleted from the system. Adding A New Call Subroute A sub route is a specific pattern within a route type that will be routed differently from other routes. For instance, if you add 858 as a route to 10 digit or 11 digit dialing, you can define the trunks that specifically route to that area code.
Adding a Service Provider 1. Select a service provider from the drop-down box to the left of the Trunks list. 2. Click Add. The service provider will appear in the list. 3. Click on the Name of the provider. 4. Click the Up or Down button to position the service provider in the list in the order calls are to be routed over this resource. Deleting a Service Provider 1. Click on a Service Provider in the list. 2. Click Delete. 3. Click on Save Changes. 4.
7. Select Mailbox Exit destination – this is the destination calls will be routed to when leaving a voicemail box. 8. Select Directory Type – this is the type of directory to use for the Directory destination. 9. Click on Save Changes. 10. Click on Apply Changes when ready to implement changes to the system. Database The IPitomy 1000 is like a computer, in that; information can be stored in the system or backed up in case it goes down.
Deleting a Backup Version from the System 1. Click on PBX Setup and Database. The Database Setup page will appear. 2. To delete a copy of the System’s Setup from the internal database, select the Backup version to be deleted from the Database Window Delete button. This will delete the version of the and click the System’s Setup selected. 3. To delete a copy of the System’s Setup from an external source, use the delete function of the operating system or throw away the CD that contains the Backup file.
Voicemail Settings 1. Select and enter Voicemail Menu settings: Play the Envelope Message – This is the Time and Date of the call. Say Caller ID – This plays the caller’s phone number when available. Skip MS on Playback – This is the interval (in Milliseconds) that voicemail will skip forward or backward on playback. This number must be between 1 and 4.
* There is no guarantee that an external mail server will work, some ISP’s or hosts may have mail filters and could block a message. Advanced Settings Allow Review – Allows users to review a message after it has been played. Allow Operator – Allows people calling this mailbox to press ‘0’ to go to the system operator destination. Voicemail Archive Download Creates a backup of all user Voicemail messages, message envelopes and greeting files. The backup file is downloaded to your computer.
Advanced Settings Advanced SIP settings define in more detail the management of network traffic. These settings are automatically provisioned when the system registers with the router. In most business implementations it is not necessary to make changes to these settings. Prompts A prompt or greeting can welcome a caller to the business, direct them to a destination, provide instructions or deliver information. The IPitomy 1000 makes managing prompts easy. Upload Voice Prompt 1.
Download a Prompt 1. Click PBX Setup and Prompts. The Edit Prompts page will appear. 2. Select a prompt from the Prompt Files on Server Window. 3. Click Download. The prompt will download. Delete a Prompt 1. Click PBX Setup and Prompts. The Edit Prompts page will appear. 2. Select a prompt from the Prompt Files on Server Window. 3. Click Delete. The prompt will be deleted from the list. 4. Click Save Changes. 5. Click Apply Changes when ready to implement these changes to the system.
5. Click Save Changes. 6. Select Browse and locate the music file to be uploaded. 7. Open the file using the operating system. The file will appear in the Load This Music File Window. 8. Click on Upload File. The file will appear under the play list of which it was uploaded too. Edit Existing Music Files 1. Click PBX Setup and Music on Hold. The Music on Hold page will appear. 2. Select a music file from the Music on Hold Main page. 3. Select a play list by clicking on the play list Name or Edit. 4.
Feature Codes Found in the PBX Setup section of online administration, the IPitomy 1000 provides a set of system feature codes. These codes allow system users to manually manage calls from an extension. To access these feature codes. Click PBX Setup and Feature Codes. The Feature Code Chart will appear. Note that the feature descriptions in online administration can be found by sliding a mouse over the “?” next to the feature code.
Report for the IPitomy 1000 tracks: Date/Time – The date and time of the call. From – The telephone number where the call is from. Destination – The extension, voicemail box or group to which the call is going. Trunk – The phone number the call came in on. Duration – The length of the call in hours, minutes and seconds. Status – A description of what happened to the call once it reached its destination (e.g., Not Answered, Disconnected or Successful).
Recordings The Recordings section allows you to: o Listen to recordings. o Download recordings. o Delete recordings. This page will display all recorded calls on the PBX. Only extensions with allow call recording selected are able to use this feature.
Appendices Copyright © IPitomy Communication, LLC 105 0007VRF
Appendix 1: IP Telephones IPitomy 480i The Model 408i is an advanced, fully featured, IP screen Telephone that provides a flexible IP solution designed with interoperability and ease of use in mind. IPitomy 9133i The Model 9133i is an advanced, fully featured multi-line IP Telephone that takes full advantage of VoIP technology by offering a flexible, interoperable solution at an affordable price.
IPitomy 480i CT IPitomy Communications is pleased to announce the newest addition to our Enterprise IP telephone portfolio. Consisting of an advanced, fully featured IP screen Telephone base station and separate cordless handset, the Model 408i CT provides high performance VoIP cordless mobility within an office or warehouse. IPitomy 53i The 53i from IPitomy offers powerful features and flexibility in a standards based carrier-grade basic level IP telephone.
IPitomy 550 The IPitomy IP550 Sip based telephone is designed for busy business environments. The IP550 is the workhorse phone for any business with a wide range of telecommunications requirements. Equally at home on the desk of a corporate executive or on a conference table, the IP550 fits just about any business situation. The IP550 is an advanced open standards business telephone.
IPitomy 57i CT The 57i CT from IPitomy offers powerful features and flexibility in a standards based, carriergrade advanced level, expandable, IP telephone that includes an integrated WDCT cordless mobility handset for coverage up to 300,000 sq ft.
calls on a regular basis, the 5i Series Expansion Modules provide an intelligent choice for all Enterprise IP environments. Detailed information regarding these phones including technical specifications can be found at www.aastra.com. CounterPath™ eyeBeam® 1.5 and X-Lite® 3.0 What is a Softphone? CounterPath’s eyeBeam® 1.5 and X-Lite® 3.0 are Web-based telephones that operate from a PC.
Performance management of the SIP end-point (Softphone). High compression CODEC support. Softphone Installation 1. Download the CounterPath™ Softphone to be used with the system from www.counterpath.com. The installation utility will install a phone icon in the toolbar of the operating system. It looks like a green light. 2. Left click the Softphone Icon in the operating system toolbar. The Softphone will appear. 3.
17. Select a status from the drop-down menu. An extension can be: Active – Currently in use. Disabled – Not currently in use. 18. Create a voicemail PIN for the extension. PIN numbers must be between 3 and 4 characters long. The default setting is for the PIN to be the extension number. Be sure to instruct users to change the PIN to avoid unauthorized use. 19. Enter a Ring Time. This is the time in seconds that a call will ring before it is considered unanswered.
o Select Enabled or Disabled. Disabled turns the forward setting off. Enabled turns the forward setting on. If the Forward setting is Enabled, you can choose to select a destination from the drop-down list. The IPitomy 1000 allows calls to be forwarded to a PSTN. Forward calls to a PSTN number by entering it into the field provided. Calls can be forwarded to any destination (or telephone number) in the drop-down list or any telephone number.
Appendix 2: Troubleshooting Why does my Aastra phone freeze with 100% done written on the screen? The phone is attempting to access an unreachable network. You need to manually change the TFTP server IP on the phone to match the PBX IP. Also make sure that PBX Network Settings IP matches your actual PBX IP. If it does not, change it and SAVE the change. Make sure that the PBX Sip IP has been properly set: 1. Change the setting in PBX Setup / SIP. 2. Click on "Apply Changes". 3. Restart the phone.
Glossary Analogue Telephone Adapter (ATA) – Connects a telephone to a high-speed modem and facilitates VoIP or fax calls over the internet. Backbone – Global network connections that route voice and data traffic from one major metropolitan area to another. Bandwidth – The transmission capacity of a given device or network. Broadband – An internet connection that is always-on and fast. Browser – A software application that allows users to view and navigate to information on the Web.
Packet – A unit of data transmitted over a network. Park – Parks a call in a reserved extension (park slot) and allows the call to be retrieved from another extension. PRI (Primary Rate Interface) – ISDN service provides 23 64-Kbps B (Bearer) channels and one 64-Kbps D (Data) channel (23 B and D). The D Channel is used for control in signaling information. Private Branch Exchange (PBX) – An in-house telephone system that connects extensions and the Public Switched Telephone Network.
IPitomy Communications, LLC Phone: 941.306.2200 Email: info@ipitomy.com www.ipitomy.com Corporate Offices: 200 S. Washington Blvd.