
Manual and Installation Guide


Series GA201M2 Page 18 Sept 25, 2020
Testing / Commissioning
Leak Test Method
Never go over connections looking for leaks with a lighted match, cigarette lighter, or any other
flame.
Perform the Leak Test before initial lighting and when connecting a new LP-Gas Cylinder. A
complete gas tightness check must be performed at the installation on site due to possible miss
handing in shipment or excessive pressure being applied to the heater.
1. Make up a dish of soap and water solution of one part liquid detergent and one part water.
2. Spread the soap and water solution over the hose connections with a spray bottle, a small
paintbrush or a rag.
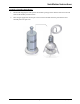
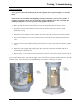
3. With the heater shut OFF, turn the cylinder valve ON. Check the connections at the LP-Cylinder.
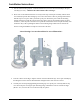
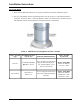
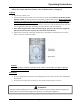
4. Take off the Housing Service Cover (shown below). Check the gas line attachment points to the
valve.
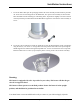
5. Any leaks will result in bubbles forming in the solution. If a leak is detected, shut OFF the cylinder
valve.
6. Repair any leak by tightening leaking parts. (The replacement Gas Hose Assembly shall be as
specified by the manufacturer.)
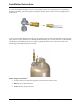
7. Repeat steps 1, 2, and 3 until no leaks are detected at all hose connection locations as shown below.
If you cannot stop the leaks, shut OFF the supply valve on the LP-Gas Cylinder and disconnect the cylinder
from the heater. Place the heater OUT OF SERVICE and consult a certified service person.