20r Owner’s Manual IRONMAN 120r RECUMBENT Customer Service 1.800.750.IRON 1.800.750.4766 Ironman Fitness 4009 Distribution Drive Suite 250 Garland, TX 75041 www.ironmanfitness.
Table of Contents Important Safety Information 3 Before You Start 4 Assembly 5-8 Console Instructions 9 Moving Instructions 10 Monitoring Your Heart Rate 11-12 Warm Up Exercises 13 Exploded View 14 Parts List 15 Warranty 16 2
Important Safety Information WARNING! Before using this unit or starting any exercise program, consult your physician. This is especially important for persons over the age of 35 and/or persons with pre-existing health problems. The manufacturer or distributor assumes no responsibility for personal injury or property damage sustained by or through the use of this product.
Before You Start Thank you for purchasing the Ironman 120r Recumbent ! This quality product you have chosen was designed to meet your needs for cardiovascular exercise. Before you start, please read the Owner's Manual and become familiar with the operation of your new unit. Remember to take the time to perform the stretching exercises provided to avoid injury. If you are taking medication, consult your physician to see if the medication will affect your exercise heart rate.
Assembly INSTRUCTIONS FOR ASSEMBLY: Unpack the box in a clear area. Check to make sure all components are present and in good condition. Do not dispose of the packing material until the assembly is completed. Tools have been provided for you to use when assembling this product. Locate the hardware pack and identify the following parts required for assembly. Tools: 1. ALLEN WRENCH, M5 AND M6 2. PHILLIPS SCREW DRIVER 3. WRENCH Main Components: 1. OWNER’S MANUAL 2. MAIN FRAME 3. FRONT STABILIZER ASSEMBLY 4.
Assembly 35 Figure 1 FIGURE 1 Step 1: Loosen the adjustment knob (41) on the front frame (1). Slide the rear frame backward and secure with the adjustment knob (41). Step 2: Attach the rear stabilizer (3) onto the rear frame with screws (49) and washers (63). Step 3: Attach the front stabilizer (34) onto the main frame with carriage bolts (35), cap nuts (37) and washers (36). 34 36 37 49 63 63 49 3 Figure 2 FIGURE 2 Step 1: Connect Cables (76) to Cables (42).
Assembly FIGURE 4: Step 1: Thread the right pedal (39) onto the right side of the crank (8) as shown. Tighten the pedal securely. Select the right pedal strap which has “R” marked on the bottom side of the strap. Snap the three hole end onto the inside edge of the right pedal (39). Snap the other three hole end onto the outside edge of the right pedal (39). Select adjustment holes which allow your foot to be easily removed from the pedals. Step 2: Repeat with the left pedal and strap.
Assembly FIGURE 6a, 6b,6c: Connect the Tension Knob to the Resistance Cable. Fit the Resistance Control Cable into the slot of the Tension Knob. Pull the brass end of the Resistance Control Cable over the lip of the Tension Knob Bracket. The connection should look like Figure 6c when completed. 6a 6c 6b FIGURE 7: Step 1: Connect Sensor and Tension Cables to Console as shown is Figure 7. Step 2: Attach Console (33) to Upright using four Screws.
Console Overview CONSOLE BUTTONS: ENTER/RESET: Press to begin workout or change console settings. PULSE/RECOVERY: Press to run Pulse program. DOWN: Press to set or change TIME, DISTANCE or CALORIES. UP: Press to set or change TIME, DISTANCE or CALORIES. GENERAL INFORMATION: 1. The console will shut off after it detects 4 minutes no activity. 2. Battery Specifications: Two 1.5V AA Batteries 3.
Moving Instructions CAUTION! TO REDUCE THE POSSIBILITY OF INJURY WHILE LIFTING, BEND YOUR LEGS AND KEEP YOUR BACK STRAIGHT. AS YOU LEAN THE UNIT, LIFT USING YOUR LEGS, NOT YOUR BACK. First, kneel down and grasp the rear support tube with both hands as shown in Figure 1. Next, with a firm grasp on rear support tube stand up bringing the rear of the bike up in the air and tilt the unit until it rolls freely on the transport wheels.
Monitoring Your Heart Rate Monitoring Your Heart Rate To obtain the greatest cardiovascular benefits from your exercise workout, it is important to work within your target heart rate zone. The American Heart Association (AHA) defines this target as 60%-75% percent of your maximum heart rate. Your maximum heart rate may be roughly calculated by subtracting your age from 220. Your maximum heart rate and aerobic capacity naturally decreases as you age.
Monitoring Your Heart Rate TARGET HEART RATE ZONE 200 195 190 185 180 Serious athletic training range 85% 170 166 162 157 Cardiovascular conditioning range 150 146 143 139 153 135 Fat burning range 60% 120 20 117 25 114 30 111 35 108 40 175 149 131 105 45 AGE 12 170 145 128 165 140 124 160 136 120 102 99 96 50 55 60 155 132 116 93 65
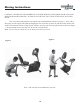
Warm Up Exercises EXERCISE GUIDELINES WARNING! Before beginning this or any exercise program, you should consult your physician. This is especially important for individuals over the age of 35 or individuals with pre-existing health problems. Warming up prepares the body for the exercise by increasing circulation, supplying more oxygen to the muscles and raising body temperature. Begin each workout with 5 to 10 minutes of stretching and light exercise to warm up.
43 50 62 3 46 14 49 60 63 42 6 63 63 43 62 50 48 5 4 45 49 60 63 60 63 50 42 55 2 46 42 40 45 74 53 1 47 28 41 47 29 36 60 64 37 69 66 53 20 36 37 19 17 18 9 10 21 16 11 13 67 68 22 18 27 59 32 18 7 23 68 24 52 63 38 60 39 8 56 75 55 56 55 56 56 56 Exploded View
Parts List Ironman 120r Recumbent Parts List Rev A Ref # 1 Part # 323-00334 MAIN FRAME, 120R Description Qty 1 2 323-00335 RAIL TUBE,120R 1 3 323-00336 REAR STABILIZER 60X600, 120R 1 4 323-00338 REAR FRAME, 120R 1 5 328-00059 SEAT PAD, 120R 1 6 328-00060 BACK PAD, 120R 1 7 311-00056 PULLEY 270MM, DCV/120E/R 1 8 330-00075 CRANK 1/2" ONE PC DCV5.2R/120R 1 2 9 331-00071 BALLBEARING HOUSING, DCV5.2R/120R 10 331-00070 BALLBEARING, DCV5.
Warranty Information IRONMAN FITNESS 120r LIMITED WARRANTY Residential Warranty Frame: Lifetime Parts: 1 Year Labor: None This Limited Warranty applies in the United States and Canada to products manufactured or distributed by Ironman Fitness (“Ironman”) under the Ironman brand name. The warranty period to the original purchaser is listed above in the table.
Customer Service 1.800.750.IRON 1.800.750.4766 Ironman Fitness 4009 Distribution Drive Suite 250 Garland, TX 75041 www.ironmanfitness.com Ironman and M-dot are registered trademarks of the World Triathlon Corp., used here by permission.