
UFO Flush Mount Installation Manual


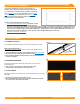


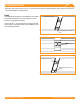

Table Of Contents

©
2022 IRONRIDGE, INC. VERSION 3.5 FLUSH MOUNT INSTALLATION MANUAL - 4
COMPONENTS
BONDING HARDWARE TORQUE VALUES
Please refer to each attachment's individual section for full details
on all torque values and instructions.
☐ Universal Fastening Object (7/16" Socket): 80 in-lbs
☐ Rail Grounding Lug Nut (7/16" Socket): 80 in-lbs
☐ Module Grounding Lug Nut (7/16" Socket): 60 in-lbs
☐ Grounding Lug Terminal Screws (7/16" Socket): 20 in-lbs
☐ Expansion Joint Nuts (7/16" Socket): 80 in-lbs
☐ Microinverter Kit Nuts (7/16" Socket): 80 in-lbs
☐ Frameless Module Kit Nuts (7/16" Socket): 80 in-lbs
☐ 3/8" Bonding Hardware Nuts (7/16" Socket): 250 in-lbs
☐ Contour Clamp (T-30 Torx Bit): 80 in-lbs
➢ Unless otherwise noted, all components have been evaluated for
multiple use. They can be uninstalled and reinstalled in the same
or new location.
COMPONENTS
XR Rail
UFO and Stopper
Sleeve (30-46MM)
CAMO
Rail Grounding Lug
8" Bonding Jumper
Single Use Only
Expansion Joint
End Cap
JAYBOX
3/8" Bonding
Hardware
Microinverter Kit
Frameless Module Kit
Frameless
End/Mid Clamp
QM Classic Conduit
Comp Mount
QM Tile Conduit
Mount
PRE-INSTALLATION
☐ Verify module compatibility. See Page 21 for info.
TOOLS REQUIRED
☐ Cordless Drill (non-impact)
☐ Impact Driver (for lag bolts)
☐ Torque Wrench (0-250 in-lbs)
☐ 7/16” Socket
☐ 1/2" Socket
☐ 9/16" Socket
☐ 7/32" Drill bit
☐ 1/8" Drill bit
☐ 1/4" Drill bit
☐ T30 Torx Bit
☐ Channel Lock Pliers
☐ #3 Phillips Bit
☐ Paddle Bit
Ironridge L-Foot and
QM L-Foot
BOSS
Module Grounding
Lug
Wire Clip
Contour Trim
Contour Clamp