
Operation Manual


23
6 - COFFEE PREPARATION
In order to obtain an excellent espresso coffee, it is important to
use a top quality blended coffee, properly roasted and ground;
grinding is correct when the coffee delivery time is between 15-18
seconds for one serving and between 30-35 seconds for two
servings. The coffee should be grinded at the time of use. Once
ground, the coffee loses its flavour within a short time; if the grin-
ding is too coarse you will obtain light-coloured and weak coffee,
without froth; if the grinding is too fine you will obtain dark and
strong coffee, with little froth.
Once you have placed the filter into the filter-holder (12), fill the
filter with the amount of coffee required for 1 or 2 cups (7 gr. –
14 gr.), level it off, and press the coffee down with the presser,
manually clean the filter edge from any coffee residues and fit the
filter-holder into the brewing unit (11) moving it rightward tightly
in its place.
Place the cups under the spouts and start the brewing using the
unit control (20).
Warm cups contribute to maintain the right temperature of the
coffee delivery; it is therefore advisable, before using it, to place
the cups on the cups-holder grid (3), which will make it possible
to take advantage of the heat released by the boiler.
Once you have obtained the desired amount of coffee, stop the
delivery using the unit control (20) and leave the filter-holder in
its place.
To prepare additional cups of coffee, remove the filter-holder (12)
from the unit, moving it leftward, empty the coffee grounds into the
drawer provided and once again follow the previous steps.
Caution! We recommend not to touch the brewing units
or the steam and hot-water nozzles when the machine
is running, and pay attention not to place your hands
under the units or nozzles during the delivery, to avoid
possible scalds.
It is advisable to leave the filter-holders, with their own filters and
coffee grounds, fitted into the unit throughout your days’ work, so
that the filter-holder will always preserve an optimal temperature.
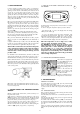
Caution! When the machine is new, the filter-holder may not be ali-
gned (perpendicular to the machine itself) as shown in the picture;
this however does not affect the proper use of the machine itself.
After a short period of use the filter-holder will be gradually settled
on the correct position.
A = Position of the closed filter-holder when the machine is new.
B = Position of the closed filter-holder after the machine has been
in use for a brief period.
7 – CONTROL GROUPS AND TEMPERATURE CONTROL
TERMOPID
Machine equipped with semiautomatic, continuous delivery wor-
king with a micro switch.
Coffee delivery is obtained moving the small lever of the group
(20) placed on the control instrument board; bringing the small
lever downwards. The micro switch connected to it will start up the
pump for the delivery of water under pressure to the group.
The group through some inner devices, allows, before the pre-
infusion and after the infusion of the coffee in several ways.
Once the desired amount of coffee has been obtained, bring the
small lever (20) upwards, stop position, to stop delivery.
7.1 HOW TO SET THE BOILER’S TEMPERATURE BY MEANS OF
THE TERMOPID
The PID has been set by the producer of this machine on a tempe-
rature of 122°C.
In order to change the temperature please proceed as follows:
- press the button (▼) ; as soon as the display shows the writing
“PRG” press the button (▼);
- as soon as the display shows the boiler’s temperature, help
yourself with the buttons (▼) and (▼)in order to set the desired
temperature, starting from a min. of 80C° up to a max. of 133C°.
- after 3 sec. from pressing the last button, the inserted temperature
is memorized and the display shows the set temperature.
NB: if the temperature is set too high, once a coffee
request is made, the display starts to flash.
The TERMOPID is already set by the producer on the
right temperature for an excellent espresso. During
heating and coffee or water distribution, the tempera-
ture can oscillate (+/- 5 ÷ 6°C ). Also, a warning has
been inserted: after 127°C the PID’s display shows the
temperature but intermittently; this is normal and it
warns the user that the coffee will not be good if made
with such high temperature.
7.2 - BREWING PRESSURE PROFILING CONTROL
The models are equipped with
the system BPPC (Brewing Pres-
sure Profiling Control).
The pressure gauge set on the
group, allows to read the brew-
ing pressure profiling of the es-
presso.
Thanks to this instruction the
barman can verify the exact
milling, pressing and dose of
the coffee in the filter.
To brew a real Italian espresso,
the correct pressure should be in a range between 8 and 10 Bar.
8 - HOT WATER DELIVERY
MONDIALE - KIA MODELS
Put a tank under the hot water jet (9), press the jointed lever (6)
down to avoid the water supply
When you reach the expected quantity of water, stop the pressu-
re, the lever will come back in the stop position breacking off the
supply.
TEA - MILLENNIUM MODELS
Place a conteiner under the hot water nozzle (9), turn the hot water
tap knob (6) counter-clockwise.
Hot water at about 95°C will come out of the botton part the steam
nozzle (9).
Close the hot water tap (6) when you have enough hot water by
turning the konb clockwise.
Put a tank under the steam/hotwater jet (24), turn anticlockwise
the water/steam tap handle (23), press the hot water switch (21).
From the lower steam/water jet will come out some water at ap-
prox 95°
When you reach the expected quantity of water turn clockwise the
water/steam tap handle (8) and press again the hot water switch
(21).