
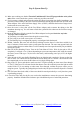
Install Instructions
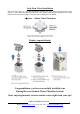

Note: Stages 6 and/or 7 only exist on certain models.
Stage 1 – 3 Pre-Filters
Replace every 6
months or sooner if you notice a decrease in water flow or quality. The replacement
frequency depends on your water usage and source water quality. To protect the RO membrane from
chlorine and other damaging contaminants, it is important to change the pre-filters according to
schedule.
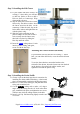
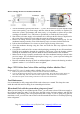
How to change the stage 1 – 3 pre-filters:
1.
Shut off the cold water supply valve and tank valve, and open the RO faucet to depressurize
the system. Place a bucket or towel under the system to catch any water spills.
If there is enough room under the sink and the filter system is hung on the wall, you can twist
the filter
housing off without removing the system from the wall. Otherwise, you will need
to pull the system out, lay it down, and remove the housings at that point. Be careful with the
tubing connections when removing the system.
Twist off the filter housings in a counter-
clockwise direction using the filter housing wrench.
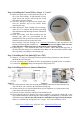
Refer to Installation Step 1.1 to install the new vertical filter cartridges, and tighten the filter
housings back on. Remember not to over tighten them or they will be hard to unscrew next
time.
2.
3.
4.
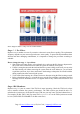
Stage 4 RO Membrane
Replace every 2-
3 years or sooner if the TDS level starts increasing. Check the TDS level at least
once a month to monitor the system’s performance. The TDS rejection rate should be 90%+.To
calculate the rejection rate, divide the RO water TDS into your tap water TDS and subtract from 1.
For example, 20 (RO TDS) / 200 (Tap water TDS) = 0.1 1-
0.1 = 0.9 so the TDS rejection rate would
be 90%. (NSF/ANSI STANDARD 58 for RO water filter).
Page 15www.123filter.com | (678) 261-7611 | Support@123Filter.com