TAVOR TS12 SHOTGUN OPERATOR MANUAL Read the instructions and warnings in this manual carefully. Understand them before using this firearm. If there is anything you do not understand, seek advice from your retailer, someone qualified in the safe handling of firearms, or contact IWI US, Inc. Tel: +1 (717) 695-2081 or services@iwi.us. This Operator Manual should always accompany this firearm. It should be transferred upon change of ownership, or when the firearm is loaned or transferred to another person.
Congratulations on your purchase of the TS12 Shotgun. Your Packaging Includes. 1. Quick-Detachable Sling Swivels (2) in a small bag 2. Literature Packet This Manual NSSF Firearms Safety Depends on You Pamphlet NSSF Firearms Responsibility in the Home Pamphlet IWI US, Inc. Limited Product Warranty Card National Rifle Association (NRA) Application IWI Sticker 3. Choke tube wrench 4. Protective VCI Bag If you notice that anything is missing from the above listing, please contact IWI US, Inc.
TABLE OF CONTENTS 1 Warnings/Safety Precautions ....................................................1 2 About This Document ...............................................................3 3 General Safety Rules and Procedures ........................................5 4 Firearms Safe Home Storage Checklist .................................... 13 5 General Description ................................................................ 14 6 5.1 Features ...............................................
10 Secondary Disassembly/Assembly .......................................... 41 10.1.1 Carrier Group Mechanism ................................ 41 10.1.1.1 Disassembly ..................................... 42 10.1.1.2 Assembly .......................................... 43 10.1.2 Bolt Assembly.................................................. 44 10.1.3 Choke Tubes ................................................... 45 10.1.3.1 Choke Tube Diagram ........................ 45 10.1.3.2 Disassembly .............
1 Warnings/Safety Precautions CARDINAL RULES OF FIREARMS SAFETY Treat all guns as if they were loaded. Point the muzzle in a safe direction at all times. (A “safe direction” is one in which no one would be injured if the gun were to discharge.) Keep your finger off the trigger and outside the trigger guard straight along the frame until you are on target and intend to fire. Be sure of your target, what's around and beyond it.
WARNING! Prior to removing this shotgun from its packaging, and prior to handling, loading and firing, carefully and thoroughly read and understand this entire Operator Manual. Your safety and that of others (including your family) depends on your responsible compliance with that advice, good judgment and common sense. Firearms safety depends on YOU. You cannot forget, you cannot overlook, you cannot allow yourself to be distracted, and you cannot become complacent or casual with firearms.
2 About This Document This manual contains: Important WARNINGS and SAFETY PRECAUTIONS that must be read and understood before using this firearm. SAFE GUN HANDLING IS YOUR RESPONSIBILITY AT ALL TIMES. Disregarding the warnings and safety precautions in this manual can result in injury or death to you, others and/or damage to property. Directions and procedures for handling, loading, firing, unloading, disassembling and assembling this firearm.
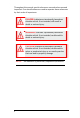
Throughout this manual, special references are made when seemed important. Four classifications are used to separate these references by their order of importance. DANGER! Indicates an imminently hazardous situation which, if not avoided, will result in death or serious injury. WARNING! Indicates a potentially hazardous situation which, if not avoided, could result in death or serious injury.
3 General Safety Rules and Procedures WARNING! This firearm was designed to function properly in its original condition. Do not alter any parts, as this will nullify the warranty. Do not replace any parts unless you are factory-trained to do so and then use only original factory parts from IWI US, Inc. WARNING! Horseplay has no place around firearms.
NOTE: This Operator Manual, and the instructions and warnings contained in it, are intended for the civilian recreational user, target shooter, or hunter, and not necessarily for the law enforcement, security, military, or other “defensive” user. Defensive use of this or any other firearm involves unusual, serious risks, and may at times require deviation from certain safety rules and firearms handling procedures contained in this manual.
superior to the trigger guard, straight alongside the frame of the shotgun until you intend to fire. Do not pull the trigger or attempt to fire until the safety selector has been moved to the “FIRE” position. WARNING! Upon firing, a hot, empty shell casing is forcefully ejected from the ejection port. All persons present must wear suitable eye protection, and must stand clear of the case ejection area.
WARNING! Remember, safety is your responsibility. Be a safe shooter. SAFETY DEPENDS ON YOU! WARNING! Always wear and require others to wear wrap around ANSI or OSHA approved safety glasses while shooting to protect your eyes from injury by ejected shell cases, gun powder gas, lubricant, dirt or metallic particles, carbon residue, sparks, bullet fragmentation from targets or other debris. WARNING! UNLOAD ALL FIREARMS WHEN NOT IN USE. NEVER STORE A LOADED FIREARM.
WARNING! Always wear and require others to wear commercially manufactured ear protection designed for shooting while shooting. Without ear protection, the noise from your gun, and other guns close to you, could leave a “ringing” in the ears for some time after firing, and could result in permanent hearing loss. WARNING! Learn the mechanical and handling characteristics of the firearm you are using. Not all firearms are the same, and your TS12 Shotgun firearm has some unique features.
WARNING! A bullet fired into the air can travel several miles and can kill or seriously injure someone when it comes down. Never fire up into the air, or at animal in a tree, or on the crest of a hill. WARNING! Before hunting with this or any other firearm, take an approved Hunter Safety Course, taught in all states by the state game commission or by the National Rifle Association (NRA). Follow your state's game laws at all times while hunting.
WARNING! Firearms and alcohol do not mix. Never drink alcoholic beverages or take drugs before or during shooting. This constitutes criminal disregard for your safety and that of others. Some medications can impair your vision, balance, reflexes, coordination, alertness or judgment. Never use a firearm while you are taking medication unless you have checked with your doctor to ensure your fitness to handle your firearm safely. Do not handle your firearm when you are ill, tired, upset or distracted.
REMEMBER, FIREARMS SAFETY DEPENDS ON YOU! THERE ARE NO “FOOLPROOF” GUNS, INCLUDING THE TS12 Shotgun. A SINGLE MOMENT OF INATTENTION OR A SINGLE FAILURE TO FOLLOW THESE FIREARMS SAFETY RULES AND WARNINGS CAN RESULT IN TRAGEDY. YOU ARE RESPONSIBLE FOR THE GUN THAT IS IN YOUR HANDS, IN YOUR POSSESSION, OR UNDER YOUR CONTROL.
4 Firearms Safe Home Storage Checklist Firearms naturally attract the attention of children, teenagers and adults alike. Accordingly, it is YOUR responsibility to ensure that your firearms, when unattended, stored or not in use, are secured under lock and key, safely out of the access of all unauthorized users. This is YOUR responsibility, and any mistake or inattention on your part can result in death or serious injury to your loved ones or others.
5 General Description DANGER! The standard TS12 Shotgun is designed as a “bullpup” and therefore should be fired only when configured for the shooter’s hand preference. Firing the standard TS12 Shotgun from the left shoulder or the TS12 Shotgun converted to lefthand operation from the right shoulder will result in ejected cases striking the shooter in the face with considerable force. This may cause serious eye injury and other injury. Never shoot a right handed TS12 from the left shoulder and vice versa.
5.
5.2 Function Overview The TS12 Shotgun is a semi-automatic auto loading bullpup shotgun, 12Ga 3’’, 18.5’’ Barrel, Accepts Beretta/ Benelli Multi Chokes, 15 round bullpup shotgun. It functions based on a uniquely Mobil designed bolt principle. It utilizes a piston which pushes on a separate skidder tube to cycle the bolt. The movement of the safety lever disengages the trigger and trigger arm, this part transfers movement of trigger rearward to the TS12 Shotgun hammer group. The TS12 Shotgun has an 18.
6 Specifications The table below details the technical specifications of the TS12 Shotgun. Specifications Table Caliber 12 Gauge Operating System Gas operated. Unique bolt design Barrel Length 18.
6.1 Ammunition Use only high quality commercially manufactured ammunition in good condition of the appropriate gauge and chamber length. The gauge and chamber length of your shotgun is marked on the left side of body. The TS12 Shotgun is chambered for 12 GA 3”, which will also fire 12 GA 2 ¾” ammunition. Use only SAAMI specification ammunition. For optimum performance of this shotgun, use shells with a minimum velocity of 1200 fps and minimum weight of 1 1/8 oz.
6.
Figure 6-2 – TS12 Shotgun Right External View 20
6.3 Safety Lever and its Positions WARNING! Safety is the first and foremost concern when handling any firearm. Always keep the muzzle pointed in a safe direction! Keep your trigger finger outside the trigger guard and on the frame of the shotgun superior of the trigger until you are aimed at a proper target and intend to fire! Keep the safety lever on “SAFE” until you are aimed at a target and only then move the safety lever to the “FIRE” position.
6.4 Gas Cylinder Adjustment For optimum performance of this shotgun, use shells with a minimum velocity of 1200 fps and minimum weight of 1 1/8 oz. The weapon can also be tested with the gas setting on “H” (heavy) or “L” (light) for function based on the velocity of the load you are using. For reliable functioning with 2 ¾ shot shells, use the “L” setting. For higher velocity 3 inch magnum rounds, use the “H” setting.
7 Zeroing The TS12 Shotgun is not equipped with optics or iron sights. However, standard back up sights and optics that can be attached to the Picatinny rail, may be utilized effectively. The sights will be roughly 3.75 inches over the height of the bore line. This means that the sight in distance for the shotgun has to be specific for how the shotgun will be utilized. For general use, a 50 yard zero (using slugs) is preferred for engaging targets out to 100 yards.
8 Operating Instructions WARNING! Before your firearm left the factory, it was function tested, inspected and packaged. IWI US, Inc. cannot control the product handling after it has left our factory. Therefore, at the time of purchase carefully examine the shotgun to be sure it is unloaded and undamaged and all components are included. Seek your dealer's help for assistance in examining the firearm and to answer your questions.
8.1.1 Unloading and Safety Check To unload or clear your shotgun of ammunition, or to make sure it is unloaded, keep the muzzle pointed in a safe direction and your finger outside the trigger area while performing the following steps: 1. Ensure that the safety lever is in the SAFE position. The red stripe must not be visible (see Safety Lever and its Positions Section on page 21). 2. Press the shot shell release button to unload the two exposed magazine tubes.
8.1.2 Function Test WARNING! Perform this test after any firearm conversion, inspection, or part replacement. WARNING! Make sure the TS12 Shotgun is cleared, unloaded, and there is no ammunition in the chamber (EMPTY) before performing the safety function test. The muzzle should be pointed in a safe direction at all times. WARNING! If the shotgun fails any of the steps of the test, do not load or use the shotgun. Contact IWI US, Inc. to return the shotgun for inspection and repair. 1. 2. 3. 4. 5. 6. 7.
8.2 Loading WARNING! Always check that the ammunition is clean, undamaged, and of the correct gauge for the shotgun. Forcing damaged ammunition into the chamber could result in injury, death, damage to property as well as damage to your shotgun. WARNING! Always position the Safety Lever in the SAFE position when loading and unloading the firearm. WARNING! Upon firing, a hot, empty shell is forcefully ejected from the ejection port of the firearm.
To load the magazine tubes: 1. Ensure that the safety lever is in the SAFE position (see Safety Lever and its Positions on p.21). 2. Point the muzzle in a safe direction. 3. Place the shot shells into the loading ports ensuring the brass of the shell is to the rear. 4. Push shot shells into the magazine tubes so the rim of the shell passes the shell stop. Repeat this action until the magazine tube is completely filled. 5.
8.2.3 Loading the Shotgun – Alternative Method 1. Ensure that the safety lever is in the SAFE position (see Safety Lever and its Positions on p.21). 2. Point the muzzle in a safe direction. 3. Verify that the shotgun is unloaded. 4. Engage the carrier stop lever and charge the bolt to the rear. The bolt should lock to the rear because the carrier stop lever was engaged. 5. Drop a shot shell through the open ejection port (with the shell oriented properly) then press the bolt release button.
8.3 Firing Operation 8.3.1 Preparation for Firing WARNING! Do not chamber a round until you are ready to fire the shotgun. Always keep the muzzle pointed in a safe direction. Do not disengage the safety or put your finger into the trigger area until you are aimed at a safe target and intend to fire. Always wear eye and ear protection when firing your shotgun.
8.3.2 Firing the Weapon To fire the weapon: 1. While looking through the sight or sights, and on target, press the trigger. The shotgun will fire the chambered round and automatically cycle the next round into the chamber. After selected magazine tube is completely discharged, the bolt will lock back. 2. To continue firing, press the magazine locking lever with the tip of your index finger and rotate the next magazine tube into position while releasing the lever.
9 Strip Field Disassembly/Assembly Instructions WARNING! Be sure the TS12 Shotgun is unloaded before starting the disassembly! Keep the muzzle pointed in a safe direction.
9.1 Disassembling the Receiver Tools Required: none To remove the Receiver: 1. Ensure the bolt is closed. 2. Press the recoil pad button located at the top rear portion of the butt assembly (1). While the button is depressed, slide recoil pad in an upward direction to slide the pad off the body (2).
3. Press sling swivel sleeve from either side and push it out of the stock assembly (3). Figure 9-2 – TS12 Shotgun – Disassembling the Receiver: Sling Swivel Sleeve Removed 4. Slide the stock body in a rearward direction to remove it (4).
5. Slide the receiver in a rearward direction to remove it (5). Figure 9-4 – TS12 Shotgun - Disassembling the Receiver: Receiver Removal 6. Remove the recoil spring guide (6) and bolt assembly by removing it from the rear of the firearm (7).
9.2 Disassembling Front Cover and Gas Piston Tools Required: flathead screwdriver, 3mm punch, eye protection. To remove the Front Cover: 1. Unscrew the barrel nut by turning it counter clockwise (1). Figure 9-6 – TS12 Shotgun - Disassembling the Barrel Nut 2. Slide the MLOK forend of the body.
To remove the Gas Piston: 1. Using a screwdriver, remove the gas cylinder retaining spring by prying it from the left side and removing it (1). 2. Use the 3mm punch, unscrew the gas cylinder counter clockwise (2) and pull out from the housing (3). 3. Remove the gas piston by pushing it forward and out of the housing (4).
9.3 Assembling Gas Piston and Front Cover Tools Required: flathead screwdriver, 3mm punch, eye protection. To assemble the Gas Piston: 1. Insert the gas piston into the housing (1). 2. Place the gas cylinder into the housing (2). 3. Use the 3mm punch, Screw the gas cylinder into the housing clockwise (3). 4. Insert the gas cylinder retaining spring from the left side (4).
To assemble the Front Cover: 1. Slide the front cover from the front to rear. Figure 9-10 – TS12 Shotgun - Assembling Front Cover 2. Turning the barrel nut clockwise until it ratchets into place and stops.
9.4 Assembling the Receiver Tools Required: none To assemble the Receiver: 1. Install the recoil spring guide to its slot on bolt. The button detent should face the rear. It can only be installed from one direction (1). 2. Slide the bolt assembly through the bolt rail and seat it into the chamber in the most forward locked position (2). 3. Slide the receiver from the rear until it fully seats onto the body. The recoil spring guide and bolt rail must protrude through the rear of the receiver (3). 4.
10 Secondary Disassembly/Assembly This section provides disassembly/assembly procedures for the following: Shotgun Assembly Page Carrier Group Mechanism Bolt Assembly Choke Tubes 41 44 45 10.1.1 Carrier Group Mechanism WARNING! The Carrier Group Mechanism disassembly can be performed ONLY by a certified armorer! To disassemble the carrier group assembly from the receiver, first remove the receiver assembly from the shotgun as shown in the Strip Field - Disassembly/Assembly Instructions on p.32.
10.1.1.1 1. 2. Disassembly Use a 3mm punch and small hammer to remove the receiver pins by tapping from the left side, removing them from the right side (1). Pull the carrier group mechanism downward and out of the receiver, until it is out completely (2).
10.1.1.2 Assembly 1. Align the holes on receiver and the carrier group (1). During alignment, press bolt release button to allow the carrier move vertically. 2. Tap the receiver pins into the holes on right side of receiver with a small hammer until the pins are flush with the receiver (2).
10.1.2 Bolt Assembly Tools required: 3mm punch To install or remove Bolt Assembly: 1. Remove the receiver from the shotgun. 2. Using a 3 mm punch, remove the tow bolt pins (1) from the bolt carrier (2). Figure 10-3 – TS12 Shotgun - Carrier Group Mechanism: Bolt 3. Remove the bolt (3) from the bolt carrier (2).
10.1.3 Choke Tubes Tools required: choke tube wrench (supplied) NOTE: The TS12 Shotgun uses standard Benelli / Beretta choke tubes. The choke tube wrench will be supplied with the shotgun. 10.1.3.
10.1.3.2 Disassembly WARNING! Make sure the TS12 Shotgun is cleared, unloaded, and there is no ammunition in the chamber (EMPTY). The muzzle should be pointed in a safe direction at all times. 1. Remove the barrel nut (1) by turning it counter clockwise (2). Figure 10-5 – TS12 Shotgun – Barrel Nut Removal NOTE: Wipe off the barrel threads with a rag or patch to make removal easier.
2. Using a choke tube wrench (supplied), turn choke tube in counter clockwise direction (3) to disengage threads of choke and barrel. 3. Hold and pull choke tube out from the muzzle (4). NOTE: Wipe off the barrel threads with a rag or patch to make installation easier.
10.1.3.3 Assembly 1. Insert the choke tube (1), turning it in clockwise direction, and tighten it with a wrench until it is properly installed (2). Figure 10-7 – TS12 Shotgun – Choke Tube Assembly CAUTION! Do not over-torque the choke tube! 2. Re-install the barrel nut.
WARNING! Only improved cylinder and cylinder choke tubes are recommended for slugs. Anything tighter than these choke tubes may cause damage and/ or injury if a slug is fired through the barrel. The warranty will also be void if compensated holes or another aftermarket modification to barrel are performed. These modifications may change the function of the weapon and/or cause further damage to other parts inside the TS12 Shotgun.
11 Cleaning and Maintenance WARNING! During cleaning the TS12 Shotgun, make sure the weapon is unloaded and cleared, of all ammunition by clearing the weapons first, and ensure that there is no ammunition in the chamber (EMPTY) and in the leaning area. See Unloading and Safety Check Section on p. 25. The muzzle should be pointed in a safe direction at all times.
11.1 Cleaning the Barrel WARNING! It is recommended that the barrel be cleaned after firing, after being stored for a long time, or immediately if dirt, water, debris or mud gets into the barrel or chamber. The barrel should immediately be inspected and cleaned if there is any possibility of a barrel obstruction. The barrel can be inspected by looking down the chamber after the weapon has been UNLOADED and disassembled. To clean the inside of the barrel: 1.
11.2 Cleaning the Gas System To clean the Gas System: 1. Unscrew the barrel nut. 2. Slide the MLOK forend off the body. 3. Remove the gas regulator. 4. Clean ventilation ports and outer surface of barrel can by gun oil and a cloth. Beware of scratching gas piston while cleaning! WARNING! Beware of scratching gas piston while cleaning! WARNING! Do not lubricate gas piston and gas cylinder. Lubricants will cause carbon build up and increase malfunctions because of fouling.
11.3 Cleaning the Bolt Assembly To clean the Bolt Assembly: 1. Wipe of the outside of the bolt assembly and clean under the extractor using a cleaning toothbrush. 2. Remove the 2 bolt pins by driving them out with a punch in either direction. Clean the bolt and inside the bolt carrier with patches and a toothbrush. 3. After cleaning the bolt assembly, dry the parts off and apply a thin coat between bolt body and bolt head. 4.
11.4 Cleaning the Trigger Assembly To clean the Trigger Assembly 1. Disassemble the receiver as described in Disassembling the Receiver Section on p. 33. 2. Push trigger pins and remove the trigger group from the receiver and remove the trigger assembly by pulling downwards. If necessary, press the bolt release button to release the carrier from receiver. 3. Spray gun degreaser or use a toothbrush to remove debris and carbon from the trigger group. 4.
12 Long Term Storage In addition to periodic maintenance, it is advised to occasionally clean and oil the bore/ barrel and all key parts to keep the TS12 Shotgun in good working order and prevent corrosion. After long term storage, always remember to conduct pre-fire maintenance to ensure the shotgun is serviceable and the bore is free of obstructions.
13 Troubleshooting and Repair This chapter provides Troubleshooting and Repair table. The table describes a problem and provides remedy action instructions for its solution. DANGER! During all troubleshooting, keep finger off the trigger and keep muzzle pointed in a safe area.
Troubleshooting and Repair Table Malfunction Description Failure to fire Hammer doesn’t fall. The weapon is not discharged. Failure to fire Hammer falls but the weapon has not discharged Possible Cause Stovepipe Safety is ON Bad primer Dirty weapon Weapon failed to cycle due to an underpowered shell. Weapon failed to go to bolt lock on the last round. Cycle the action and attempt to fire if necessary.
14 Limited Product Warranty 1. This Warranty is given by "IWI US, Inc." solely to the original purchaser (the “Purchaser”) of IWI US, Inc.'s TS12 Shotgun SEMI- AUTOMATIC RIFLE (the “Product”) for a period of 5 years commencing from the date of Product retail purchase (the “Warranty Period”).Subject to the limitations and exclusions contained below, IWI US, Inc. warrants the Product to be free from defects in design, materials and workmanship.
4. This Warranty does not apply to: 4.1 Maintenance, repair or replacement of parts due to normal wear and tear. 4.2 Expendable items such as batteries (including battery leaks), bulbs, cleaning supplies and other consumables. 4.3 Firing the Product with an obstruction in the barrel. 4.4 Any cosmetic damage that does not impede form, fit, and function of the Product. 4.5 Products that show evidence of tampering. 4.6 IWI US, Inc.
15 Repair Services If you need assistance with your firearm, please call: Tel: +1 (717) 695-2081, Monday through Friday, 8:00AM to 4:00PM US Eastern time and ask to speak to Customer Service. If it is determined that shipment of your firearm to IWI US, or an authorized IWI US, Inc. Service Center is warranted, please prepare and ship as follows: 1. Request a Return Authorization number (RA#) from the IWI US, Inc. Customer Service Representative. Please note that IWI US, Inc.
WARNING! DO NOT SEND LIVE AMMUNITION OR SPENT (FIRED) SHELLS/CARTRIDGES IN YOUR FIREARM OR IN THE SAME BOX WITH YOUR FIREARM. THIS IS A VIOLATION OF FEDERAL LAW. IF YOU FEEL YOU MUST SEND SPENT (FIRED) SHELLS/CARTRIDGES, PLEASE SHIP THEM IN A SEPARATE PACK- AGE AND INCLUDE A COPY OF THE LETTER THAT YOU PACKED WITH YOUR FIREARM.
IWI US, Inc. • 1441 Stoneridge Drive • Middletown, PA 17057 •Tel: +1 (717) 695-2081 • Fax: +1 (717) 412-0873 • services@iwi.us WWW.IWI.US Copyright © 2019 by IWI US, Inc. This document is the property of IWI US, Inc. (“IWI US, Inc.”) and contains proprietary and confidential information. IWI US, Inc. reserves the whole rights to this document and to the data/invention/content herein described. This document may only be used for the specific purpose and under the terms of the license granted by IWI US, Inc.
IWI US, Inc. • 1441 Stoneridge Drive • Middletown, PA 17057 • Tel: +1 (717) 695-2081 • Fax: +1 (717) 412-0873 • services@iwi.us WWW.IWI.