
Workshop Manual


6E–125
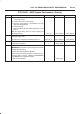
6VE1 3.5L ENGINE DRIVEABILITY AND EMISSIONS
Evaporative (EVAP) Emissions Canister Purge Valve Check
Step Action Value(s) Yes No
1 1. Ignition “OFF”.
2. Ignition “ON”, engine “OFF”.
3. At the throttle body, disconnect the hose that goes
to the purge solenoid.
4. Using a hand vacuum pump with an attached
vacuum gauge J 23738-A, apply vacuum (10 in. Hg
or 34 kPa) to the solenoid.
Does the solenoid hold the vacuum?
— Go to
Step 3
Go to
Step 2
2 1. Disconnect the solenoid electrical connector.
2. As in Step 1, apply vacuum (10 in. Hg or 34 kPa) to
the solenoid.
Does the solenoid hold the vacuum?
— Go to
Step 4
Go to
Step 7
3 1. At the throttle body, put a cap over the vacuum port
where the hose was disconnected for testing. This
is to prevent a vacuum leak when the engine is
started.
2. Ignition “OFF”.
3. Install the Tech 2.
4. Apply vacuum to the purge solenoid with the hand
vacuum pump.
5. Start the engine, run at 2500 RPM.
6. Using the Tech 2, select Powertrain, 3.5–V6 6VE1,
F3: Misc. Tests, F2: EVAP Purge, F0: EVAP Purge.
(Refer to the Misellaneous Test.)
7. Turn the purge solenoid “ON”.
Did the vacuum drop when the purge was turned on?
— Go to
Step 8
Go to
Step 9
4 Check for a short to ground in the S7 Pin wire.
Is there a short?
— Go to
Step 5
Go to
Step 6
5 Repair the short to ground.
Is the action complete?
— Verify repair —
6 Replace the PCM.
IMPORTANT: The replacement PCM must be
programmed. Refer to
On-Vehicle Service
in
Powertrain Control Module and Sensors for
procedures.
And also refer to latest Service Bulletin.
Check to see if the Latest software is released or not.
And then Down Load the LATEST PROGRAMMED
SOFTWARE to the replacement PCM.
Is the action complete?
— Verify repair —
7 Replace the faulty purge solenoid. Refer to
On-Vehicle
Service, EVAP Canister Purge Solenoid.
Is the action complete?
— Verify repair —