
Workshop Manual


6A–80
ENGINE MECHANICAL (6VE1 3.5L)
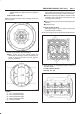
5. Remove the rod caps.
6. Measure the width of the plastigage and
determine the oil clearance. If the oil clearance
exceeds the limit, replace the rod bearing as a
set.
Standard : 0.019 mm–0.043 mm
(0.0007 in–0.0017 in)
Limit : 0.08 mm (0.0031 in)
015RS008
7. Clean the plastigage from the bearings and the
crankshaft pins.
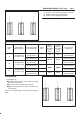
Con–rod Bearing Selection
Select and install the new connecting rod bearings,
paying close attention to the connecting rod big end
diameter size mark (1).
NOTE: Take care not to confuse the alignment mark (2)
and the size mark (1) during the installation procedure.
015RS034
mm ( in)
1 Size Mark
Big end Bore
Diameter
Crankshaft Pin
Diameter
Connecting Rod
Bearing Thickness
(Reference)
Color of
Size
Mark
Oil Clearance
(Reference)
A
56.994-57.000
(2.2439-2.2441)
1.512-1.516
(0.0595-0.0597)
Yellow
0.025-0.054
(0.0010-0.0021)
B
56.988-56.994
(2.2436-2.2439)
53.922-53.937
(2.1229-2.1235)
1.508-1.512
(0.0594-0.0595)
Green
0.027-0.056
(0.0011-0.0022)
C
56.982-56.988
(2.2434-2.2436)
1.504-1.508
(0.0592-0.0594)
Pink
0.029-0.058
(0.0011-0.0023)
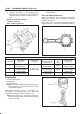
Reassembly
1.Install connecting rod
2.Install piston
3.Install piston pin
B Apply a thin coat of engine oil to the piston pin. Try to
insert the piston pin into the piston pin hole with
normal finger pressure.
NOTE: When changing piston / connecting rod
combinations, do not change the piston / piston pin
combination and do not reuse the old piston pin.
B Attach the piston to the connecting rod with the
piston front mark and the connecting rod front mark
on the same side.
015RS036