
Workshop Manual
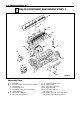

5–12 ENGINE ASSEMBLY III
11. Piston and Connecting Rod
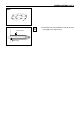
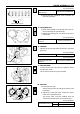
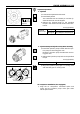
Position the piston ring gaps as shown in the illus-
tration.
1) Set the piston ring gaps as shown in the illustra-
tion.
2) Lubricate the piston, the piston rings, and the
connecting rod bearings with engine oil.
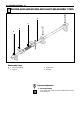
3) Position the piston front mark towards the front
of the engine.
1
4
3
2
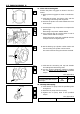
4) Use the piston ring compressor to compress the
piston rings.
Piston Ring Compressor: 9-8522-1251-0
5) Use a hammer grip to push the piston in until it
makes contact with the crankpin.
At the same time, rotate the crankshaft until the
crankpin reaches its highest point.
Front
mark
(▲)
Piston ring compressor
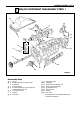
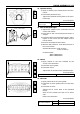
6) Set the bearing cap cylinder number marks and
the connecting rod cylinder number marks.
The marks must be facing the exhaust manifold.
Cylinder
number
7) Lubricate the connecting rod cap bolt threads
and setting fases with Mos grease.
8) Use the angular tightening method to tighten
the connecting rod cap bolts to the specified
torque.
N·m (kgf·m/lb.ft)
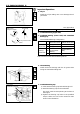
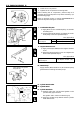
12. Oil Pump and Coupling
1) Lubricate the oil pump with the specified grade
of engine oil.
2) Install the oil pump with the coupling.
3) Tighten the oil pump bolts to the specified
torque.
N·m (kgf·m/lb.ft)
1st step 2nd step
Connecting Rod Bolt Torque 39
60°–90°
and Angle (4/29)
Coupling
Oil Pump Bolt Torque 42–62 (4.3–6.4/31–46)