
User's Manual Part 3
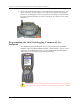


Programming the 100G Datalogging Commercial Gas Endpoint
100G Datalogging Installation Guide - Direct Mount 65
To Attach the Index/Cover Assembly on the Elster American Commercial
Meter
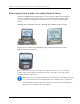
1. Place the mounting plate gasket (previously removed) on the index cover mounting
plate. Align the gasket and index cover mounting plate screw holes.
2. Place the index/cover assembly on the index mounting plate. (The index must face the
direction it faced before removal.) Attach the index/cover assembly on the mounting
plate using original index screws. Insert one screw and tighten two turns to hold it in
place on the mounting plate. Insert the second mounting screw and tighten until
secure. Completely tighten the first mounting screw. Each index cover mounting
screw must be tightened evenly.
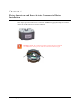
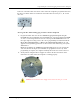
3. Turn the commercial 100G Datalogging Gas Endpoint wriggler so it intersects with
the index wriggler. Carefully lower the index-cover mounting plate assembly onto the
100G Datalogging Gas Endpoint.
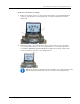
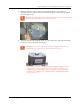
4. Install four endpoint mounting screws (SCR-0062-001, see Installation Prerequisites
on page 8). Tighten screws in an alternating diagonal pattern.
• Insert the first screw and tighten enough to hold index assembly in place.
• Insert the second screw diagonal to first screw and tighten two to three turns.
• Insert the third screw, tightening two or three turns.
• Insert the fourth screw and tighten until secure.
• Tighten the first, 2nd, and third screw until secure. Turn each screw 1/4 to 1/2
turn after it contacts the cover.
Each endpoint mounting screw must be tightened evenly. If you have access to a
torque-driver, tighten mounting screws to 72-inch pounds.