EASY LUX User Manual V 1.
Contents 1. SAFETY AND PRECAUTIONS ....................................................................... 3 2. CARE AND MAINTENANCE........................................................................... 4 3. Appearance ..................................................................................................... 8 3.1 Keys ....................................................................................................... 9 3.2 LCD Display .....................................................
1. SAFETY AND PRECAUTIONS Please read these simple guidelines. Not following them may be dangerous or illegal. Read the complete user guide for further information. Switch off the phone in proximity of chemical plants, gas stations and other locations containing explosive objects. Keep the phone away from children. When driving, please use the hands free calling device to ensure safety. Please park the car for communication unless in emergency.
Do not use liquid or a damp cloth with strong detergents to clean the handset. Wireless phones may be susceptible to interference, which can affect performance。 Use only approved enhancements and batteries. Do not connect incompatible products. Use only in the normal position as explained in the produce documentation. Do not touch the antenna unnecessarily. Ensure the phone is switched on and in service. Enter the emergency number, then press the call key. Give your location.
·Do not leave the battery in very warm or cold places, such as in a closed car in summer or winter. All of the above suggestions apply to the phone, battery, charger, or any accessory. If phone or accessories are not working properly, refer only to authorised service facilities. Damaged batteries can damage or ruin components (e.g. Plastics). • When the phone or accessories have been exposed to very high or low temperature and return to normal temperature, moisture can form inside and damage circuit boards.
OPERATING ENVIRONMENT Remember to follow any particular rules that may apply wherever you happen to be, and always turn off the unit whenever its use is forbidden, or it can cause interference or danger. Only use the units in its normal user position. This unit complies with guidelines for radiation when it is used either in a normal position against your ear, or when it is at least 2.2 cm (7/8 inch) from your body.
manufacturer or its representative for more information about yr vehicle or any additional equipment. Do not keep or transport flammable liquid gases or explosives together with the unit or its accessories. For vehicles equipped with air bags: remember that air bags fill with air with considerable force. Do not place objects, including fixed or portable radio equipment in the area above the airbag or the area where it might expand.
Rate, or SAR. The ICNIRP SAR limit for mobile devices used by the general public is 2.0 W/kg. As SAR is measured utilizing the device’s highest transmitting power, the actual SAR of the device while operating is typically below the above indicated level. This is due to automatic changes to the power level of the device to ensure it only uses the minimum level requested to reach the network.
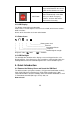
3.1 Keys This phone has the following keys: Key Name Annotations Dial or answer a call. In idle mode, press this key to browse the Outgoing Calls. Send Key To end a call, firmly press this key to turn off the phone. In the Menu options, press this key to return to Idle mode. End Key Short-cut keys Volume Key Press M1 or M2 key to select the phone numbers saved in each key. In Menu options, M1 is to select/confirm an option and M2 is to return to previous interface.
In Idle mode, firmly press the # key to switch between the current profile and the Conference mode. SOS Button Firmly press it for 3 seconds, the phone automatically sends SMS to the pre-stored emergency numbers, and then dial out the SOS contact list orderly. 3.2 LCD Display The Display shows different information Status icons; Text and Graphics Area are in the middle, which shows numbers, words and icons. Names of the instruction are shown at the bottom. 3.
Before installing, the phone must be turned off and not connected to battery charger or any other accessory. 1) Put the phone backside up, press the concave part on the battery cover; push the battery back downward to take it out. 2) Gently slide the SIM card into the slot metal side downwards until the card is in place, and please ensure cut angle of the card corresponds to the slot. SIM Card Precautions: 1) Turn off the phone, and wait a few seconds before removing or inserting the SIM card .
4.3 Charge/Recharge the Battery 1) Insert the charger into the charger socket; Be careful that only the original charger is used and in 5 correct position. 2) Connect the electrical plug side of the charger into electric power plug. 3) When charging is complete, always disconnect from the electrical source and then from the phone. Notes: 1) When battery power is low and the phone cannot be turned on, keep charging until the screen resumes indication of power.
than normal, replace the battery. 3) If the battery is completely discharged, it may take many minutes before the charging indicator appears on the display or before the phone can be used. 4) Your device is powered by a rechargeable battery. The full performance of a new battery is achieved only after two or three complete charge and discharge cycles. 4.5 Turn On or Off 1) Firmly press the End key until the phone powers on. The idle screen appears in the display.
blocked and can be unblocked only be entering the PUK code. The PUK password is normally supplied by the SIM card network operator. PUK Code The PUK code is used when the PIN code is blocked. The PUK code is provided with the SIM card by the network operator. If not supplied, please contact your network operator. If the PUK code is entered incorrectly 10 times, then the SIM card will be invalidated. You must connect the network operator for replacement.
1) In Idle mode, press the Send Key to display the outgoing call list. 2) Use the Up/Down key to select the number to dial 3) Press the Send Key to dial the number. Short-cut Key 1) To store a number in the speed dial keys M1/M2. In the idle mode, input the Phone numbers and press the M1 to select “Save to M1/M2”. Press the End key to exit. 2) In idle mode, press the M1/M2 key, then press the Send key to dial the number. 5.2 Adjust Volume During a call, press the Volume up/down button to adjust the volume.
To input letters Press once to input enter the first letter on the key. Press twice to input the second letter on the key. Press three times to input the third letter on the key. Note: The Zero key inputs spaces. 5.6 Keypad Lock Lock keypad: In idle mode, firmly press * key to lock keypad. Unlock keypad: Press OK key, then press # key to unlock keypad. 6. Menu Instructions 6.1 Phonebook Search To enter the Search menu press the OK/M1 key. Press Up/Down button to browse. Press the OK key to select record.
Storage Status Display the utilized memory capacity and the total memory capacity in Phonebook on the phone and the SIM card. Press the OK key to enter menu. Press the up/down key to display storage status. 6.2 Messages Inbox Displays the messages received. Delete: Press the OK key to delete the message Text reply: Press the OK key to reply the message. Forward: Forward the message to others. Edit: Edit the message to send or save. Dial Back: Press the OK key to select and dial the number.
Voice mailbox number: Add or edit your voice mail number for quick operation. Delete all Press the OK key to enter menu. Delete all messages: Press the OK key to confirm. Delete inbox messages: Press the OK key to confirm delete all inbox messages. Delete outbox messages: Press the OK key to confirm delete all outbox messages. Delete draft box messages: Press the OK key to confirm delete all draft box messages. 6.
(2) SMS Alert Tone: Select your desired tone as SMS alert ring. (3) Alarm Tone: Select your desired tone as the alarm ring. (4) Alert Type: Select single ring or repeat ring. Single: the ring tone is heard once only. Repeat: the ring tone repeats uninterruptedly. (5) Ring Tone Volume: Press the Up or Down button to adjust the volume. (6) Key Volume: Press the Up or Down button to adjust the volume. (7) Vibration: Select Enable/Disable the vibration. 6.
Press the Up/Down button to select “Always on” or amount of seconds before the backlight turns off automatically. Press OK to confirm. Clock Settings: Date & Time Settings: Press the OK key to enter. The screen displays the format of the time. Insert the time and date using the keypad. Press OK to confirm. Date Display Format: To set how the date is displayed. Time Display Format: To set how the time is displayed. 6.7.
30 Seconds: Activates automatically after 30 seconds the Phone is in standby. 60 Seconds. Activates automatically after 60 seconds the Phone is in standby. 6.8 Menu setting In this menu, you are able to “Enable or “Disable” each menu: Phonebook, Messages, Call Records, Profiles, Tools, SOS Setting, Phone settings. Note: Choose “Enable” or “Disable” to appear or disappear the menu in the main menu listing.