
User guide

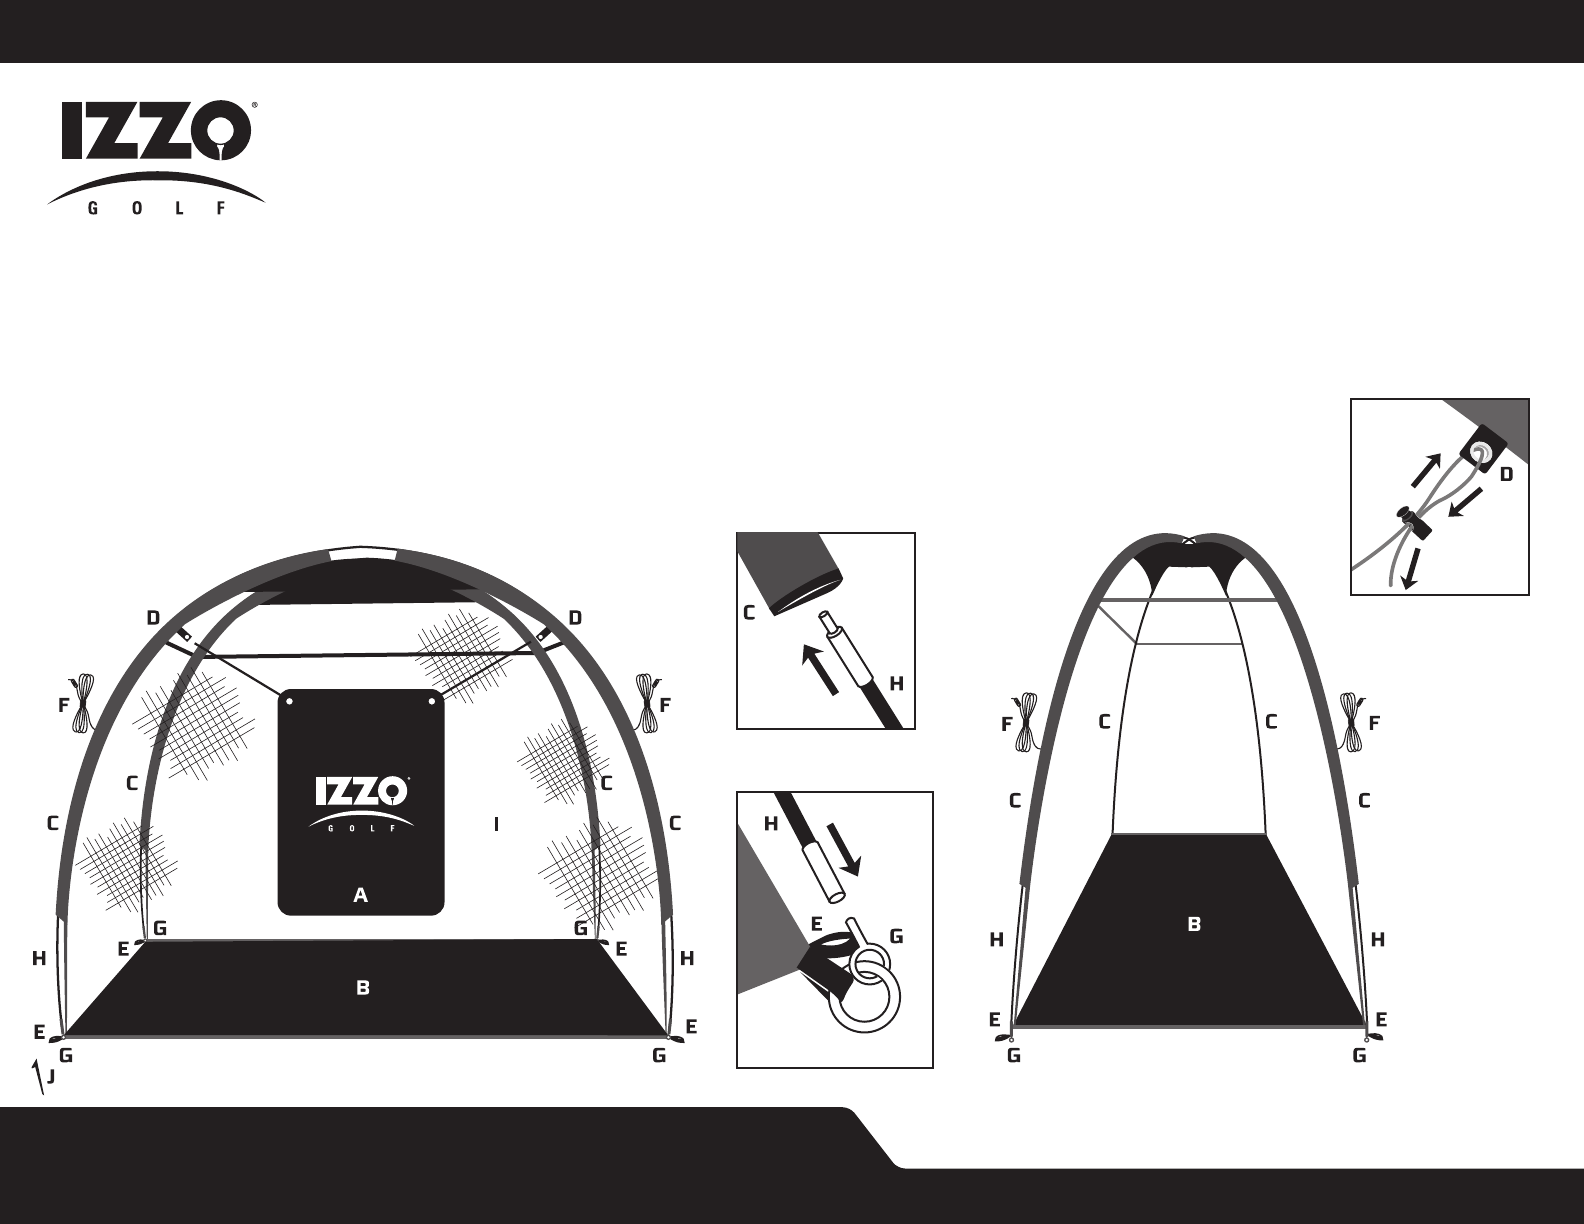
A. Hitting Target
B. Mesh Base
C. Hitting Net Sleeves (4)
D. Target Holder Rings (2)
E. Anchor Stake Loops (4)
F. Anchor Stake Draw Strings (4)
G. Corner Pin (4)
H. Frame Pole
I. Hitting Net
J. Stakes (6)
giant/giant jr. hitting net Instructions
™
1. Assemble both Frame Poles by interlocking shock-corded poles.
2. Lay hitting net on the ground with the mesh base facing down.
3. Slide One Frame Pole through the RED marked sleeve of the
hitting net and out through the other side. You should be able to see
both ends of the pole now. Now insert the other Frame Pole through
the BLUE marked sleeve of the hitting net.
4. Insert the Corner Pin into one end of the Frame Pole. (illus. 3)
Go to opposite end of the pole and gradually apply pressure to the
pole forming an arch until you are able to insert the Corner Pin that
is located diagnally from the other end of the Frame Pole. (illus. 3)
You should now have an arch formed.
5. Repeat STEP 4 for the second Frame Pole. Your hitting net should
now look like the images below. (illus. 1 & 2)
6. To anchor the hitting net to the ground push the stakes through all
three Anchor Stake Loops. For added support untie the Anchor Stake
Draw Strings and stake to the ground as shown below. (illus. 1)
7. To install the Hitting Target, thread one end of the string attached
to the target through the Target Holder Ring. Then thread the end
back through the cord lock. (illus. 6) Adjust accordingly for desired
target height.
(Illus. 2)
(Front)(back)
(Illus. 3)
(Illus. 4)
Front View
Side View
(Illus. 5)
(Illus. 1)