TV Stand Width-86.6inch Depth-15.7inch Height-12.
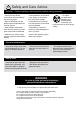
! Safety and Care Advice Important – Please read these instructions fully before starting assembly • Check you have all the components and tools listed on the following pages. • During assembly do not stand or put weight on the product, this could cause damage. • Remove all fittings from the plastic bags and separate them into their groups. • Assemble the item as close to its final position (in the same room) as possible.
28 9 1 27 13 11 6 28 2 7 12 10 15 4 14 24 26 8 5 26 23 25 25 26 23 26 26 26 24 19 20 21 21 18 17 18 16 19 20 19 20 22 21 21 18 22 19 20 22 18 16 1 22 17
A B1 Ф8x40MM B2 32 pcs Ф6x40MM C 80 pcs Ф15x10MM D Ф3.5x14MM E 74 pcs Ф3.
F1 F2 J1 J2 J3 3
B1 STEP 1 B1 B1 6 B1 B1 B1 6 B1 B1 B1 B1 B1 5 B1 5 B1 B1x12pcs STEP 2 B1 B1 4 B1 B1 B1 B1 B1 4 B1 B1 B1x8pcs 4
STEP 3 B1 9 C B1 B1 M B1 C 8 C M M C 13 M C M 12 C M B1x4pcs Mx4pcs Cx4pcs C M B1 STEP 4 9 10 B2 A A B2 B2 A 11 A 5 8 A B2 B2 A 6 B2 B2 A A B2 A Ax8pcs B2x8pcs 5 B2
STEP 5 B2 13 B2 A A 4 B2 12 A B2 A A Ax4pcs B2x4pcs B2 STEP 6 28 28 10 8 11 6 9
STEP 7 13 27 12 STEP 8 B1 B1 B1 B1 B1 2 B1 B1 3 B1 B1 B1x8pcs 7
STEP 9 B1 B1 1 B1 B1 B1 B1x4pcs STEP 10 A A 2 B2 3 A B2 A A 10 B2 A B2 B2 A A B2 B2 9 B2 11 8 A Ax8pcs B2x8pcs 8 B2
STEP 11 A B2 1 A B2 13 A A B2 12 B2 A Ax4pcs B2x4pcs STEP 12 B2 B1B1 B1B1 B1B1 B1B1 B1B1 24 B1B1 B1B1 24 25 B1B1 25 B1B1 B1B1 23 B1B1 23 B1B1 B1 B1x24pcs 9
STEP 13 B2 B2 25 B2 B2 26 B2 B2 26 B2 B2 24 B2 B2 24 26 B2 B2 B2 B2 26 B2 B2 25 B2 B2x16pcs STEP 14 B2 B2 26 B2 B2 23 B2 B2 23 26 B2 B2 B2 B2x8pcs 10
STEP 15 A A B2 B2 24 B2 5 26 B2 26 6 A B2 26 25 Ax4pcs B2x8pcs B2 A 25 B2 26 B2 24 A B2 A B2 STEP 16 A 23 A B2 B2 4 26 B2 B2 A 23 26 A Ax4pcs B2x4pcs 11
STEP 17 K2 3 K1 K2 K1 K2 K2 1 K2 K1 K1 K2 K1 11 K1 2 K2 K2 13 K1 K1 10 K1 K2 12 K1 K1 K2 K2 Kx8pcs STEP 18 b a=b √ a G Cx14pcs Gx14pcs 12 C
STEP 19 F1 3 C F1 C 1 F1 C F1 C C C C 11 F1 2 C F1 C C F1 8 F1 C 10 C C C C Cx16pcs F1x8pcs STEP 20 Install the light clip on the glass and place the glass into the cabinet 7 1 7 J1 J2 J3 Jx1pcs 13 C 9
STEP 21 CC CC E E CC 15 H1 E CC E H2 14 H1 H2 H1 H2 Cx8pcs Hx2pcs Ex4pcs STEP 22 If the door can't close,please adjust the hinges. 15 14 This is used to adjust the door panel in the up and down direction. This is used to adjust the door panel in the front and rear. Cx16pcs 14 This is used to adjust the door panel in the left and right direction.
STEP 23 x2 19 B2 22 18 B1 B2 B2 B1 B1 B1 B1 B2 16 B2 16 B2 B1x10pcs B2x10pcs B1 STEP 24 x2 D D D 20 19 D D 18 16 16 D Dx10pcs 15
STEP 25 x2 C H2 16 C H1 C F2 C H1 H2 Cx8pcs F2x4pcs Hx2pcs STEP 26 x2 19 22 18 B1 B2 B2 B2 B1 B1 17 B1 B1 17 B2 B2 B2 B1x10pcs B2x10pcs B1 15
STEP 27 D x2 D D 20 19 D D 17 18 17 D Dx10pcs STEP 28 x2 C H2 17 C H1 C F2 C H1 H2 Cx8pcs F2x4pcs Hx2pcs 15
STEP 29 17 17 16 16 STEP 30 L In order to make the product more beautiful, please paste hardware L on the exposed holes Lx80pcs 15
LED light RECEIVER 1.LED light includes four parts: ①power supply ②receiver③ power adapter④ LED light 2.Please note that for transportation safety, the remote control does not contain batteries; the attery model is: CR2025. 3.The connection method of the LED light is as shown in the figure below: L E D 4.