
Installation Guide

PO Box 342113, Austin, TX 78734
512-840-0616
•
sales@jandhled.com
www.jandhled.com
A Division of Littles and Associates, LLC
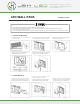
LED WALL PACK
Installation Guide
WARNIN G
1.To avoid electric shock, disconnect power at source prior to installation.
2.The installation should be performed by qualified electricians or lighting technicians.
3. Before conducting any installation, maintenance, or removal, disable all power to the luminaries and wait until the fixture cool down.
4. Do not touch the fixture while it is in service.
5. If there is any problem with the fixture, DO turn off power and DO NOT attempt repair unless you are a qualified technician or the customer service member.
1
.
Junction box Mounting
1
. Loosen screws and remove the front lens set carefully 2. Drill appropriate knockouts (B) for wiring, the fixture
from the bac k plate.
supports standard 3 1/4 '' and 4''Junction box.
gasket
B
4. Finish wiring (Black for Line, White for Neutral
and Green/Yellow Green wire for Ground).
5. Replace the lens on the hinges, make connections
and close the lens set then tighten the screws.
Wire Connection
Black Line
White
Neutral
Green/Yellow Green
Ground
2. Conduit Mounting
1. Loosen screws and rem ove the front lens set
carefully from the back plate. (See step 1 above)
2. Remove 1/2” plug from where you intend to feed conduit .
1
B
2
3. Drilling ou t the holes (C) to secure it on the
wall w ith choosin g proper screw s.
4. Finish wiring ( Black for line, White for neutral and
Green/Yellow Green for ground). (See step 4 above)
C
C
C
5. Replace the lens set on the hinge and finish
connection, Close the lens set and tighten the
screws to fasten the lens set to the back plate.
3. Attach the back plate on the wall, use the supplied
gaskets for a weather tight seal.