owner’s manual J-300™ Collection J - 315 J - 325 J - 335 J - 345 J - 355 J - 365 J - 375 2530-398W Rev.
Attention New Spa Owner! Congratulations on the purchase of your new Jacuzzi® spa! The following is a list of automated functions performed by your spa. These functions are listed below in an attempt to alleviate any operational concerns you may have during the first 24-hours of ownership! Also listed below are important maintenance recommendations you should observe on a regular basis to protect your new investment.
Table of Contents J-300 1.0 2.0 Important Spa Owner Information ������������������������������������1 FCC Notice ��������������������������������������������������������������������������1 3.0 Important Safety Instructions for all Spa Owners �����������2 3.1 3.2 3.3 3.
J-300 12.6 12.7 12.8 Maintaining The Synthetic Cabinet ���������������������������������������������� 35 Winterizing ����������������������������������������������������������������������������������� 35 Restarting Your Spa in Cold Weather ������������������������������������������ 36 13.0 Water Quality Maintenance ����������������������������������������������36 13.1 13.2 13.
1.0 Important Spa Owner Information J-300 Your Jacuzzi J-300 Collection spa is constructed to the highest standards and is capable of providing many years of trouble-free use. However, because heat retentive materials are utilized to insulate the spa for efficient operation, an uncovered spa surface and wall fittings directly exposed to sunlight and high temperatures for an extended period is subject to permanent damage. Damage caused by exposing the spa to this abuse is not covered under warranty.
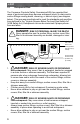
J-300 3.0 Important Safety Instructions for all Spa Owners READ AND FOLLOW ALL INSTRUCTIONS CAREFULLY! This spa was manufactured to meet the standards and specifications outlined in the “Virginia Graeme Baker Pool and Spa Safety Act” (VGB Safety Act). When installing and using this spa, basic safety precautions should always be followed, including: ! DANGER: Risk of Severe Injury or Drowning! 1. • Extreme caution must be exercised to prevent unauthorized access by children.
J-300 • • • • • unit and any metal equipment, metal enclosures of electrical equipment, metal water pipe, or conduit within 5 feet (1.5m) of the unit. Never permit any electrical appliance, such as a light, telephone, radio, television, etc. within 5 feet (1.5m) of a spa unless such appliances are built-in by the manufacturer. Never bring any electrical appliances into or near the spa. Never operate any electrical appliances from inside the spa or when you are wet.
J-300 • • • • • Persons suffering from obesity or a medical history of heart disease, low or high blood pressure, circulatory system problems, diabetes, infectious diseases or immune deficiency syndromes should consult a physician before using a spa. If you experience breathing difficulties in association with using or operating your spa, discontinue use and consult your physician.
J-300 10. CAUTION: To DECREASE Risk of Product Damage. • Maintain water chemistry in accordance with manufacturer’s instructions. • Proper chemical maintenance of spa water is necessary to maintain safe water and prevent possible damage to spa components. 11. NOTE: This spa is not intended nor designed to be used in a commercial or public application.
J-300 3.1 Entrapment Risk The Consumer Products Safety Commission/USA has reported that users of pools and spas have become entrapped (stuck) to drain and/or suction fittings causing death, drowning, or serious injury (see diagram below). This spa was manufactured to meet the standards and specifications outlined in the “Virginia Graeme Baker Pool and Spa Safety Act” (VGB Safety Act). Entrapment risk can be minimized if proper precautions are taken.
J-300 3. • DANGER: Risk of Severe Injury or Drowning! Body entrapment: May occur when part of the torso becomes entrapped, inserted or sucked into a suction or outlet opening. Never allow children to play or get near the suction fittings, suction covers, filter, filter lid or skimmer assembly. ! ! DANGER: Risk of Severe Injury or Drowning! 4. Evisceration (disembowelment) entrapment: May occur when the buttocks becomes entrapped, inserted or sucked into a suction or outlet opening.
J-300 3.3 Important Additional CSA Safety Instructions (Canada Only) When using this electrical equipment, basic safety precautions should always be followed, including the following: 1. READ AND FOLLOW ALL INSTRUCTIONS. 2. A green colored terminal or a terminal marked G, Gr, Ground, Grounding or the symbol* is located inside the supply terminal box or compartment.
4.0 Choosing A Location J-300 IMPORTANT: Because of the combined weight of the spa, water and users, it is extremely important that the base upon which the spa rests be smooth, flat, level and capable of uniformly supporting this weight, without shifting or settling, for the entire time the spa is in place. If the spa is placed on a surface which does not meet these requirements, damage to the skirt and/or the spa shell may result. Damage caused by improper support is not covered under warranty.
J-300 4.1 Outdoor Location In selecting the ideal outdoor location for your spa, we suggest that you take into consideration: • • • • • • The proximity to changing area and shelter (especially in colder weather). The pathway to and from your spa (this should be free of debris so that dirt and leaves are not easily tracked into the spa). The closeness to trees and shrubbery (remember that leaves and birds could create extra work in keeping the spa clean).
J-300 • Proper Ventilation: Proper ventilation should be discussed with an Engineer or authority competent enough to understand the necessary provisions needed to vent moist or heated air and air associated with chemical odors outdoors. When the spa is in use considerable amounts of moisture will escape, potentially causing mold and mildew over time which can damage certain surfaces and/ or surroundings.
J-300 5.0 General Electrical Safety Instructions Your new Jacuzzi spa is equipped with a “state-of-the-art” equipment system. It contains the most advanced safety and self-protective equipment in the industry. Nonetheless, this spa must be installed properly to insure dependable usage. Please contact your dealer or local building department should you have any questions regarding your installation. Proper grounding is extremely important. Jacuzzi spas are equipped with a current collector system.
J-300 North American J-335, J-345, J-355, J-365 and J-375 Models (60 Hz) Circuit Breaker (2-Pole): Number of Wires: Frequency: Current Draw: 240V/40A* 240V/50A** 240V/60A*** 40A 50A 60A 3 3 3 60 Hz 60 Hz 60 Hz 26A 36A 45A In 40A configuration, the heater will not operate while either jets pump is running in high speed. Note: pump 2 runs only in high speed. ** In 50A configuration, the heater will not operate while both jets pumps are running in high speed. This is the factory setting.
J-300 Export J-335, J-345, J-355, J-365 and J-375 Models (50 Hz) Circuit Breaker: Number of Wires: Frequency: Current Draw: 230V/20A* 230V/30A** 230V/40A*** 20A 30A 40A 3 3 3 50 Hz 50 Hz 50 Hz 15A 23A 29A In 20A configuration, the heater will not operate while either jets pump is running in high speed. This is the factory setting. Note: pump 2 runs only in high speed. In 30A configuration, the heater will operate while one jets pump ** is running in high speed.
7.0 Electrical Wiring Instructions J-300 IMPORTANT NOTICE: The electrical wiring of this spa must meet the requirements of the National Electrical Code/USA (NEC) and any applicable state or local codes. The electrical circuit must be installed by a qualified electrician and approved by a local building/ electrical inspection authority. 1. Convertible 120/240V Power Models: • • DANGER: To DECREASE the risk of shock, product damage or electrical fire.
J-300 ANSI/NFPA 70. The disconnecting means must be readily accessible to the spa’s occupant but installed at least 5 feet (1.5m) from spa water. 7. The electrical circuit supplied for the spa must include a suitable ground fault circuit interrupter (GFCI) as required by NEC/USA Article 680-42. 8. To gain access to the spa’s power terminal block, remove the screws securing the synthetic cabinet panel under the control panel (Figure A). Then remove the four control box door screws and door (Figure B). 9.
J-300 Figure B Control Box 2 TB1 1 3 1. Terminal Block 2. Bonding Lug 3.
J-300 8.0 Spa Fill Up Procedure For best results, read each step in its entirety before proceeding with that step. 1. Prepare The Spa For Filling • Clear all debris from the spa. (Although the spa shell has been polished at the factory, you may want to treat it with a specially formulated spa cleaner.) Consult your authorized Jacuzzi dealer for additional information prior to filling spa. • Remove filter cover, then remove filter cartridge as outlined in Section 12.1 (page 30). 2.
J-300 5. Add Start-Up Chemicals Add the spa water chemicals as recommended by your authorized Jacuzzi dealer. See Section 13.0 “Water Quality Maintenance” (page 36) for general guidance. ! WARNING: Risk of poisoning or death. Never leave chemicals opened and accessible to anyone. Use chemicals according to the vendors instructions. Always store chemicals in a safe and/or locked location. Keep away from and out of reach of children. 6.
J-300 8. Place Cover On Spa • Keeping the insulating cover in place anytime the spa is not in use will reduce the time required for heating, thereby minimizing operating costs. • The time required for initial heat-up will vary depending on the starting water temperature. ! DANGER: Risk of PERSONAL injury. Check water temperature carefully before entering hot tub! Excessive water temperature can cause burns, welts and body temperature to rise, hyperthermia (over-heating).
J-300 10. Leave spa cover open during this step to allow excessive chemical vapors to exit spa, protecting pillows and plastic knobs from chemical attack. If spa is indoors, open doors and windows for proper ventilation. Turn on all jet pumps for one hour, then place the massage selector knob in the center “combo” position and open all air controls. Note: You will need to press the jets pump button(s) every 20 minutes since these functions have an automatic 20 minute time-out function that turns them off.
J-300 ! WARNING: RISK OF PERSONAL INJURY. • • To decrease the risk of injury, entrapment or drowning, never leave your hot tub unattended for any reason, especially if while the cover is open and accessible to small children and animals! To decrease the risk of contracting a waterborne illness (e.g. an infection, bacteria or virus) and/or respiratory ailments, maintain water chemistry within 6 step parameters.
9.0 J-300 Control Functions 9.1 Control Panel A. LED Display: Can display current water temperature (default display), water temperature set point, selected filtration/ heating mode, and error messages. A H G F B C D E 2-Pump Control Panel Shown B. Warmer ( ) Button: Increases water temperature set point. C. Cooler ( ) Button: Decreases water temperature set point. D. Light On/Off Button Options: Turns waterfall, footwell light, lighted cup holders and backlit pillows on in unison.
J-300 9.2 General Spa Features And Controls 13 2 2 13 11 16 16 4 7 2 6 15 17 10 5 10 15 3 10 9 6 8 12 2 17 5 5 16 16 2 14 13 1 13 J-365 model illustrated - Location of Features Varies by Model. Specifications/features subject to change without notice. 1. Control Panel 2. Toggle Air Controls 3. Filter/Skimmer Grill 4. PowerPro MX Jets 5. Therapy Jets 6. Massage Selector Valves 7. Therapy Seat 8. Spa Light 9. Vertical Jets (Foot Jets) 10.
10.0 Operating Instructions J-300 The spa control system has automatic functions that operate upon start-up and normal operation to protect the system. Upon power up, the readout displays the following information: 1. Control panel displays current software release 1. (e.g. 3.57), then; 2. Control panel displays “888” and all indicator LEDs are lit, permitting visual inspection of all display seg2. ments and indicator lights for proper operation. 3. After the initial start-up sequence ends, the actual 3.
J-300 10.3 Light On/Off Button Pressing this button activates the waterfall, footwell light, lighted cup holders, and backlit pillows lights in unison as follows: high - medium - low - off. Note: Lights automatically turn off after 2 hours. 10.4 Light Mode Button This button offers 4 light modes for your enjoyment.
J-300 10.6 Selecting Desired Massage Action B C All models incorporate a massage selector valve that allows you to customize the massage and performance by A diverting water between various jet systems within the spa. Simply turn valve to positions A, B or C to divert water pressure to various jet groups. Note: The valve is intended to operate in positions A (Combo), B, or C for optimum performance.
J-300 11.0 Automatic Filtration Cycles Your new spa includes a 24-hour circulation pump which filters the water continuously. The circulation pump draws water through the skimmer bag and one of two filter cartridges to effectively remove small debris in your spa. Note: The 24-hour circulation pump system also supplies heated water to the spa when the heater turns on. The pump is not programmable.
Standard Filtration/Heating Modes F0 5 minutes of filtration per day (one 5 minute “Blow-Out” cycle every 24 hours to purge all plumbing lines) F1 1 hour of filtration per day (one 30-minute cycle every 12 hours); This is the factory default setting. F2 1.
J-300 12.0 Spa Maintenance Proper and regular maintenance of your spa will help it retain its beauty and performance. Your authorized Jacuzzi dealer can supply you with all the information, supplies, and accessory products you will need to accomplish this.
J-300 An optional chemical feeder is available through your authorized Jacuzzi dealer that installs under the filter cap (#2472‑673). Always remove the chemical feeder cap and feeder (when used) during the filter cleaning process by turning the cap handle counterclockwise. Reinstall the cap and feeder back onto the filter cartridge after the filter cleaning process is complete. It is recommended that latex gloves be used to avoid touching the chemical feeder during the filter cleaning process.
J-300 F G Trapped Air Bubbles C ar tri dg e 2 C ar tri dg e 1 E Lift unthreaded filter cartridge from skimmer well. H If used, remove the chemical feeder as instructed prior to rinsing the filter cartridges. Rinse debris from filter pleats on each cartridge using a garden hose and high pressure nozzle. Start at the top and work downward towards handle. Repeat until all pleats are clean. I Submerge both filter cartridges in spa.
J-300 Periodically, the filter cartridge will need a more thorough cleaning to remove imbedded oils and minerals. For this, we suggest cleaning as illustrated in step “F”, followed by soaking the filter overnight in a plastic container filled with a solution of water and specially formulated filter cleanser available from your authorized Jacuzzi dealer. The average life expectancy of each filter is approximately two years with proper care and water quality maintenance.
J-300 12.3 Pillow Care Remove and clean the headrest pillows as needed with soapy water using a cloth or soft-bristle brush. Always remove the pillows when adding chemical shock treatment to the spa water. When the sanitizer reading is below 4.0 ppm, pillows can be reinstalled. ! CAUTION: Never attempt to remove the pillows by pulling on the complete assembly! The pillows utilize a bolt-on design that prohibits removal without tools. To remove pillows: 1.
J-300 B. Additional Care and Maintenance Instructions: 1. Debris can accumulate on the spa cover. Removal of snow or other debris will help to avoid breakage of the foam cores. 2. Be sure to lock the cover straps to secure the cover from unwanted or accidental entry. 3. Do not place heavy objects on the vinyl. 4. Do not walk, sit or stand on the cover. 5. Do not drag or use the flaps/skirt or the cover lock straps to remove the cover. 6. Use only recommended cover lift systems. 7.
J-300 CAUTION: Turn off power to hot tub! 1. Turn off power to the spa. 2. Follow the directions on page 33 for draining the spa. 3. Turn the massage/diverter selector(s) into the middle combo position to allow the water in the plumbing lines to drain, see page 27. 4. Turn the waterfall valve(s) to the open position to allow the water in the plumbing lines to drain, see page 27. 5.
J-300 hot tub investment. For specific guidance on maintaining water quality, consult your Authorized Jacuzzi dealer who can recommend appropriate chemical products for sanitizing and maintaining your hot tub. ! WARNING: Failure to maintain water quality WILL: • Increase risk of contracting a waterborne illness (e.g. an infection bacteria or virus) and/or respiratory ailments. • Damage the equipment, components and spa shell, which are not covered under the hot tub’s warranty.
J-300 ! WARNING: Risk of PERSONAL injury, drowning OR entrapment! Never leave your hot tub unattended for any reason while the cover is open and accessible, especially to small children and animals! CAUTION: Risk of PERSONAL injury OR SPA DAMAGE! Never add chlorine tablets (trichlor) or acid to your hot tub for any reason! These chemical may damage components within your hot tub, burn or irritate your skin, create a rash and void the manufacturer warranty for your spa. 13.
J-300 14.3 Panel Displays ICE Freeze Protection - A potential freeze condition has been detected. No action is required. Jets Pump 1 and heater will activate to circulate and warm water through the plumbing until spa is out of danger. See “Winterizing” (page 35). 14.4 Panel Displays SN1 Open sensor (heater is disabled) or shorted sensor (spa is deactivated). The high-limit temperature sensor is not functioning. Contact your authorized Jacuzzi dealer or qualified service technician. 14.
J-300 Contact your authorized Jacuzzi dealer or qualified service technician. To correct condition: • Remove the spa's cover and allow your spa to cool down. • Program the filter settings for Economy Mode (page 28). Raise water temperature setting to cancel Summer Logic condition (page 38). • If the condition persists, contact your authorized Jacuzzi dealer. 14.8 Panel Displays (- - -) WARNING: Risk of Hyperthermia (over-heating) ! Causing Severe Injury, burns, or welts.
J-300 1. Jets may all be closed. Verify all jets are in the open “on” position (Sec. 10.5, page 26). 2. Pump may not be properly primed. This can happen after the spa is drained and refilled. Press the JETS 1 button on the control panel several times, never leaving the motor running for more than 5 to 10 seconds at a time. Turn power off and let the air out of spa plumbing system by removing the filter cartridge (Sec. 12.1, page 30).
42 6560-134 Blue wires 12 VAC constant voltage (connects to the yellow wires on the transformer) Control Panel PUMP 2 PUMP 1 HI HI LO CIRC. PUMP O3 C BLK WHT RED BLK WHT BLK WHT BLK WHT A Yellow Connector Waterfall and Footwell lights can connect to any plug on the DCU (P/N 6560-134) OZONATOR (OPTIONAL) 12 VAC From X W Transformer A Light DCU GRN 1 K6 K5 K4 K3 K2 K1 2 RED BLK K7 J8 6 W K8 TEMPERATURE SENSOR Heater 5.
2 3 TB1 GRN WHT BLK RED 1 RED* BLK 1 J6 J13 2 3 Main Pump J17 HI RED K5 K7 W X BLK Heater IN J7 J8 RED J4 Transformer 120 VAC J1 BLK Heater OUT J9 J10 K8 Use copper conductors ONLY. Wire size must be appropriate per NEC and/or local codes (All Canadian spas must be hard wired per CSA).
6560-134 44 PUMP 2 PUMP 1 HI HI LO CIRC.
O3 1 J6 J13 2 LO F1 K4 K3 K2 Main Pump J5 J17 HI BLK K5 K7 BRN J8 Heater IN J7 BLU J4 K8 J1 J3 J2 J9 BRN J10 Heater OUT BLU 7 5 3 1 JP1 8 6 4 2 Control Panel 230 VAC, 3-Wire Connection (50Hz, 1-Phase Service) USE COPPER CONDUCTORS ONLY. WIRE SIZE MUST BE APPROPRIATE PER NEC AND/OR LOCAL CODES TB1 J15 J11 J16 F1 BRN 20A 250V SC-20 BRN BLU BLU BLU Circ.
J-300 17.0 Optional Stereo Receiver Functions 17.1 Stereo Receiver Control Functions 10 SE 11 12 13 SUBW 2 ZONE XBAS AR CH BAND 2 14 22 7 21 AS-PS 3 5 TOP MENU SAT INFO AUDIO ENTER AQ-CD-3 15 INT RPT RDM 16 17 18 MODE MULTIENVIRONMENT PLAYER 19 20 6 8 4 1 9 Models equipped with the stereo option only: To start enjoying your new Stereo Receiver, please read the following operation instructions in their entirety. 1. Power Button: Press PWR (Power) to turn deck on or off.
J-300 C. To navigate through the menus use the ( ) or ( ) buttons or press the MENU button repeatedly. D. To adjust the selected menu item, press the VOLUME Up (7) or Down (8) buttons. E. After the selected menu item(s) has been changed and no other buttons have been pressed within the 5 second time-out, the unit will resume to the previous operation. • Contrast: “CONTRAST 5” will be displayed by default. The user now has 5 seconds to press the VOLUME Up or Down buttons to adjust from 0 – 10.
J-300 10 SE 11 12 13 SUBW 2 ZONE XBAS AR CH BAND 2 14 22 7 21 AS-PS 3 5 TOP MENU SAT INFO AUDIO ENTER AQ-CD-3 15 • INT RPT RDM 16 17 18 MODE MULTIENVIRONMENT PLAYER 19 20 6 8 4 1 9 VOLUME (Volume Level): User has 5 seconds to use the Volume button to adjust the desire volume level, the volume level will be shown on the LCD display ranging from 00 (lowest) to 46 (highest).
J-300 Shows the Bass Quality factor (Curve characteristics) of each step 15.0 12.5 10.0 7.5 Level (dB) 5.0 2.5 1W 2W 1N 2N Figure 1 0.0 10 100 1.0K 10.0K Frequency (Hz) • MIDDLE (Middle Level): User has 5 seconds to use the Volume Up or Down button to adjust the desired Middle level range from -6 to +6. • MID-CFQ (Middle Center Frequency): User has 5 seconds to use the Volume Up or Down button to adjust the desired Middle Range Center Frequency to 500 Hz, 1 KHz, 1.5 KHz, or 2.5 KHz.
J-300 10 SE 11 12 13 SUBW 2 ZONE XBAS AR CH BAND 2 14 22 7 21 AS-PS 3 5 TOP MENU SAT INFO AUDIO ENTER AQ-CD-3 15 • INT RPT RDM 16 17 18 MODE MULTIENVIRONMENT PLAYER 19 20 6 8 4 1 9 FADER: User has 5 seconds to use Volume Up or Down button to adjust the Fader between the front and rear speakers from R12 (full rear) to F12 (full front). “C00” represents an equal balance between the front and rear speakers. 7.
J-300 14. AS/PS (Automatically Store/Preset Scan) Button: While in seek mode the stereo unit will automatically select 6 strong stations and store them in the current band. Select a band (if needed). • Preset Scan: Scan stations stored in the current band. Select a band, press AS/PS button for less than 3 seconds. The unit will pause for ten seconds at each preset station. Press AS/PS button again to stop scanning when the desired station is reached.
J-300 10 SE 11 12 13 SUBW 2 ZONE XBAS AR CH BAND 2 14 22 7 21 AS-PS 3 5 TOP MENU SAT INFO AUDIO ENTER AQ-CD-3 15 INT RPT RDM 16 17 18 MODE MULTIENVIRONMENT PLAYER 19 20 6 8 4 1 9 20. Preset 6/UP Button: In Tuner mode, any station can be stored as preset 6 by simply pressing and holding this button for 2 seconds, after the desired station is selected. To recall the station preset, simply press and release this button.
J-300 The system can only display the first 8 letters of ID3 tags. If the recorded information is longer than 8 letters, text will scroll to the left once, then the 8 first letters will be displayed. If specific info has not been recorded on an MP3 disc, NO FOLD, NO TRK, NO TLT, NO ALBM, NO ART will display. 24. Playback Order of CD with MP3 Files: • A directory that does not include an MP3 file is skipped. • We recommend that you make no more than two levels for each disc.
J-300 General Power.................................................................................DC 11.5 -14.4V Pre Output Voltage................................................................................. 5V Current Consumption........................................................................ < 15A Stand-By-Mode .................................................................................. < 1A Maximum Mounting Angle............................................ 30° from horizontal Fuse..
J-300 ROOT Level 1 Level 4 Level 3 Level 2 01 Folder 001.MP3 002.MP3 The equipment assigns folder numbers. The user cannot assign folder numbers. It is not possible to check folders that do not include MP3/ WMA files. (These folders will be skipped without displaying the folder number and name) 003.MP3 004.MP3 04 009.MP3 010.MP3 NOT DISPLAY 011.MP3 05 File • 012.MP3 013.MP3 014.MP3 06 015.MP3 016.MP3 08 02 019.MP3 07 017.MP3 NOT DISPLAY 020.MP3 018.MP3 NOT DISPLAY 005.MP3 09 021.
J-300 2. File/Folder Repeat play : • Press the M3 button more than 3 seconds during playing MP3/WMA disc for “repeat play” for all files of the current folder and keep on repeat playing the current folder until “repeat play” is disabled. To disable current folder “repeat play”, long press M3 button more than 3 seconds. • Press the M3 button less than 3 seconds to “repeat play” the current file and keep on repeat playing the current file until the “repeat play” is disabled.
J-300 ICON DESCRIPTION FOLDER ICON FILE ICON TRACK ICON ARTIST ICON ALBUM ICON 17.4 Stereo Audio Receiver Troubleshooting Before going through the check list, check wiring connection. If any of the problems persist after check list has been made, consult your nearest service dealer.
J-300 ERROR Mechanism Error Press the eject button to correct the problem. If the error code does not disappear, consult your nearest service dealer Disc Error Maybe disc dirty/disc scratched/disc upside down Replace the disc 17.5 Standard Wireless Remote Control Functions A remote control is supplied on all spas with the optional audio system. This remote provides control over some of the radio and CD playback functions. MODE 1 AUDIO SEL 4 3 2 MENU A.
J-300 B. Bonding the Remote and Stereo If your remote does not operate the stereo, you may need to bond them by pressing on of the following methods: • Press and hold the MUTE button for 5 seconds or; • Press the four buttons MODE, MUTE, BAND/SEARCH, and TOP buttons at the corners one by one clockwise. This must be completed within two seconds. 17.6 iPod®/MP3 Player Connection A. Connecting Your iPod/MP3 Player 1.
J-300 17.7 Wireless Remote Battery Replacement Procedure 1. Turn the remote unit over and locate the battery door (Figure A). Fig. A CLOSED OPEN 2. Rotate the battery door, with a coin, counterclockwise until the dot aligns with the Open arrow (Figure B). Battery Door CLOSED OPEN Fig. B CLOSED 3. Remove battery door using coin to pry the door upward (Figure C). OPEN Fig. C 4. Replace battery using CR2025 or equivalent (Figure D). CLOSED OPEN LITHIUM BATTERY CR2025 3V Fig. D 5.