
Installation Guide


• NEVER use high-speed power tools (e.g. saws, grinders, etc.) to cut James Hardie
®
products indoors as they may generate excessive silica dust.
• NEVER dry sweep – Use wet suppression methods or HEPA vacuum for clean-up.
• To further limit respirable silica exposures, wear a properly-tted, NIOSH-approved
dust mask or respirator (e.g. N-95) in accordance with applicable government
regulations and manufacturer instructions.
1 | English
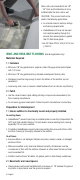
CUTTING
HARDIEBACKER
®
BOARD
• Use a straight edge as a guide to score
the board’s face and snap upward
along the score line. We recommend
using a carbide-tipped scoring knife,
but a utility knife may also be used.
The use of shears (manual, electric or
pneumatic) is also acceptable.
• For cutouts and small holes, score
around perimeter and break out from
the face side with hammer.
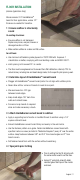
COUNTERTOP INSTALLATION
1 | Ensure cabinets are level and
secure
• Use minimum 1/2” exterior grade
plywood or equivalent, positioned
across the wood cabinet. Space
between plywood supports is not to exceed 16” on center.
2 | Determine layout of HardieBacker
®
cement board
• Do not align HardieBacker cement board with plywood joints.
• Score and snap boards to required sizes and make necessary cutouts.
• We recommend an 1/8” gap from board edges.
3 | Attach HardieBacker cement board to countertop
• Apply a supporting bed of dry-set mortar or modied thinset to plywood with a 1/4”
square-notched trowel. Mastic can also be used with a 5/32” V-notched trowel.
• Use the fastener pattern as a guide. Fasten HardieBacker cement board with
specied nails or screws (as listed in “Materials Required”) every 8” over the entire
surface. Keep fasteners between 3/8" and 3/4" from board edges and 2" from
board corners.
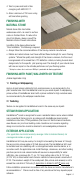
4 | Tape joints prior to tiling
• Prior to setting the tile, ll all joints with the same mortar used to set the tiles.
• Embed 2” wide high-strength alkali-resistant glass ber tape in the mortar and level.
5 | Exterior application (HardieBacker 500 only)
‡
Additional details on page 4
• Follow Countertop installation steps 1 thru 4
• Mastic (organic adhesives) shall not be used in exterior applications