
Full Product Manual


18
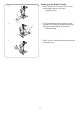
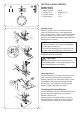
Straight Stitch
Machine setting
q Stitch selector: A or B
w Presser foot: Zigzag foot A
e Thread tension: 2 – 6
r Stitch length: 1.5 – 4
Starting to sew
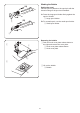
Raise the presser foot and position the fabric
next to a seam guide line on the needle plate
(5/8˝ (1.6 cm) is most common). Lower the needle
to the point where you want to start. Lower the
presser foot and pull the threads toward the back.
Depress the foot control.
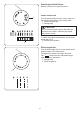
Finishing sewing
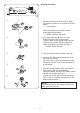
To fasten the ends of a seam, press the reverse
stitch lever and sew several reverse stitches.
Raise the presser foot. Remove the fabric, draw
the threads to the back and cut them with the
thread cutter. The threads are now the proper
length to begin sewing the next seam.
CAUTION:
Do not place ngers near to the presser foot
when guiding fabric, or the needle clamp screw
may strike and injure your ngers.
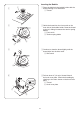
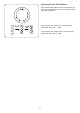
Changing the Sewing Direction
Stop the machine and turn the handwheel toward
you to bring the needle down into the fabric.
Raise the presser foot.
Pivot the fabric around the needle to change
sewing direction as desired. Lower the presser
foot and continue sewing in the new direction.
SECTION 3. BASIC SEWING
NOTE:
Draw the threads to the left when sewing with
the sliding buttonhole foot.
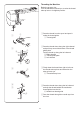
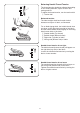
To fasten the beginning of the seam, rst sew
several stitches in reverse then sew forward.
Gently guide the fabric along a seam guide line
letting the fabric feed naturally.