
Operation Manual


48
↓
↓
↓
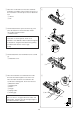
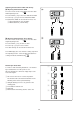
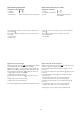
b Depress the foot control to sew a buttonhole.
The machine will sew a buttonhole in the following
order:
aa
aa
a Step 1 and 2: Front bartack and left row
!2 Starting point
ss
ss
s Step 3: Right row
dd
dd
d Step 4: Back bartack and locking stitches at the
end
!3 End point
ff
ff
f LED shows each sewing step and a dot will blink
when the buttonhole is finished.
!4 Dot
b
aa
aa
a
ss
ss
s
dd
dd
d
ff
ff
f
!2
!3
n
m
!5
!6
!7
!8
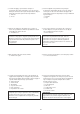
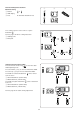
m After the buttonhole sewing is finished, push the
buttonhole lever upward as far as it will go.
!8 Buttonhole lever
n Remove the fabric and place a pin just before the
bartack at each end to prevent cutting bartacks.
Cut the opening with the seam ripper. Use an awl
to open the keyhole buttonhole.
!5 Pin
!6 Seam ripper
!7 Awl
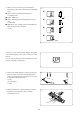
If you try to select another pattern without raising the
foot, the LED display shows “UP” to alert you to raise
the foot.
You can sew another layer of the buttonhole over the
previous stitching (see page 50).
!4