
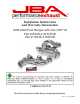
Manual

1. Place vehicle in a location where the floor is solid and flat, with adequate lighting. Do not attempt to work
on a hot engine. Heat causes metal to expand and makes removal of fasteners difficult at best. Disconnect the
battery cables from the battery. Raise the front of the vehicle to obtain adequate access to the bottom exhaust
manifold anges. Use large-base jack stands to support the vehicle. Do not rely on the jack! Block the tires to
prevent the vehicle from rolling off the jack stands.
2. Apply penetrating oil on all accessible fasteners and ttings before attempting to remove them.
3. Disconnect the negative battery cable from the battery.
4. From underneath the vehicle, loosen the bolts connecting the exhaust system to the exhaust manifolds. Move
the exhaust system back about 1/2” to gain workspace.
5. If equipped remove the EGR tube from the EGR valve and the exhaust manifold.
6. On the driver’s side, remove the fasteners attaching the manifold to the head and remove the manifold.
7. The dipstick must now be removed. It has a separate mounting bolt on the head and uses an O-ring seal at the
bottom. Use care to protect the O-ring.
8. On the passenger side, remove the fasteners attaching the manifold to the head then remove the manifold.
9. Unbolt the bracket and cable from the passenger side, above the exhaust manifold. Retain the larger bolt for
reuse.
10. Remove the gaskets and any gasket material or any carbon deposits that remain on the head surface. The use
of a gasket removal agent will ease the removal of any gasket material. Use care not to get debris into ports or
spark plug holes. Clean excess carbon deposits from the Exhaust system mating flange.
11. Slip the dipstick into the driver’s side header and guide it into the block as you maneuver the header into
place. Apply anti-seize to the header bolts if installing on aluminum heads. Bolt the Driver’s side header to the
engine using the supplied gaskets, bolts, and lock washers. Torque to 30 lbs./in on iron heads 23 lbs./in on alu-
minum heads.
12. Install the passenger side header through the wheel well. Apply anti-seize to the header bolts if installing
on aluminum heads. Bolt the header to the engine using the supplied gaskets, bolts, and lock washers. Torque to
30 lbs./in on iron heads, 23 lbs./in on aluminum heads.
13. Put a thin coat of High Temperature, Silicone Safe, Silicone on the header collector domes and re-connect
the exhaust system to the headers using the hardware provided. Tighten to 35 ft./lbs.
14. Models with EGR ttings only. Remove the EGR adapter tting which adapts the EGR tube to the t-
ting on the factory manifold. This adapter must be reused. Thread the adapter into the fitting on the header and
reconnect the EGR tube. (Note: Some Models may or may not have this adapter)
15. Check that all bolts are tight. Make sure that all wiring, fuel lines, transmissions lines, brake lines etc are
clear of the headers and the exhaust and relocate as necessary.
16. Reconnect the battery.
17. Start the engine, check for leaks and test drive. Then let engine cool and then re-torque the header bolts.
18. Periodically check and retighten the header bolts.