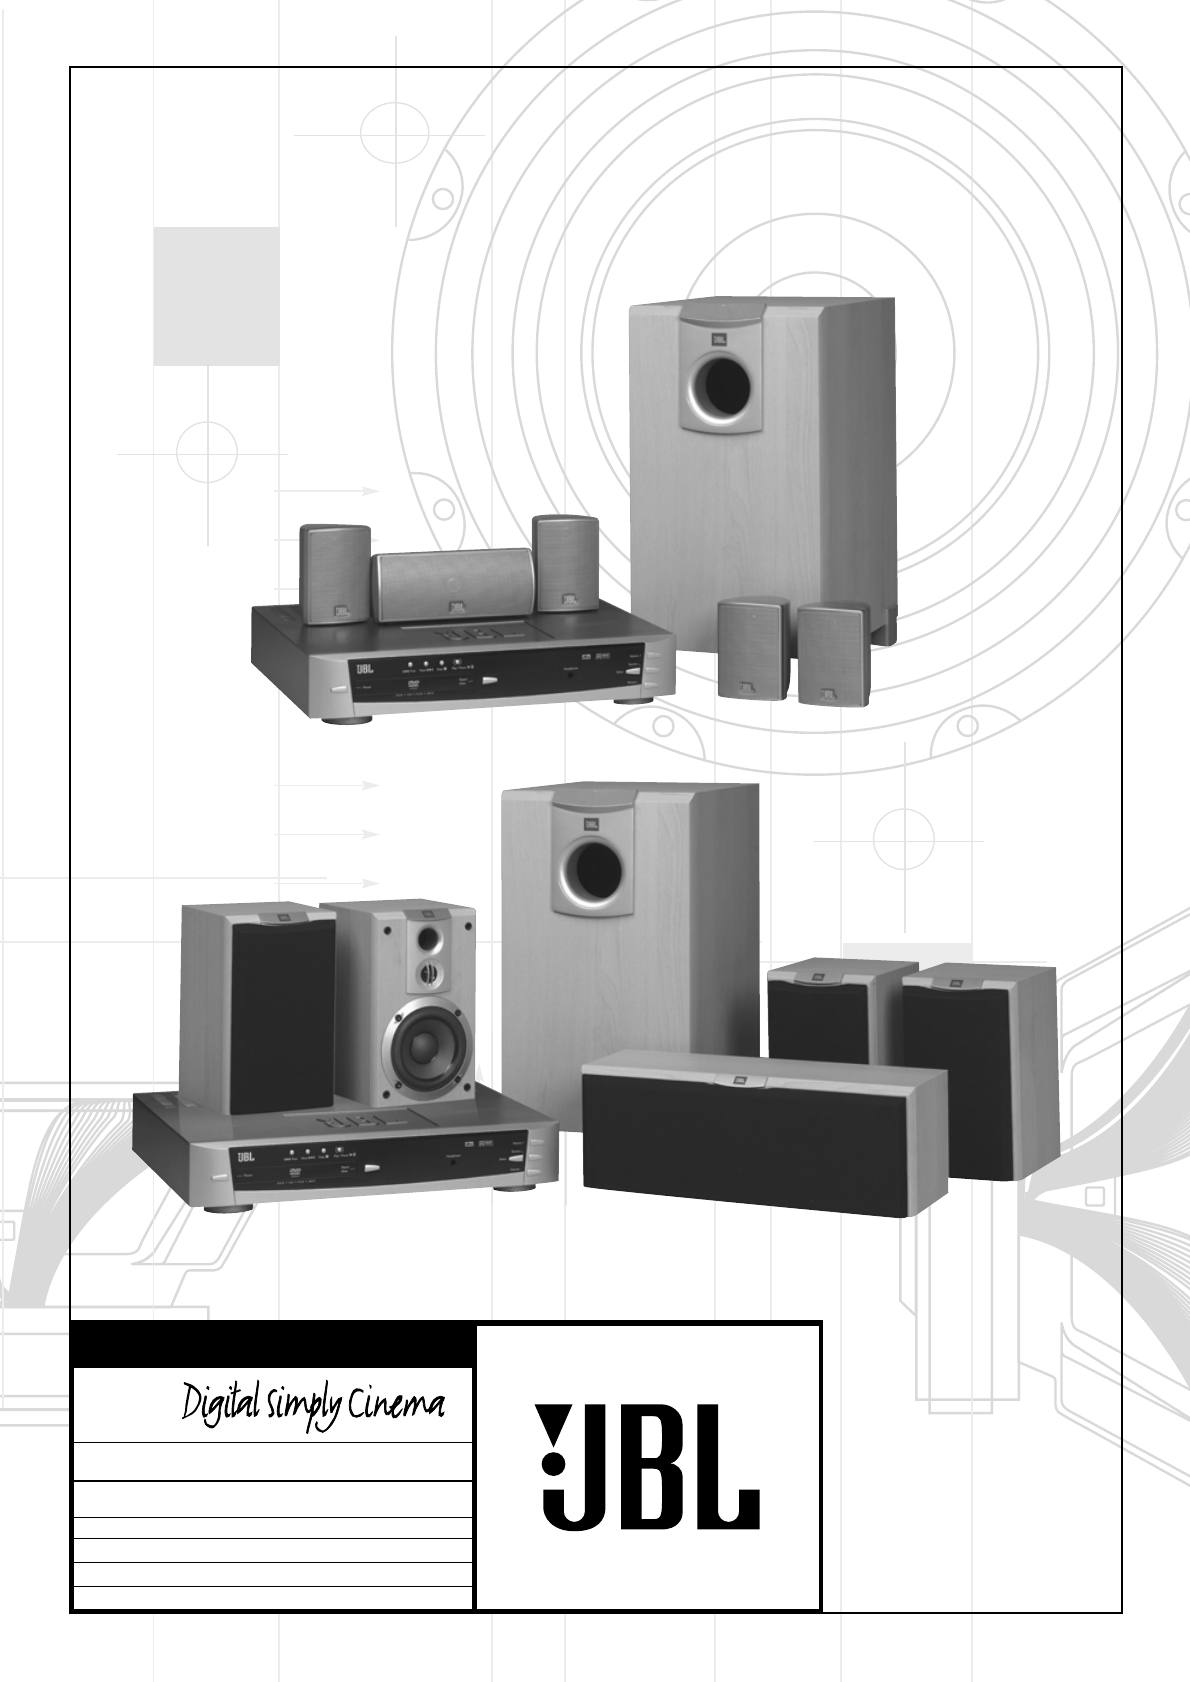
DSC 400 DSC 800 X + 0 + Y 2 0 M HZ OWNER’S GUIDE PRODUCT LINE: ® MODEL NUMBER: DSC 400 (230V)/DSC 800 (230V) DESIGN GOAL: Bring the thrill of live performance and movie sound to the home environment by calling on JBL’s professional engineering leadership.
WELCOME And thank you for purchasing this JBL Digital Simply Cinema system. This state of the art system includes everything you need to experience movie theater quality digital video and audio in the comfort of your own living room. The only thing you need to add is your own TV. We have designed this system to be easy to set up, and even easier to use. But please review this manual before you operate your system.
TA B L E O F C O N T E N T S Introduction Important Safeguards and Precautions Front Panel Controls Front Panel Display Rear Panel Connections Remote Control Basic Information About This Manual Notes On Discs DVD Regional Coding Inserting Batteries into the Remote Control Page 3 5 6 7 8 10 10 10 10 10 Installation Page Speaker Placement 11 System Connections 13 Antenna Connections 14 TV, Audio and Power Connections and Sub Auto On 15 TV and Aux Connections 15 Connecting AC Power 15 Subwoofer Auto-On 15 Ad
IMPORTANT SAFEGUARDS AND PRECAUTIONS Power Cord Protection Non-Use Periods Stacking To avoid any malfunctions of the system controller or subwoofer, and to protect against electric shock, fire or personal injury, please observe the following: • Hold the plug firmly when connecting or disconnecting the AC power cord. • Keep the AC power cord away from heating appliances. • Never put any heavy object on the AC power cord. • Do not attempt to repair or modify the AC power cords in any way.
IMPORTANT SAFEGUARDS AND PRECAUTIONS If There is Noise Interference on the TV While a Broadcast is Being Received Depending on the reception condition of the TV, interference may appear on the TV monitor while you watch a TV broadcast and the controller is left on. This is not a malfunction of the controller or the TV. To watch a TV broadcast, turn off the controller. Service • Do not attempt to service the controller or subwoofer yourself. • Please contact your authorized JBL dealer.
F R O N T PA N E L C O N T R O L S Volume Source Open/ Close Power Select Headphone DVD VCD CD MP3 Volume Refer to the pages indicated in parentheses for details. POWER (page 15). Turn on and off the main power of the system. (Note: This switch must be “on” in order to operate the system with the remote control.) Disc Tray (page 18). Place a disc on the tray. REV. While playing a disc (page 19), press this button to select the previous title, chapter or track.
F R O N T PA N E L D I S P L AY RDS PTY RDS PTY Refer to the pages indicated in parentheses for details. Speakers Icon (page 16, 36). Indicates which of the six speakers are operating. Status Bar. Shows the operating information, such as “OPEN”, “CLOSE”and “LOADING”, etc. Shows the type of disc playing: DVD, CD and MP3, etc. Shows track and time information of the CD or MP3 disc. Shows the tuner band and frequency. Sleep (page 38).
R E A R PA N E L C O N N E C T I O N S Refer to the pages indicated in parentheses for details. AM Antenna (page 14). Connect to the supplied AM loop antenna. FM Antenna (page 14). Connect to the supplied FM antenna. Audio Out (page 15). Optional connection to a TV set or external audio system (also for recording devices). Not necessary when using DSC loudspeaker system and subwoofer connection. AUX Audio In (page 15). Connect to a line-level analog audio source: TV, tape player, Minidisc, PC, etc.
REMOTE CONTROL STANDBY DVD TUNER AUX OPEN / CLOSE 1 11 GOTO ZOOM SETUP TITLE RETURN 28 24 STANDBY DVD TUNER AUX OPEN / CLOSE 25 GOTO ZOOM SETUP TITLE RETURN 26 1 2 3 MENU / PBC REPEAT 4 5 6 ANGLE A-B 31 7 8 9 SLEEP MUTE 32 >10 0 29 12 2 1 MENU / PBC 3 2 REPEAT 30 13 4 5 ANGLE 6 A-B 3 14 7 >10 9 8 SLEEP 0 MUTE 15 16 LISTENING 33 LISTENING + PROGRAM N/P TEST TONE SELECT 17 ADJ/VOL N/P TEST TONE SELECT 19 SUBTITLE STA + TUN - TUN
RETURN (page 20). Displays root menu when playing a DVD. REPEAT (page 21). Press to select Repeat 1 or Repeat All tracks (CDs) or titles/chapters (DVDs) playback. A-B (page 21). Specifies a section and plays it repeatedly. MUTE (page 18). Mutes the sound. LISTENING (page 36). Selects desired listening (Surround/Audio) mode. ADJUST/VOLUME (+ or –) (page 18, 40). Increase/decrease the master volume level or the selected channel level. SELECT (page 40).
B A S I C I N F O R M AT I O N About This Manual • The types of functions and operations that can be used for a particular disc vary depending on the features of that disc. In some cases, these functions and operations may differ from the descriptions given in this manual. In this event, follow the instructions given on the screen. This manual only covers basic disc operations. • For some operations, the icon may appear on the screen.
SPEAKER PLACEMENT Front Speakers Center Channel Speaker Subwoofer 0 – 0.6m (0 – 2 ft.) Surround Speakers 150-180 cm The front speakers should be placed the same distance from each other as they are from the listening position. They should be placed at about the same height from the floor as the listeners’ ears will be, or they may be angled toward the listeners.
SPEAKER MOUNTING OPTIONS DSC800 Satellites and Surrounds On shelves. On the wall. Wall brackets are included. On optional stands. Wall-Mounting The customer is responsible for proper selection and use of mounting hardware, available through hardware stores, to properly and safely wall-mount the speakers. DSC400 Satellites and Surrounds 12 On shelves. On the wall. Wall brackets are an optional extra (WB300S). On optional stands (FS300S). Attach plate to wall.
DSC SYSTEM CONNECTION Caution: Always make certain that the controller and the subwoofer are turned off before connecting or disconnecting anything. Connecting the Controller to the Subwoofer Connect the special multi-pin cable (included) to the output marked "System Audio Output" on the controller and to the input marked "System Audio Input" on the subwoofer.
ANTENNA CONNECTIONS Connect the supplied AM and FM antennas as shown for radio reception. Connect the AM loop antenna to the AM screw terminals. Connect the FM antenna to the 75 Ohm FM antenna socket. AM loop antenna (included) FM antenna (included) Notes: • To prevent noise pickup, keep the AM loop antenna away from the system and other components. • Be sure to fully extend the FM wire antenna. • After connecting the FM wire antenna, keep it as horizontal as possible.
T V, A U D I O A N D P O W E R C O N N E C T I O N S AND SUB AUTO ON Connecting the TV and optional components TV Connection (method 1) - using SCART cable (cable included) To view the video from DVD discs on your TV set, connect the SCART TV Out jack of this system to the SCART In jack of your TV set. If this connection is made, the audio signal will also be routed to the TV, but as long as the speakers of your JBL DSC system are active, the volume on your TV should be turned down.
ADJUSTING SPEAKER LEVELS After you have connected the system and positioned the speakers, the next step is to adjust the level of each satellite, using the Test Tone, so that their levels at your normal listening position are identical. This adjustment should be made with the Test Tone only, not while you are watching a DVD movie. selected, note that all six speaker icons in the display are on (see page 6), otherwise press LISTENING on the remote until this is the case.
USING TUNER PRESETS Presetting Radio Stations on the right) to select another preset memory number, and press MEMO again to enter that station in the selected preset memory number. You can preset up to 40 of your favorite AM and FM stations, in any combination, in the tuner memory for easy recall.
P L AY I N G D I S C Basic DISC Playback IMPORTANT: Please note that some DVD movie discs may not have all the features described in this chapter. Refer to the instructions or notes included with each disc to determine what features and operations are available on that particular disc. When a disc is inserted the following will occur depending on the type of disc inserted. • When playing a DVD, a DVD menu or title menu may appear on the TV screen (see page 20).
P L AY I N G D I S C Slow Motion Playback Frame By Frame Advance 8. Press SLOW on the remote control to play a disc in slow motion. If the disc is a DVD, press repeatedly to select the desired slow-motion speed: SF1➞SF2➞SF3➞SR1➞SR2➞ SR3➞normal play. 9 Press STEP repeatedly to advance the disc step by step (one frame at a time). Notes: • SF: Slow Forward SR: Slow Reverse • The larger the number, the slower the speed. • This function is not available for CD and MP3.
USING THE INDIVIDUAL DVD DISC MENU Using the title menu A DVD is divided into sections called “titles”. Normally, a title consists of several chapters. When you play a DVD which contains several titles, you can select the title (or chapter) you want using the title menu.
R E P E AT P L AY B A C K You can repeat all chapters in a title or on a disc. You can repeat all tracks on a disc. You can repeat a single title, chapter or track. In program play mode, the system repeats the chapters or tracks in the programmed order.
P R O G R A M P L AY ( A U D I O C D A N D V C D O N LY ) Ensure that the disc tray is selected as the source by pressing DVD on the remote control. Note • This function is not available for DVD and MP3 discs. You can arrange the order of the tracks on the disc to create your own program with up to 99 tracks. 1. In stop mode, press PROGRAM. The programming display appears on the TV screen and the front panel display. 4.
S E L E C T I N G A S TA R T P O I N T Selecting a start point by chapter or time code GO TO NUMBER BUTTONS DVD TUNER GOTO ZOOM SETUP TITLE RETURN 1 2 3 MENU / PBC REPEAT 4 5 6 ANGLE A-B 9 SLEEP MUTE 7 8 >10 0 PROGRAM N/P You can search by inputting the time code. Note that with VCD "Total Elapsed" or "Total Remain" time must be selected with the Display button on the remote (see page 24).
C H E C K I N G D I S C I N F O R M AT I O N U S I N G D I S P L AY B U T T O N You can check information about the disc, such as the total number of titles or chapters, tracks or time, using the Display function. The information you want appears on the TV screen and/or on the front panel display. When playing a DVD or VCD 1. Press DISPLAY once. Title number, chapter number and title elapsed time appear on-screen. TITLE 02 / 05 CHAPTER 001 / 006 00 : 34 : 56 TI : 02 / 05 CH : 001 / 006 2.
SETTINGS AND ADJUSTMENTS Using the SETUP Menu and Navigation Buttons (D/ E/ / ) • The SETUP Menu contains a listing of all of the optional settings that are included in this home theater system. They have all been preset to work properly with most systems and setups. The speaker setup cannot be altered, as it has been preset to the correct positions for using the system with the 6 speakers included when you purchased this system.
SETUP MENU LISTING Following is a listing of all of the possible options for each setting in this system as they appear on the menu pages. The factory default setting for each item is underlined. Before you decide to change any of the factory default settings, please review the specific explanation of each setting on the following pages to be sure you understand how the change will affect the operation of your system.
GENERAL SETUP 2. Select OSD LANG using (D/E), then press to go to the right option list. Select the desired language using (D/E), then press ENTER to confirm your selection. Selecting the On Screen Display (OSD) Language The first step in making any settings is to select your preferred language for the On Screen Display menus. We have preset the initial default On Screen Display (OSD) Language to English.
GENERAL SETUP TV Display Setting Path: Main Page ➞ General Page ➞ TV Display N OR M A L / PS N OR M A L / LB W ID E 16:9 Selects the aspect ratio of the TV set to be connected. • NORMAL/PS (4:3 Pan & Scan mode):Used when you connect a normal TV to the system. Displays a wide picture on the whole TV screen with a portion (right and left sides of the picture) automatically cut off. • NORMAL/LB (4:3 Letterbox mode): Used when you connect a normal TV to the system.
GENERAL SETUP Video Output Setting The initial default Video Output Mode setting for this system is "S-VIDEO" which is the correct setting when you are connecting this system to your TV using either the Video Out jack, the SVideo output socket or the SCART connector. There is no need to change the video output mode setting. A composite video signal is always available at the Video Out jack, should you wish to use this as your preferred connection method.
SPEAKER SETUP Audio Mode Setting Path: Main Page ➞ Speaker Set Up Page ➞ Audio Mode STE R EO PR O LOG IC 5.1 C H LT / R T SE T A U D IO M O D E The Audio Mode switches automatically to the type of audio on the disc you are playing. • If you play a DVD with either Dolby Digital or DTS audio, the "5.1" mode is selected automatically and sound is heard from all 5 satellites and the subwoofer. • If you play a DVD with a stereo soundtrack (PCM only, not Dolby Digital 2.
D O L B Y D I G I TA L A N D P R E F E R E N C E S S E T U P DOLBY DIGITAL SETUP Dynamic Range Setting PREFERENCES SETUP Dual Mono Setting Path: Main Page➞Dolby Digital Setup➞Dynamic Selecting the Language for Audio Path: Main Page ➞ Dolby Digital Setup ➞ Dual Mono --DOLBY DIGITAL SETUP-DUAL MONO STEREO DYNAMIC RNG LEFT MONO RIGHT MONO MIXED MONO MAIN PAGE DUA MONO(1+1)SETUP Default Setting: STEREO Some (rare) Dolby Digital DVDs may be recorded with Dual Mono program, i.e.
PREFERENCES SETUP Selecting the Language for Subtitles Path: Main Page➞Preferences Page➞Subtitle Selects the preferred language for subtitles as default. Movie ratings, if any, are as follows (see also menu above): • ENGLISH • SPANISH • FRENCH • ITALIAN • GERMAN • OFF Notes: • When you select a preferred language (English is the default) that is not recorded on the disc, one of the recorded languages is automatically selected.
PREFERENCES SETUP Changing the Password Path: Main Page ➞ Preferences ➞ Password ➞ Change To change the password from the original factory setting of "3308", follow the path shown above to select the "Change" heading. Press ENTER for the "Password Change Page". Use the number keys on the remote to enter the old password "3308". Only "XXXX" will appear as you enter the numbers. If you enter an incorrect password, the "XXXX" will disappear from the "Input Password" box and you must enter the correct password.
OTHER FUNCTIONS Angle Selection Example: Sequence of angles shot. Some DVD discs contain scenes which have been shot simultaneously from more than one camera angle to allow the user to select the preferred viewing angle. (The recorded angles differ from disc to disc.) • During some scenes, the subtitles may not appear immediately after you turn them on. • Some DVD's allow you to make subtitle selections and turn subtitles on or off only via the disc menu. Use D/E/ / and ENTER.
OTHER FUNCTIONS Listening To The Radio 3. Adjust the volume level by pressing the ADJ/VOL + or -. This system's Dolby Pro Logic decoder may be used for enhanced FM stereo listening. For details, see “Selecting Listening Modes” on page 36. To listen to preset radio stations Store radio stations in the system’s memory first (see “Presetting Radio Stations” on page 17). 1. Press SOURCE on the controller repeatedly until “FM” or “AM” appears on the front panel display. 4.
OTHER FUNCTIONS (CONTINUED) Listening To An External Source Program Types (PTY) An important feature of RDS is its capability of encoding broadcasts with Program Type (PTY) codes that indicate the type of material being broadcast. The following list shows the abbreviations used to indicate each PTY, along with an explanation of the PTY: If an external audio source is connected to this system (see page 15), you can listen to the external source through the system. 1.
OTHER FUNCTIONS (CONTINUED) Notes: • Before you press the listening button, please lower the volume level to reduce the possibility of speaker damage. • If you are listening to a mono broadcast or recording, select the Stereo setting (all surround indicators disappear in the display) for best results. Do not select one of the surround sound settings. • When "Normal" is selected with "Pro Logic" all channels will be used, including the Center and the Rears (Rears not with "3 Stereo").
OTHER FUNCTIONS (CONTINUED) Using The Sleep Timer MP3 Playback You can set the system to turn off automatically at a specified time. The JBL DSC100DVD is rare among DVD players in that it is able to playback discs recorded with MP3 files. This means that you may enjoy the latest music using discs created in your computer through the high quality audio components in your home theater system.
OTHER FUNCTIONS (CONTINUED) NOTES ON MP3 PLAYBACK • During MP3 playback, the front panel display and the time indicator on the screen on top of the list will show the number and the elapsed time of the track being played (on the screen only when selected with the DISPLAY button). Other time display options are not available with MP3 playback. • The JBL DSC100DVD is only compatible with standard MP3encoded discs.
OTHER FUNCTIONS (CONTINUED) Adjusting The Individual Speaker Volume (without Test Tone) And Treble Controls Note: You must make the adjustment while the treble level appears in the display. If the treble level indicator disappears, the setting will not be changed. When you change the setting, the new setting becomes the default setting until you change it again. Note: All bass sounds are directed to the subwoofer only.
SPECIAL FUNCTIONS (CONTINUED) • Zooming does not work on subtitles or menu screens included on DVDs. Picture Zooming (DVD and VCD) • The magnification level varies depending on the TV DISPLAY selection in the SETUP menu. 1. Press the ZOOM button on the remote control during normal, slow or still (pause) playback.
TROUBLESHOOTING If you experience any of the following difficulties while using the system, use this troubleshooting guide to help you remedy the problem. Should any problem persist, consult your authorized JBL dealer. • Depending on the TV, you may not be able to change the aspect ratio. In that case (TV not adjustable to 16:9) do not select "WIDE 16:9" in the TV Display. Then, no change of the aspect ratio is needed. No power.
TROUBLESHOOTING (CONTINUED) The remote does not function. • Remove any obstacles between the remote control and the system. • Move the remote control closer to the system. • Point the remote control at the remote sensor on the front panel. • Replace all the batteries in the remote control with new ones if they are weak. • Check that the batteries are loaded correctly. The disc does not play. • There is no disc inside. (“NO DISC” appears on the front panel display and the TV screen.) Insert a disc.
GLOSSARY Bit rate Value indicating the amount of video data compressed in a DVD per second. The unit is Mbps (megabit per second). 1 Mbps indicates that the data per second is 1,000,000 bits. The higher the bit rate, the larger the amount of data. However, this does not always mean higher quality pictures. Chapter Sections of a picture or a music piece on a DVD that are smaller than titles. Many titles are composed of several chapters, but many others are not.
D S C 1 0 0 D V D - R D S S P E C I F I C AT I O N S DVD player Pickup: Semiconductor laser, wavelength 650nm Signal system: NTSC / PAL Video signal horizontal resolution: More than 480 lines (DVD) Video signal-to-noise ratio: More than 60 dB (DVD) Audio frequency response: (Stereo) DVD (PCM): 20Hz ~ 22kHz (+/- 1.0dB) CD (PCM): 20Hz ~ 20kHz (+/- 1.0dB) Audio signal-to-noise ratio: More than 80 dB (PCM) Total harmonic distortion:: Less than 0.
L O U D S P E A K E R S P E C I F I C AT I O N S Satellite DSC400 DSC800 Frequency response (-6 dB) 120 Hz - 20 kHz 90 Hz - 22 kHz Sensitivity (2.
47
OWNER’S GUIDE PRO SOUND COMES HOME™ PRODUCT LINE: ® MODEL NUMBER: DSC 400 (230V)/DSC 800 (230V) JBL Consumer Products 250 Crossways Park Drive, Woodbury, NY 11797 Europe: 2. Route de Tours, 72500 Château du Loir, France DESIGN GOAL: Bring the thrill of live performance and movie sound to the home environment by calling on JBL’s professional engineering leadership. www.jbl.com SATELLITE TYPE: Titanium-laminate-dome tweeter ©2001 JBL, Incorporated.