USER GUIDE Jeep.com Download a FREE electronic copy of the Owner’s Manual and Warranty Booklet by visiting: www.jeep.com/en/owners/manuals or www.jeep.com/en/warranty (U.S.); www.owners.mopar.
If you are the first registered retail owner of your vehicle, you may obtain a complimentary printed copy of the Owner’s Manual, Navigation/ Uconnect® Manuals or Warranty Booklet by calling 1-877-426-5337 (U.S.) or 1-800-387-1143 (Canada) or by contacting your dealer. This guide has been prepared to help you get quickly acquainted with your new Jeep and to provide a convenient reference source for common questions. However, it is not a substitute for your Owner’s Manual.
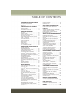
TABLE OF CONTENTS INTRODUCTION/WELCOME WELCOME FROM CHRYSLER GROUP LLC . . . . . . . . . . . . . . . . . . 2 OFF-ROAD CAPABILITIES FOUR-WHEEL DRIVE OPERATION CONTROLS AT A GLANCE DRIVER COCKPIT . . . . . . . . . . . . . . 6 INSTRUMENT CLUSTER . . . . . . . . . . 8 GETTING STARTED KEY FOB . . . . . . . . . . . . . . . . . . REMOTE START . . . . . . . . . . . . . . VEHICLE SECURITY ALARM . . . . . . SEAT BELT SYSTEMS . . . . . . . . . . SUPPLEMENTAL RESTRAINT SYSTEM (SRS) — AIR BAGS . . . . . . . . . . .
INTRODUCTION/WELCOME WELCOME FROM CHRYSLER GROUP LLC Congratulations on selecting your new Chrysler Group LLC vehicle. Be assured that it represents precision workmanship, distinctive styling, and high quality - all essentials that are traditional to our vehicles. Your new Chrysler Group LLC vehicle has characteristics to enhance the driver's control under some driving conditions. These are to assist the driver and are never a substitute for attentive driving. They can never take the driver's place.
INTRODUCTION/WELCOME VEHICLES SOLD IN CANADA With respect to any vehicles sold in Canada, the name Chrysler Group LLC shall be deemed to be deleted and the name Chrysler Canada Inc. used in substitution. WARNING! • Pedals that cannot move freely can cause loss of vehicle control and increase the risk of serious personal injury. • Always make sure that objects cannot fall into the driver foot well while the vehicle is moving.
INTRODUCTION/WELCOME Rollover Warning WARNING! • Pedals that cannot move freely can cause loss of vehicle control and increase the risk of serious personal injury. • Always make sure that objects cannot fall into the driver foot well while the vehicle is moving. Objects can become trapped under the brake pedal and accelerator pedal causing a loss of vehicle control.
INTRODUCTION/WELCOME USE OF AFTERMARKET PRODUCTS (ELECTRONICS) The use of aftermarket devices including cell phones, MP3 players, GPS systems, or chargers may affect the performance of on-board wireless features including Keyless Enter-N-Go™ and Remote Start range. If you are experiencing difficulties with any of your wireless features, try disconnecting your aftermarket devices to see if the situation improves. If your symptoms persist, please see an authorized dealer.
CONTROLS AT A GLANCE DRIVER COCKPIT 1. Electronic Vehicle Information Center (EVIC) Controls pg. 68 2. Turn Signal/Lights Lever (behind steering wheel) pg. 26 3. Electronic Vehicle Information Center (EVIC) Display 4. Instrument Cluster pg. 8 5. Speed Control pg. 28 6. Ignition Switch (behind steering wheel) 7. Wiper/Washer Lever pg. 27 8. Audio System pg. 36 9. Climate Controls pg. 32 10.
CONTROLS AT A GLANCE 11. Glove Compartment 12. Power Outlet pg. 75 13. Shift Lever pg. 31 14. Switch Panel • Heated Seat Switches pg. 23 • Electronic Stability Control (ESC) OFF pg. 85 • Hazard Switch 15. Tilt Steering Column pg. 24 16. Hood Latch pg. 101 17. Power Windows 18. Power Door Locks 19.
CONTROLS AT A GLANCE INSTRUMENT CLUSTER 1. Fuel Filler Door Location 2. Fuel Gauge 3. Speedometer (See page 80 for Instrument Cluster Warning/Indicator descriptions information.
CONTROLS AT A GLANCE 4. Tachometer 5. Engine Temperature Gauge 6. Gear Selection Display (See page 80 for Instrument Cluster Indicator Light information.
GETTING STARTED KEY FOB Locking And Unlocking The Doors And Liftgate Lock The Doors And Liftgate • Press and release the LOCK button on the RKE transmitter to lock all doors and liftgate. The turn signal lights will flash and the horn will chirp to acknowledge the signal. Unlock The Doors And Liftgate • Press and release the UNLOCK button on the RKE transmitter once to unlock the driver’s door, or twice within five seconds to unlock all doors and liftgate.
GETTING STARTED WARNING! • When leaving the vehicle, always make sure the ignition is in the OFF position, remove the key fob from the vehicle, and lock your vehicle. • Never leave children alone in a vehicle, or with access to an unlocked vehicle. Allowing children to be in a vehicle unattended is dangerous for a number of reasons. A child or others could be seriously or fatally injured. Children should be warned not to touch the parking brake, brake pedal or the transmission gear selector.
GETTING STARTED WARNING! • Do not start or run an engine in a closed garage or confined area. Exhaust gas contains Carbon Monoxide (CO) which is odorless and colorless. Carbon Monoxide is poisonous and can cause serious injury or death when inhaled. • Keep Key Fob transmitters away from children. Operation of the Remote Start System, windows, door locks or other controls could cause serious injury or death.
GETTING STARTED If the Vehicle Security Alarm is armed and the battery becomes disconnected the Vehicle Security Alarm will remain armed when the battery is reconnected. The exterior lights will flash, and the horn will sound. If this occurs, disarm the Vehicle Security Alarm. SEAT BELT SYSTEMS Lap/Shoulder Belts • All seating positions in your vehicle are equipped with lap/shoulder belts. • Be sure everyone in your vehicle is in a seat and using a seat belt properly.
GETTING STARTED SUPPLEMENTAL RESTRAINT SYSTEM (SRS) — AIR BAGS Air Bag System Components Your vehicle may be equipped with the following air bag system components: • Occupant Restraint Controller (ORC) • Air Bag Warning Light • Steering Wheel and Column • Instrument Panel • Knee Impact Bolsters • Advanced Front Air Bags • Supplemental Side Air Bags • Front and Side Impact Sensors • Seat Belt Pretenioners • Seat Belt Buckle Switch • Seat Track Position Sensors Supplemental Side Air Bags • This vehicle is eq
GETTING STARTED CHILD RESTRAINTS Children 12 years or younger should ride properly buckled up in a rear seat, if available. According to crash statistics, children are safer when properly restrained in the rear seats rather than in the front. Every state in the United States and all Canadian provinces require that small children ride in proper restraint systems. This is the law, and you can be prosecuted for ignoring it. NOTE: • For additional information, refer to www.Seatcheck.org or call 1–866–SEATCHECK.
GETTING STARTED Locating the LATCH Lower Anchorages The lower anchorages are round bars that are found at the rear of the seat cushion where it meets the seatback. They are just visible when you lean into the rear seat to install the child restraint. You will easily feel them if you run your finger along the gap between the seatback and seat cushion.
GETTING STARTED Installing The Child Restraint Using The LATCH Lower Anchors NOTE: Never “share” a LATCH anchorage with two or more child restraints. 1. Loosen the adjusters on the lower straps and on the tether strap of the child seat so that you can more easily attach the hooks or connectors to the vehicle anchorages. 2. Attach the lower hooks or connectors of the child restraint to the lower anchorages in the selected seating position. 3.
GETTING STARTED 5. Try to pull the webbing out of the retractor. If it is locked, you should not be able to pull out any webbing. If the retractor is not locked, repeat the last step. 6. Finally, pull up on any extra webbing to tighten the lap portion around the child restraint while you push the child restraint rearward and downward into the vehicle seat. 7.
GETTING STARTED WARNING! • In a collision, an unrestrained child, even a tiny baby, can become a projectile inside the vehicle. The force required to hold even an infant on your lap could become so great that you could not hold the child, no matter how strong you are. The child and others could be severely injured or killed. Any child riding in your vehicle should be in a proper restraint for the child's size.
GETTING STARTED FRONT SEATS Power Seats The power seat switch is located on the outboard side of the seat near the floor. Use the switch to move the seat up, down, forward, rearward, or to tilt the seat. Power Seat Switch Manual Seat Adjustment Forward/Rearward • Lift up on the adjusting bar located at the front of the seat near the floor and release it when the seat is at the desired position.
GETTING STARTED Recliner • Lift the recliner handle located on the outboard side of the seat, lean back and release at the desired position. Driver’s Seat Height Adjustment • The height adjustment lever is located on the outboard side of the seat. Raise the lever to raise the seat. Lower the lever to lower the seat. Seat Height Adjustment/Recliner/Lumbar 1 — Height Adjustment 2 — Recliner Lumbar Support • The lumbar lever is on the inboard side of the seatback.
GETTING STARTED REAR SEATS Folding Rear Seatback • To fold each rear seatback, pull the strap forward to move the seatback forward and flat. Reclining Rear Seatback • To recline each rear seatback, pull the strap forward just enough to release the seatback latch. Then push the seatback to a reclined position, approximately 35 degrees maximum, and release the strap. Rear Seatback Pull Straps WARNING! Be certain that the seatback is securely locked into position.
GETTING STARTED HEATED SEATS Front Heated Seats The controls for the front heated seats are located on the center instrument panel area. • Press the switch once to select Highlevel heating. • Press the switch a second time to select Low-level heating. • Press the switch a third time to shut the heating elements Off. If the High-level setting is selected, the system will automatically switch to Lowlevel after approximately 30 minutes.
GETTING STARTED TILT STEERING COLUMN The tilt lever is located on the steering column, below the turn signal lever. • Push down on the lever to unlock the steering column. • With one hand firmly on the steering wheel, move the steering column up or down as desired. • Pull upward on the lever to lock the column firmly in place. Steering Column Lever WARNING! Do not adjust the steering column while driving.
OPERATING YOUR VEHICLE ENGINE BREAK-IN RECOMMENDATIONS A long break-in period is not required for the engine and drivetrain (transmission and axle) in your vehicle. Drive moderately during the first 300 miles (500 km). After the initial 60 miles (100 km), speeds up to 50 or 55 mph (80 or 90 km/h) are desirable. While cruising, brief full-throttle acceleration within the limits of local traffic laws contributes to a good break-in.
OPERATING YOUR VEHICLE TURN SIGNAL/LIGHTS LEVER Turn Signal/Lights Lever Headlights/Parking Lights • Rotate the end of the lever to the first detent for parking lights . second detent for headlights and to the Instrument Panel Dimmer • Rotate the center portion of the lever to the extreme bottom position to fully dim the instrument panel lights and prevent the interior lights from illuminating when a door is opened.
OPERATING YOUR VEHICLE Fog Lights • Turn on the parking lights or low beam headlights and pull out the end of the lever. Turn Signals/Lane Change Assist • Tap the lever up or down once and the turn signal (right or left) will flash three times and automatically turn off.
OPERATING YOUR VEHICLE Rear Wiper Wiper Operation • Rotate the center portion of the lever forward to the first detent for rear wiper operation. Washer Operation • Rotate the center portion of the lever past the first detent to activate the rear washer. ELECTRONIC SPEED CONTROL The Electronic Speed Control switches are located on the steering wheel. Cruise ON/OFF • Push the ON/OFF button to activate the Speed Control. will appear on the instruCRUISE ment cluster to indicate the Speed Control is on.
OPERATING YOUR VEHICLE Accel/Decel To Increase Speed • When the Electronic Speed Control is set, you can increase speed by pushing the RES + button. The speed increment shown is dependant on the chosen speed unit of U.S. (MPH) or Metric (km/h): U.S. Speed (MPH) • Pressing the RES + button once will result in a 1 MPH increase in set speed. Each subsequent tap of the button results in an increase of 1 MPH.
OPERATING YOUR VEHICLE Resume • To resume a previously selected set speed in memory, push the RES + button and release. Cancel • Push the CANCEL button, or apply the brakes to cancel the set speed and maintain the set speed memory. • Push the ON/OFF button to turn the system off and erase the set speed memory. WARNING! • Leaving the Electronic Speed Control system on when not in use is dangerous. You could accidentally set the system or cause it to go faster than you want.
OPERATING YOUR VEHICLE CONTINUOUSLY VARIABLE AUTOMATIC TRANSMISSION (CVT) While conventional automatic transmissions typically have 4, 5 or 6 speeds, the Continuously Variable Transmission (CVT) has an infinite number of speeds. This allows it to adjust to exactly the right ratio to optimize performance and fuel economy. Under hard acceleration, you may hear more engine noise than with a conventional transmission. The CVT may also occasionally feel like it is “shifting.
OPERATING YOUR VEHICLE MANUAL CLIMATE CONTROLS Manual Climate Controls 1 — Rotate Blower Control 2 — Push Air Recirculation Button 3 — Rotate Temperature Control 4 — Push A/C Button 5 — Rotate Mode Control 6 — Push Rear Window Defroster Air Recirculation • Use Recirculation for maximum A/C operation. • For window defogging, turn the Recirculation button off. • Recirculation is allowed in floor mode and defrost/floor (mix mode). Heated Mirrors The exterior mirrors are heated to melt frost or ice.
OPERATING YOUR VEHICLE AUTOMATIC TEMPERATURE CONTROLS (ATC) Automatic Temperature Controls 1 — Rotate Blower Control 2 — Push Air Recirculation Button 3 — Rotate Temperature Control 4 — Push A/C Button 5 — Rotate Mode Control 6 — Push Rear Window Defroster Automatic Operation • Rotate the blower control and the mode control knobs counterclockwise to the AUTO position. • Select the desired temperature for the driver and/or passenger.
OPERATING YOUR VEHICLE POWER SUNROOF The power sunroof switch is located on the overhead console. Opening Sunroof Express Open • Press the switch rearward and release it within one-half second. The sunroof will fully open and stop automatically. Manual Open • Press and hold the switch rearward to open the sunroof. Any release of the switch will stop the movement, and the sunroof will remain in a partially open position until the switch is pressed again.
OPERATING YOUR VEHICLE WARNING! • Never leave children alone in a vehicle, or with access to an unlocked vehicle. Never leave the Key Fob in or near the vehicle, or in a location accessible to children. Occupants, particularly unattended children, can become entrapped by the power sunroof while operating the power sunroof switch. Such entrapment may result in serious injury or death. • In a collision, there is a greater risk of being thrown from a vehicle with an open sunroof.
ELECTRONICS YOUR VEHICLE'S SOUND SYSTEM 1. Uconnect® Voice Command Button pg. 65 2. Uconnect® Phone Button pg. 62 3. Steering Wheel Audio Controls (Right) pg. 61 4. Steering Wheel Audio Controls (Left) pg.
ELECTRONICS 5. USB Port on Radio pg. 51 6. Audio Jack pg. 46 7. Front Power Outlet pg. 75 8. USB Port (inside glove box) pg.
ELECTRONICS Uconnect® 130 Uconnect® 130 1 2 3 4 5 6 7 8 — — — — — — — — CD Eject Button Seek Down Button Seek Up Button AM/FM Button Disc Mode Button AUX Mode Button Rewind Button Fast Forward Button 9 — Set Clock Button 10 — Audio Settings/Rotate To Tune 11 — Audio Jack 12 — Radio Sales Code 13 — Set Preset/CD Random Play 14 — Station Presets Buttons 15 — ON/OFF/Rotate For Volume NOTE: • Your radio has many features that add to the comfort and convenience for you and your passengers.
ELECTRONICS 5. Push the TUNE/SCROLL control knob to save the changes. 6. Push any button/knob or wait five seconds to exit. Equalizer, Balance And Fade 1. Push the TUNE/SCROLL control knob and “BASS” will display. 2. Rotate the TUNE/SCROLL control knob to select the desired setting. 3. Continue pushing the TUNE/SCROLL control knob to display and set “MID RANGE,” “TREBLE,” “BALANCE” and “FADE.” Radio Operation Seek Up/Down Buttons • Push to seek through radio stations in AM or FM bands.
ELECTRONICS Uconnect® 130 WITH SiriusXM SATELLITE RADIO Uconnect® 130 With SiriusXM Satellite Radio 1 — CD Eject Button 2 — Seek Down Button 3 — Seek Up Button 4 — Voice Command Button 5 — Uconnect® Phone Button 6 — Station Info Button 7 — Rewind Button 8 — Fast Forward Button 9 — Set Clock Button 10 — Audio Settings/Rotate To Tune 11 — Audio Jack 12 13 14 15 16 17 18 19 20 21 — — — — — — — — — — Radio Sales Code Set Preset/CD Random Play Station Preset Buttons ON/OFF/Rotate For Volume AM/FM Mode Butto
ELECTRONICS Clock Setting 1. Push and hold the TIME button until the hours blink. 2. Turn the TUNE/SCROLL control knob to set the hours. 3. Push the TUNE/SCROLL control knob until the minutes begin to blink. 4. Turn the TUNE/SCROLL control knob to set the minutes. 5. Push the TUNE/SCROLL control knob to save the changes. 6. Push any button/knob or wait five seconds to exit. Equalizer, Balance And Fade 1. Push the TUNE/SCROLL control knob and “BASS” will display. 2.
ELECTRONICS SiriusXM Satellite Radio SiriusXM services require subscriptions, sold separately after the 12-month trial included with the new vehicle purchase. If you decide to continue your service at the end of your trial subscription, the plan you choose will automatically renew and bill at then-current rates until you call SiriusXM at 1-866-635-2349 to cancel. See SiriusXM Customer Agreement for complete terms at siriusxm.com. All fees and programming subject to change.
ELECTRONICS Uconnect® 230 Uconnect® 230 1 — CD Eject Button 2 — Seek Down Button 3 — Seek Up Button 4 — Scan Radio Stations Button 5 — Voice Command Button 6 — Uconnect® Phone Button 7 — Set Clock Button 8 — Station Info Button 9 — Rewind Button 10 — Fast Forward Button 11 — Push To Load CD’s 12 — Audio Settings/Rotate To Tune 13 14 15 16 17 18 19 20 21 22 23 24 — — — — — — — — — — — — Audio Jack Radio Sales Code AUX Mode Button Station Presets Buttons Set Preset Button ON/OFF/Rotate For Volume AM/FM B
ELECTRONICS Clock Setting 1. Push and hold the TIME button until the hours blink. 2. Turn the TUNE/SCROLL control knob to set the hours. 3. Push the TUNE/SCROLL control knob until the minutes begin to blink. 4. Turn the TUNE/SCROLL control knob to set the minutes. 5. Push the TUNE/SCROLL control knob to save the changes. 6. Push any button/knob or wait five seconds to exit. Equalizer, Balance And Fade 1. Push the TUNE/SCROLL control knob and “BASS” will display. 2.
ELECTRONICS SiriusXM Satellite Radio SiriusXM services require subscriptions, sold separately after the 12-month trial included with the new vehicle purchase. If you decide to continue your service at the end of your trial subscription, the plan you choose will automatically renew and bill at then-current rates until you call SiriusXM at 1-866-635-2349 to cancel. See SiriusXM Customer Agreement for complete terms at siriusxm.com. All fees and programming subject to change.
ELECTRONICS Audio Jack Operation The AUX/Audio Jack provides a means to connect a portable audio device, such as an MP3 player or an iPod®, to the vehicle’s sound system. This requires the use of a 3.5 mm stereo audio patch cable. • Pushing the AUX button will change the mode to auxiliary device if the Audio Jack is connected, allowing the music from your portable device to play through the vehicle's speakers.
ELECTRONICS NOTE: • Your radio may not be equipped with the Uconnect® Voice Command and Uconnect® Phone features. To determine if your radio has these features, push the Voice Command button on the radio. You will hear a voice prompt if you have the feature, or see a message on the radio stating “Uconnect Phone not available” if you do not. • Your radio has many features that add to the comfort and convenience of you and your passengers.
ELECTRONICS Equalizer, Balance And Fade Audio Control Menu • Push the AUDIO button on the faceplate on the right side of the radio. • Use either the “arrow” buttons on the touchscreen or the cross-hair on the screen to change Balance and Fade. The “CENTER” button on the touchscreen resets the settings. • Press the “Equalizer” button on the Audio Control Menu touchscreen and use either the arrow buttons on the touchscreen or the sliders on the screen to adjust BASS, MID, and/or TREBLE.
ELECTRONICS Radio Operation Radio Operation 1 2 3 4 5 — — — — — Radio Tuner Tabs Individual Presets Search/Browse Radio Station/Track Info Sort Presets 6 7 8 9 — — — — Station Scan Seek Down Direct Tune Seek Up • To access Radio Mode, press the RADIO button on the left side of the faceplate, then press the “AM,” “FM” or “SAT” button at the top of the screen to select the band.
ELECTRONICS Store Radio Presets • Select the radio band by pressing either the “AM,” “FM,” or “SAT” button on the touchscreen. • Find the station to store by either pressing the “Seek Up” or “Seek Down” buttons on the touchscreen, pressing the “SCAN” button on the touchscreen, or by using the “DIRECT TUNE” button on the touchscreen. • Once the station is found, press and hold one of the “PRESET” buttons on the touchscreen in the list to the right, until you hear a confirmation beep.
ELECTRONICS NOTE: Your Touchscreen Radio will automatically switch to the appropriate mode when something is first connected or inserted into the system. Insert a CD/DVD Disc • To insert a disc, push the LOAD button on the faceplate. • With the printed side upwards, insert the disc into the disc slot of the radio. The radio pulls the disc in automatically and closes the flip screen. The radio selects the appropriate mode after the disc is recognized, and starts playing the first track.
ELECTRONICS Copying Music From CD • Push the LOAD button on the faceplate. • Insert a disc, then push the MY FILES button on the faceplate and then select “MY MUSIC” button on the touchscreen. • Press the “Add Music Files to HDD” button on the touchscreen, then press the “Disc” button on the touchscreen in the next screen to start the process. NOTE: • You might need to select the folder or title depending on the CD, then push “DONE” to start the copy process.
ELECTRONICS Copying Pictures To The HDD • Insert either a CD or a USB device containing your pictures in JPEG format. • Push the MY FILES button on the faceplate. • Press the “My Pictures” button on the touchscreen to get an overview of the currently stored images, then press the “Add” button on the touchscreen. • Press the “Disc” or “USB” button on the touchscreen, then select the folders or pictures you wish to copy to the HDD.
ELECTRONICS Playing Music From The HDD • Push the MEDIA button on the faceplate to display the media source tabs at the top of the screen. Press the “HDD” button on the touchscreen. Press the desired track button on the touchscreen to play or press the “SEARCH/BROWSE” button on the touchscreen to search by artist, by album, by song, by genre, from a folder, or from Favorites.
ELECTRONICS Main Navigation Menu Finding Points Of Interest • From the main Navigation menu, press the “Where To?” button on the touchscreen, then press the “Points of Interest” button on the touchscreen. • Select a Category, then a subcategory, if necessary. • Select your destination and press the “Go” button on the touchscreen. Finding A Place By Spelling The Name • From the Main Navigation Menu press the “Where To?” button on the touchMain Navigation Menu screen.
ELECTRONICS Following Your Route Your route is marked with a magenta line on the map. If you depart from the original route, your route is recalculated. A speed limit icon could appear as you travel on major roadways.
ELECTRONICS Taking A Detour To take a detour you must be navigating a route. • Press the “back arrow” icon button on the touchscreen multiple times to return to the Main Navigation menu. • Press the “Detour” button on the touchscreen. NOTE: If the route you are currently taking is the only reasonable option, the device might not calculate a detour. Acquiring Satellites The GPS Satellite strength bars indicate the strength of your satellite reception. • Acquiring satellite signals can take a few minutes.
ELECTRONICS Search/Browse • Press the “magnifying glass” button on the touchscreen to search/browse the SiriusXM channel listing by Favorites and Categories such as Song, Artist and Channel Name. The Search/Browse also allows you manage your Favorites. SiriusXM Satellite Radio Favorites (SAT Favorites) • You can save 50 favorite songs and 50 favorite artists. • Press the “add favorite” button on the touchscreen to add either the song or the artist of the currently playing program to the SAT Favorites list.
ELECTRONICS Display SAT Favorites List • Press the “Search/Browse” button on the touchscreen and select “Favorites” from the SAT Browse screen. • Press the desired favorites button on the touchscreen to switch the SAT tuner to the corresponding channel.
ELECTRONICS SiriusXM Travel Link (Uconnect® 730N & Uconnect® 430N Only) NOTE: • SiriusXM Travel Link requires a subscription, sold separately after the five year trial subscription included with your vehicle purchase. • SiriusXM Travel Link is only available in the United States. SiriusXM Travel Link • SiriusXM Travel Link brings a wealth of useful information into your vehicle, right to your fingertips.
ELECTRONICS STEERING WHEEL AUDIO CONTROLS The steering wheel audio controls are located on the rear surface of the steering wheel. Right Switch • Push the switch up or down to increase or decrease the volume. • Push the button in the center to change modes AM/FM/CD/SAT. Left Switch • Push the switch up or down to search for the next listenable station or select the next or previous CD track.
ELECTRONICS NOTE: The USB port supports certain Mini, Classic, Nano, Touch, and iPhone® devices. The USB port also supports playing music from compatible external USB Mass Storage Class memory devices. For supported audio file formats, refer to the USB Port section in the Owner's Manual on the DVD. Refer to UconnectPhone.com website for a list of tested iPod®s. Some iPod® software versions may not fully support the USB port features. Please visit Apple’s website for iPod® software updates.
ELECTRONICS • After the BEEP, say “device pairing.” • After the BEEP, say “pair a device.” • Follow the audible prompts. • You will be asked to say a four-digit Personal Identification Number (PIN), which you will later need to enter into your mobile phone. You can say any four-digit PIN. You will not need to remember this PIN after the initial pairing process. Phone Pairing • You will then be prompted to give the phone pairing a name (each phone paired should have a unique name).
ELECTRONICS Making A Phone Call • Push the “Phone” button . • After the BEEP, say “dial” (or “call” a name). • After the BEEP, say number (or name). Receiving A Call — Accept (And End) • When an incoming call rings/is announced on Uconnect®, push the “Phone” . button • To end a call, push the “Phone” button . Mute (Or Unmute) Microphone During Call • During a call, push the “Voice Command” button . • After the BEEP, say “mute” (or “mute off”).
ELECTRONICS Uconnect® VOICE COMMAND Voice Command Operation • The Uconnect® Voice Command system allows you to control your AM, FM radio, satellite radio, disc player, HDD, Uconnect® Phone, a memo recorder, and supported portable media devices. located on the radio • When you press the “Voice Command” button faceplate or steering wheel, you will hear a beep. The beep is your signal to give a command. If you do not say a command within a few seconds, the system will present you with a list of options.
ELECTRONICS While In: Radio Mode SiriusXM Satellite Radio Mode Disc Mode Memo Mode 66 Voice Command Example: “Frequency” (to change the frequency) “Next Station” (to select the next station) “Previous Station” (to select the previous station) “Radio Menu” (to switch to the radio menu) “Main Menu” (to switch to the main menu) “Channel Number” (to change the channel by its spoken number) “Next Channel” (to select the next channel) “Previous Channel” (to select the previous channel) “List Channel” (to he
ELECTRONICS Voice Text Reply • If equipped with Uconnect® Voice Command, your Uconnect® 430N / 730N radio may be able to play incoming Short Message Service (SMS) messages (text messages) through the vehicle's sound system. • It also allows you to respond by selecting from various predefined phrases. • Not all phones are compatible with this feature. Refer to the phone compatibility list at UconnectPhone.com. Connected mobile phones must be bluetoothcompatible and paired with your radio.
ELECTRONICS ELECTRONIC VEHICLE INFORMATION CENTER (EVIC) The EVIC features a driver interactive display that is located in the instrument cluster. Pushing the controls on the steering wheel allows the driver to select vehicle information and Personal Settings. For additional information, refer to Programmable Features in this guide.
ELECTRONICS PROGRAMMABLE FEATURES Electronic Vehicle Information Center (EVIC) The EVIC can be used to program the following Personal Settings. Push and release the MENU button until Personal Settings displays, then push the DOWN Arrow button to scroll through the settings. Push the RIGHT Arrow button to change the setting.
ELECTRONICS Auto Unlock Doors On Exit To have all of the vehicle doors unlock when any door is opened: • Enter your vehicle and close all the doors, and fasten your seat belt. • Cycle the ignition switch between the LOCK and ON position four times, ending in the LOCK position (do not start the engine). • Push the power door UNLOCK switch to unlock the doors. A single chime will indicate that programming is complete.
ELECTRONICS UNIVERSAL GARAGE DOOR OPENER (HomeLink®) • HomeLink® replaces up to three hand-held transmitters that operate devices such as garage door openers, motorized gates, lighting or home security systems. The HomeLink® unit is powered by your vehicles 12 Volt battery. • The HomeLink® buttons that are located in the overhead console or sunvisor designate the three different HomeLink® channels. • The HomeLink® indicator is located above the center button.
ELECTRONICS Programming A Rolling Code NOTE: For programming Garage Door Openers that were manufactured after 1995. These Garage Door Openers can be identified by the “LEARN” or “TRAIN” button located where the hanging antenna is attached to the Garage Door Opener. It is NOT the button that is normally used to open and close the door. The name and color of the button may vary by manufacturer. 1. Place the ignition switch into the ON/RUN position. 2.
ELECTRONICS Programming A Non-Rolling Code NOTE: For programming Garage Door Openers manufactured before 1995. 1. Turn the ignition switch to the ON/RUN position. 2. Place the hand-held transmitter 1 to 3 inches (3 to 8 cm) away from the HomeLink® button you wish to program while keeping the HomeLink® indicator light in view. 3. Push and hold the HomeLink® button you want to program while you push and hold the hand-held transmitter button. 4. Continue to hold both buttons and observe the indicator light.
ELECTRONICS POWER INVERTER A 115 Volt, 150 Watt AC power inverter is located on the front of the center console. This outlet can power cellular phones, electronics and other low power devices requiring power up to 150 Watts. NOTE: The power inverter is designed with built-in overload protection. If the power rating of 150 Watts is exceeded, the power inverter will automatically shut down. Once the electrical device has been removed from the outlet, the inverter should automatically reset.
ELECTRONICS POWER OUTLET The power outlet is located on the instrument panel below the climate control and is powered when the ignition switch is in the ON/RUN position. Power Outlet Fuses 1 — Cigar Lighter 2 — Power Outlet The outlet can operate a conventional cigar lighter unit or power accessories designed for use with a standard power outlet adapter. NOTE: • Do not exceed the maximum power of 160 Watts (13 Amps) at 12 Volts.
OFF-ROAD CAPABILITIES FOUR-WHEEL DRIVE OPERATION This vehicle has two full time, on-demand, four-wheel-drive (4WD) systems available, Freedom Drive I™ and Freedom-Drive II™. They provide for all-weather, all-terrain capability for added driving security in less-than-ideal road conditions.
OFF-ROAD CAPABILITIES • To activate, pull the T-handle, located in between the front driver and passenger seats, up once and release. The “4WD Indicator Light” will come on in the cluster. • This can be done on the fly, at any vehicle speed. To deactivate, simply pull on the T-handle one more time. The “4WD Indicator Light” will then turn off.
UTILITY TRAILER TOWING WEIGHTS (MAXIMUM TRAILER WEIGHT RATINGS) Engine/ Transmission 2.0L Auto/Man 2.4L Auto/Man Frontal Area 22 sq ft (2.04 sq m) 22 sq ft (2.04 sq m) Max. GTW (Gross Trailer Wt.) Max. Tongue Wt. (See Note) 1,000 lbs (450 kg) 150 lbs (68 kg) 1,000 lbs (450 kg) 150 lbs (68 kg) 2.4L Auto/Man with Trailer Tow 32 sq ft 2,000 lbs (907 kg) 300 lbs (136 kg) Prep Package (3.0 sq m) (AHC) 2.4L Auto With Freedom Drive 32 sq ft 2,000 lbs (907 kg) 300 lbs (136 kg) II Off Road (3.
UTILITY RECREATIONAL TOWING (BEHIND MOTORHOME, ETC.
WHAT TO DO IN EMERGENCIES ROADSIDE ASSISTANCE Dial toll-free 1-800-521-2779 for U.S. Residents or 1-800-363-4869 for Canadian Residents. • Provide your name, vehicle identification number, license plate number, and your location, including the telephone number from which you are calling. • Briefly describe the nature of the problem and answer a few simple questions. • You will be given the name of the service provider and an estimated time of arrival.
WHAT TO DO IN EMERGENCIES - Electronic Throttle Control (ETC) Indicator Light This light informs you of a problem with the system. If a problem is detected, the light will come on while the engine is running. Cycle the ignition when the vehicle has completely stopped and the shift lever is placed in the PARK position; the light should turn off. If the light remains lit with the engine running, your vehicle will usually be drivable; however, see an authorized dealer immediately.
WHAT TO DO IN EMERGENCIES When the system detects a malfunction, the telltale will flash for approximately one minute and then remain continuously illuminated. This sequence will continue upon subsequent vehicle start-ups as long as the malfunction exists. When the malfunction indicator is illuminated, the system may not be able to detect or signal low tire pressure as intended.
WHAT TO DO IN EMERGENCIES - Engine Temperature Warning Light This light warns of an overheated engine condition. If the light turns on and a warning chime sounds while driving, safely pull over and stop the vehicle. If the A/C system is on, turn it off. Also, shift the transmission into NEUTRAL and idle the vehicle. If the temperature reading does not return to normal, turn the engine off immediately. We recommend that you do not operate the vehicle or engine damage will occur.
WHAT TO DO IN EMERGENCIES - Malfunction Indicator Light (MIL) Certain conditions, such as a loose or missing gas cap, poor fuel quality, etc., may illuminate the MIL after engine start. The vehicle should be serviced if the light stays on through several typical driving cycles. In most situations, the vehicle will drive normally and not require towing. If the MIL flashes when the engine is running, serious conditions may exist that could lead to immediate loss of power or severe catalytic converter damage.
WHAT TO DO IN EMERGENCIES - Front Fog Light Indicator This indicator will illuminate when the front fog lights are on. - Vehicle Security Light This light will flash rapidly for approximately 15 seconds when the vehicle theft alarm is arming. The light will flash at a slower speed continuously after the alarm is set. The security light will also come on for about three seconds when the ignition is first turned on. – 4WD Indicator This light indicates the vehicle is in 4-wheel drive (4WD) mode.
WHAT TO DO IN EMERGENCIES IF YOUR ENGINE OVERHEATS In any of the following situations, you can reduce the potential for overheating by taking the appropriate action: • On the highways — slow down. • In city traffic — while stopped, shift the transmission to NEUTRAL, but do not increase engine idle speed. NOTE: There are steps that you can take to slow down an impending overheat condition: • If your air conditioner (A/C) is on, turn it off.
WHAT TO DO IN EMERGENCIES AUTOMATIC TRANSMISSION OVERHEATING During sustained high speed driving or trailer towing up long grades on hot days, the automatic transmission oil may become too hot. When the transmission overheat warning light turns on, you will experience reduced performance until the automatic transmission cools down. Once the transmission has cooled down and the light turns off, you may continue to drive normally. If the high speed is maintained, the overheating will continue to occur.
WHAT TO DO IN EMERGENCIES Preparations For Jacking 1. Park the vehicle on a firm level surface, avoiding ice or slippery areas. 2. Turn on the Hazard Warning flasher. 3. Set the parking brake. 4. Place the shift lever in PARK (automatic transmission) or REVERSE (manual transmission). 5. Turn OFF the ignition. 6. Block both the front and rear of the wheel diagonally opposite the jacking position. For example, if changing the right front tire, block the left rear wheel.
WHAT TO DO IN EMERGENCIES 2. Loosen, but do not remove, the wheel nuts by turning them to the left one turn while the wheel is still on the ground. NOTE: • There are front and rear jacking locations on each side of the body. The front locations are outlined by two triangular cutouts, the rear locations by two rectangular cutouts. • For vehicles equipped with plastic trim, the plastic has been cut away to expose the jacking locations in the body.
WHAT TO DO IN EMERGENCIES 5. Remove the wheel nuts and pull the wheel and wheel covers, where applicable, off the hub. Install the spare wheel and wheel nuts with the cone shaped end of the nuts toward the wheel. Lightly tighten the nuts. NOTE: The wheel cover is held on the wheel by the wheel nuts. When reinstalling the original wheel, properly align the wheel cover to the valve stem, place the wheel cover onto the wheel, then install the wheel nuts. 6.
WHAT TO DO IN EMERGENCIES Road Tire Installation Vehicles Equipped With Wheel Covers 1. Mount the road tire on the axle. 2. To ease the installation process for steel wheels with wheel covers, install two lug nuts on the mounting studs which are on each side of the valve stem. Install the lug nuts with the cone shaped end of the nut toward the wheel. Lightly tighten the lug nuts. 3. Align the valve notch in the wheel cover with the valve stem on the wheel.
WHAT TO DO IN EMERGENCIES Vehicles Without Wheel Covers 1. Mount the road tire on the axle. 2. Install the remaining lug nuts with the cone shaped end of the nut toward the wheel. Lightly tighten the lug nuts. 3. Lower the vehicle to the ground by turning the jack handle counterclockwise. 4. Finish tightening the lug nuts. Push down on the wrench while at the end of the handle for increased leverage. Tighten the lug nuts in a star pattern until each nut has been tightened twice.
WHAT TO DO IN EMERGENCIES WARNING! • Being under a jacked-up vehicle is dangerous. The vehicle could slip off the jack and fall on you. You could be crushed. Never put any part of your body under a vehicle that is on a jack. If you need to get under a raised vehicle, take it to a service center where it can be raised on a lift. • Never start or run the engine while the vehicle is on a jack. • The jack is designed to be used as a tool for changing tires only.
WHAT TO DO IN EMERGENCIES JUMP-STARTING PROCEDURES If your vehicle has a discharged battery it can be jump-started using a set of jumper cables and a battery in another vehicle or by using a portable battery booster pack. Jump-starting can be dangerous if done improperly so please follow the procedures in this section carefully. NOTE: When using a portable battery booster pack follow the manufacturer’s operating instructions and precautions.
WHAT TO DO IN EMERGENCIES • To access the battery remove the air intake duct by turning the two finger screws, located on the radiator support. 1. Set the parking brake, shift the automatic transmission into PARK and turn the ignition to LOCK. 2. Turn off the heater, radio, and all unnecessary electrical accessories. 3. If using another vehicle to jump-start the battery, park the vehicle within the jumper cables reach, set the parking brake and make sure the ignition is OFF.
WHAT TO DO IN EMERGENCIES 3. Disconnect the opposite end of the positive (+) jumper cable from the positive (+) post of the booster battery. 4. Disconnect the positive (+) end of the jumper cable from the positive (+) post of the vehicle with discharged battery. 5. Reinstall the air intake duct. If frequent jump-starting is required to start your vehicle you should have the battery and charging system inspected at your authorized dealer.
WHAT TO DO IN EMERGENCIES SHIFT LEVER OVERRIDE If a malfunction occurs and the shift lever cannot be moved out of the PARK position, you can use the following procedure to temporarily move the shift lever: 1. To access the shift lever override, locate and remove the removable plug in the right side of the shift lever housing. 2. Firmly set the parking brake. 3. Turn the ignition switch to the ACC or ON position without starting the engine. 4. Press and maintain firm pressure on the brake pedal. 5.
98 NONE Rear Front ALL Flat Tow Wheel Lift or Dolly Tow Flatbed Wheels OFF the Ground Towing Condition 6-Speed Automatic (FWD Only) 6-Speed Automatic 4WD If transmission is If transmission is operoperable: able: • Transmission in • Transmission in • Transmission in NEUTRAL NEUTRAL NEUTRAL • Key in ACC or ON/ • 25 mph (40 km/h) • 25 mph (40 km/h) RUN position max speed max speed • 15 miles (24 km) • 15 miles (24 km) max distance max distance NOT ALLOWED NOT ALLOWED OK NOT ALLOWED FWD Models ONLY BEST
WHAT TO DO IN EMERGENCIES FREEING A STUCK VEHICLE If your vehicle becomes stuck in mud, sand or snow, it can often be moved by a rocking motion. Turn your steering wheel right and left to clear the area around the front wheels. Then move the shift lever back and forth between REVERSE and DRIVE. Using minimal accelerator pedal pressure to maintain the rocking motion, without spinning the wheels, is most effective.
WHAT TO DO IN EMERGENCIES EVENT DATA RECORDER (EDR) This vehicle is equipped with an Event Data Recorder (EDR). The main purpose of an EDR is to record, in certain crash or near crash-like situations, such as an air bag deployment or hitting a road obstacle, data that will assist in understanding how a vehicle’s systems performed. The EDR is designed to record data related to vehicle dynamics and safety systems for a short period of time, typically 30 seconds or less.
MAINTAINING YOUR VEHICLE OPENING THE HOOD 1. Pull the release lever located below the instrument panel and in front of the driver’s door. 2. Raise the hood and locate the safety latch, in the middle of the hood opening. 3. Move the safety latch while lifting the hood at the same time. 4. Insert the support rod into the slot on the hood. 5. To close the hood, remove the support rod and place it in the retaining clip, then lower the hood slowly.
MAINTAINING YOUR VEHICLE ENGINE COMPARTMENT 2.0L Engine 1. Washer Fluid Reservoir 2. Brake Fluid Reservoir 3. Integrated Power Module (Fuses) 4. Air Cleaner Filter 5.
MAINTAINING YOUR VEHICLE 6. Engine Oil Fill 7. Engine Coolant Pressure Cap 8. Engine Oil Dipstick 9. Engine Coolant Reservoir 10.
MAINTAINING YOUR VEHICLE 2.4L Engine 1. Washer Fluid Reservoir 2. Brake Fluid Reservoir 3. Integrated Power Module (Fuses) 4. Air Cleaner Filter 5.
MAINTAINING YOUR VEHICLE 6. Engine Oil Fill 7. Engine Coolant Pressure Cap 8. Engine Oil Dipstick 9. Engine Coolant Reservoir 10.
MAINTAINING YOUR VEHICLE FLUID CAPACITIES U.S. Metric Fuel (Approximate) 13.6 Gallons 51.5 Liters Engine Oil with Filter 2.0L and 2.4L Engine 4.5 Quarts 4.26 Liters (SAE 5W-20, API Certified) Cooling System * 2.0L and 2.4L Engine (MOPAR® Antifreeze/ Engine Coolant 10 Year/ 7.2 Quarts 6.8 Liters 150,000 Mile Formula or equivalent) * Includes heater and coolant recovery bottle filled to MAX level.
MAINTAINING YOUR VEHICLE CAUTION! • Mixing of engine coolant (antifreeze) other than specified Organic Additive Technology (OAT) engine coolant (antifreeze), may result in engine damage and may decrease corrosion protection. Organic Additive Technology (OAT) engine coolant is different and should not be mixed with Hybrid Organic Additive Technology (HOAT) engine coolant (antifreeze) or any “globally compatible” coolant (antifreeze).
MAINTAINING YOUR VEHICLE MAINTENANCE PROCEDURES For information on the maintenance procedures for your vehicle, please refer to “Maintenance Procedures” in “Maintaining Your Vehicle” in your Owner’s Manual or applicable supplement on the DVD for further details. MAINTENANCE SCHEDULE Your vehicle is equipped with an automatic oil change indicator system. The oil change indicator system will remind you that it is time to take your vehicle in for scheduled maintenance.
MAINTAINING YOUR VEHICLE Severe Duty All Models Change Engine Oil at 4000 miles (6,500 km) if the vehicle is operated in a dusty and off road environment. This type of vehicle use is considered Severe Duty.
X Inspect brake linings, replace if necessary. Check park brake function, adjust if necessary. X Change the automatic transmission fluid and filter. (CVT only) X Change automatic transmission fluid and filter if using your vehicle for any of the following: police, taxi, fleet, or frequent trailer towing. (CVT only) X X X X X Replace power transfer unit (PTU) fluid. X X 50,000 X X 40,000 X 60,000 Replace rear drive assembly (RDA) fluid.
64,000 48,000 20,000 32,000 Or Kilometers: 80,000 70,000 60,000 50,000 40,000 30,000 90,000 X • You can be badly injured working on or around a motor vehicle. Do only service work for which you have the knowledge and the right equipment. If you have any doubt about your ability to perform a service job, take your vehicle to a competent mechanic. • Failure to properly inspect and maintain your vehicle could result in a component malfunction and effect vehicle handling and performance.
112 20,000 Miles (32,000 km) or 2 Years 30,000 Miles (48,000 km) or 3 Years 40,000 Miles (64,000 km) or 4 Years 50,000 Miles (80,000 km) or 5 Years 60,000 Miles (96,000 km) or 6 Years 70,000 Miles (112,000 km) or 7 Years 80,000 Miles (128,000 km) or 8 Years Odometer MAINTENANCE RECORD Date Signature, Authorized Service Center 90,000 Miles (144,000 km) or 9 Years 100,000 Miles (160,000 km) or 10 Years 110,000 Miles (176,000 km) or 11 Years 120,000 Miles (192,000 km) or 12 Years 130,000 Miles (208,000 km)
MAINTAINING YOUR VEHICLE FUSES Integrated Power Module The Integrated Power Module is located in the engine compartment near the air cleaner assembly. This center contains cartridge fuses and mini-fuses. A label that identifies each component may be printed on the inside of the cover. Refer to “Engine Compartment” in “Maintaining Your Vehicle” for further information.
MAINTAINING YOUR VEHICLE Cavity 17 18 19 20 21 Cartridge Fuse 40 Amp Green 20 Amp Yellow 15 Amp Lt Blue 10 Amp Red 22 23 24 25 26 27 28 29 30 31 32 33 34 35 36 37 Mini-Fuse 10 Amp Red 10 Amp Red 15 Amp Lt Blue 15 Amp Lt Blue 10 Amp Red 15 Amp Lt Blue 10 Amp Red 10 Amp Red 20 Amp Yellow 10 Amp Red 30 Amp Pink 10 Amp Red 30 Amp Pink 40 Amp Green 30 Amp Pink 25 Amp Clear Description Wireless Control Module Auto Shutdown Relay Radio Amplifiers Radio Intrusion Module/Siren – If Equipped Heating, AC/Compas
MAINTAINING YOUR VEHICLE TIRE PRESSURES Check the inflation pressure of each tire, including the spare tire, at least monthly and inflate to the recommended pressure for your vehicle. The tire pressures recommended for your vehicle are found on the “Tire and Loading Information” label located on the driver’s side door opening. NOTE: Refer to the Owner's Manual on the DVD for more information regarding tire warnings and instructions.
MAINTAINING YOUR VEHICLE SPARE TIRES — IF EQUIPPED NOTE: For vehicles equipped with Tire Service Kit instead of a spare tire, please refer to “Tire Service Kit” in “What To Do In Emergencies” for further information. CAUTION! Because of the reduced ground clearance, do not take your vehicle through an automatic car wash with a compact, full size or limited-use temporary spare installed. Damage to the vehicle may result.
MAINTAINING YOUR VEHICLE Full Size Spare — If Equipped The full size spare is for temporary emergency use only. This tire may look like the originally equipped tire on the front or rear axle of your vehicle, but it is not. This spare tire may have limited tread life. When the tread is worn to the tread wear indicators, the temporary use full size spare tire needs to be replaced.
MAINTAINING YOUR VEHICLE EXTERIOR BULBS LIGHT BULBS – Exterior Low Beam Headlamp Premium Low Beam Headlamp High Beam Headlamp Premium High Beam Headlamp Daytime Running Light (DRL) Front Park/Turn Signal Front Side Marker Lamp Front Fog Lamp Center High Mounted Stop Lamp (CHMSL) Rear Tail/Stop Lamp Rear Turn Lamp Backup Lamp License Lamp 118 Bulb Number H11 HIR2 9005 HIR2 3157K 7444NA 194 H11LL LED Assembly (Serviced at Authorized Dealer) LED Assembly (Serviced at Authorized Dealer) 7440NA (WY21W) Amber 7
CUSTOMER ASSISTANCE CHRYSLER GROUP LLC CUSTOMER CENTER P.O. Box 21–8004 Auburn Hills, MI 48321–8004 Phone: 1–877–426–5337 CHRYSLER CANADA INC. CUSTOMER CENTER P.O. Box 1621 Windsor, Ontario N9A 4H6 Phone: 1–800–465–2001 (English) Phone: 1–800–387–9983 (French) ASSISTANCE FOR THE HEARING IMPAIRED To assist customers who have hearing difficulties, the manufacturer has installed special TDD (Telecommunication Devices for the Deaf) equipment at its customer center.
CUSTOMER ASSISTANCE REPORTING SAFETY DEFECTS IN THE UNITED STATES If you believe that your vehicle has a defect that could cause a collision or cause injury or death, you should immediately inform the National Highway Traffic Safety Administration (NHTSA) in addition to notifying the manufacturer. If NHTSA receives similar complaints, it may open an investigation, and if it finds that a safety defect exists in a group of vehicles, it may order a recall and remedy campaign.
MOPAR® ACCESSORIES AUTHENTIC ACCESSORIES BY MOPAR® In choosing Authentic Accessories you gain far more than expressive style, premium protection, or extreme entertainment, you also benefit from enhancing your vehicle with accessories that have been thoroughly tested and factory-approved. The following highlights just some of the many Authentic Jeep Accessories by MOPAR® featuring a fit, finish, and functionality specifically for your Jeep Compass.
FAQ (How To?) FREQUENTLY ASKED QUESTIONS GETTING STARTED • How do I install my LATCH Equipped Child Seat? pg. 15 • How do my heated seats operate? pg. 23 ELECTRONICS • Which radio is in my vehicle? • Uconnect® 130 pg. 38 • Uconnect® 130 with Satellite Radio pg. 40 • Uconnect® 230 pg. 43 • Uconnect® 430/430N pg. 46 • How do I activate the Audio Jack? • Uconnect® 130 pg. 46 • Uconnect® 130 with Satellite Radio pg. 46 • Uconnect® 230 pg. 46 • Uconnect® 430/430N pg.
INDEX Adding Engine Coolant (Antifreeze) . .108 Adding Washer Fluid . . . . . . . . .108 Air Bag Advance Front Air Bag . . . . . .14 Air Bags . . . . . . . . . . . . . . .14 Air Bag Warning Light . . . . . . .14 Front Air Bag . . . . . . . . . . . .14 Rollover . . . . . . . . . . . . . . .14 Side Impacts . . . . . . . . . . . .14 Air bag Light . . . . . . . . . . . . . .80 Air Cleaner, Engine (Engine Air Cleaner Filter) . . . . . . . . . . . . . . . .108 Air Conditioner Maintenance . . . .
INDEX Drain, Flush, and Refill . . . . .108 Inspection . . . . . . . . . . . .108 Points to Remember . . . . . . .108 Pressure Cap . . . . . . . . . . .108 Selection of Coolant (Antifreeze) . . . . . . . .106, 108 Corrosion Protection . . . . . . . . .108 Cruise Control (Speed Control) . . . .28 Cruise Light . . . . . . . . . . . . . . .28 Customer Assistance . . . . . . . . .119 Defects, Reporting . . . . . . . Dimmer Control. . . . . . . . . Dimmer Switch, Headlight . . Disabled Vehicle Towing . . . .
INDEX High Beam . . . . . . . . . . . . .26 Head Restraints . . . . . . . . . . . .19 Heated Mirrors . . . . . . . . . . .32, 33 Heated Seats . . . . . . . . . . . . . .23 High Beam Indicator . . . . . . . . . .84 High Beam/Low Beam Select (Dimmer) Switch . . . . . . . . . . . . . . . .26 HomeLink® (Garage Door Opener) . .71 Hood Release . . . . . . . . . . . . .101 Instrument Cluster . . . . . . . . . . . .8 Indicators . . . . . . . . . . . . . .9 Instrument Cluster Warning Lights . . . . . . . . . . . .
INDEX Outlet Power . . . . . . . . . . . . . . . .75 Overheating, Engine . . . . . . . . . .86 Paint Care . . . . . . . . . . . . . . .108 Panic Alarm . . . . . . . . . . . . . . .10 Phone (Uconnect®) . . . . . . . . . .62 Placard, Tire and Loading Information. . . . . . . . . . . . .115 Power Inverter . . . . . . . . . . . . . . .74 Outlet (Auxiliary Electrical Outlet) . . . . . . . . . . . . . . .75 Seats . . . . . . . . . . . . . . . .20 Power Steering Fluid . . . . . . . . .107 Power Sunroof . . . . . .
INDEX Towing Vehicle Behind a Motorhome. . . . . . . . . . . . . .79 Trailer Towing Trailer and Tongue Weight . . . .78 Trailer Weight . . . . . . . . . . . . . .78 Transmission Automatic . . . . . . . . . . . . .31 Fluid . . . . . . . . . . . .107, 108 Maintenance . . . . . . . . . . .108 Turn Signals . . . . . . . . . . . .27, 84 Uconnect® Voice Command . . . . . .65 Vehicle Security Alarm Disarming . .12 Voice Command . . . . . . . . . . . .65 Voice Prompt Volume Navigation . . . . . . . . . . . . . .
NOTES 128
If you are the first registered retail owner of your vehicle, you may obtain a complimentary printed copy of the Owner’s Manual, Navigation/ Uconnect® Manuals or Warranty Booklet by calling 1-877-426-5337 (U.S.) or 1-800-387-1143 (Canada) or by contacting your dealer. This guide has been prepared to help you get quickly acquainted with your new Jeep and to provide a convenient reference source for common questions. However, it is not a substitute for your Owner’s Manual.
USER GUIDE Jeep.com Download a FREE electronic copy of the Owner’s Manual and Warranty Booklet by visiting: www.jeep.com/en/owners/manuals or www.jeep.com/en/warranty (U.S.); www.owners.mopar.